Lab 9: Custom Event Tracking
In this lab, you will explore how CloudVision generates events based on streaming data. You will verify a pre-configured built-in event and then design and test a custom Syslog event rule to detect interface flapping.
Introduction to Event Components
Events serve as alerts regarding changes in the status and performance of your network. These alerts are driven by Event Generation, a feature that allows you to create and manage custom rules that CloudVision continuously checks against streaming data.
Lab Tasks – Verify Pre-Configured Event
If you don't create custom rules for the generation of a particular event type, CloudVision will generate the event according to the default rule or rules pre-determined. Before we create our own custom event, let’s look at one of the pre-configured event rules within CloudVision.
- Navigate to the Events page within CloudVision.
- Click on the Event Generation button at the top right of the page.
Note* Scroll through and read about some of the built-in event rules. Each built-in event is assigned a default severity based on its relative risk to network performance. You can edit, reorder, or even disable these rules to better fit your operational needs.
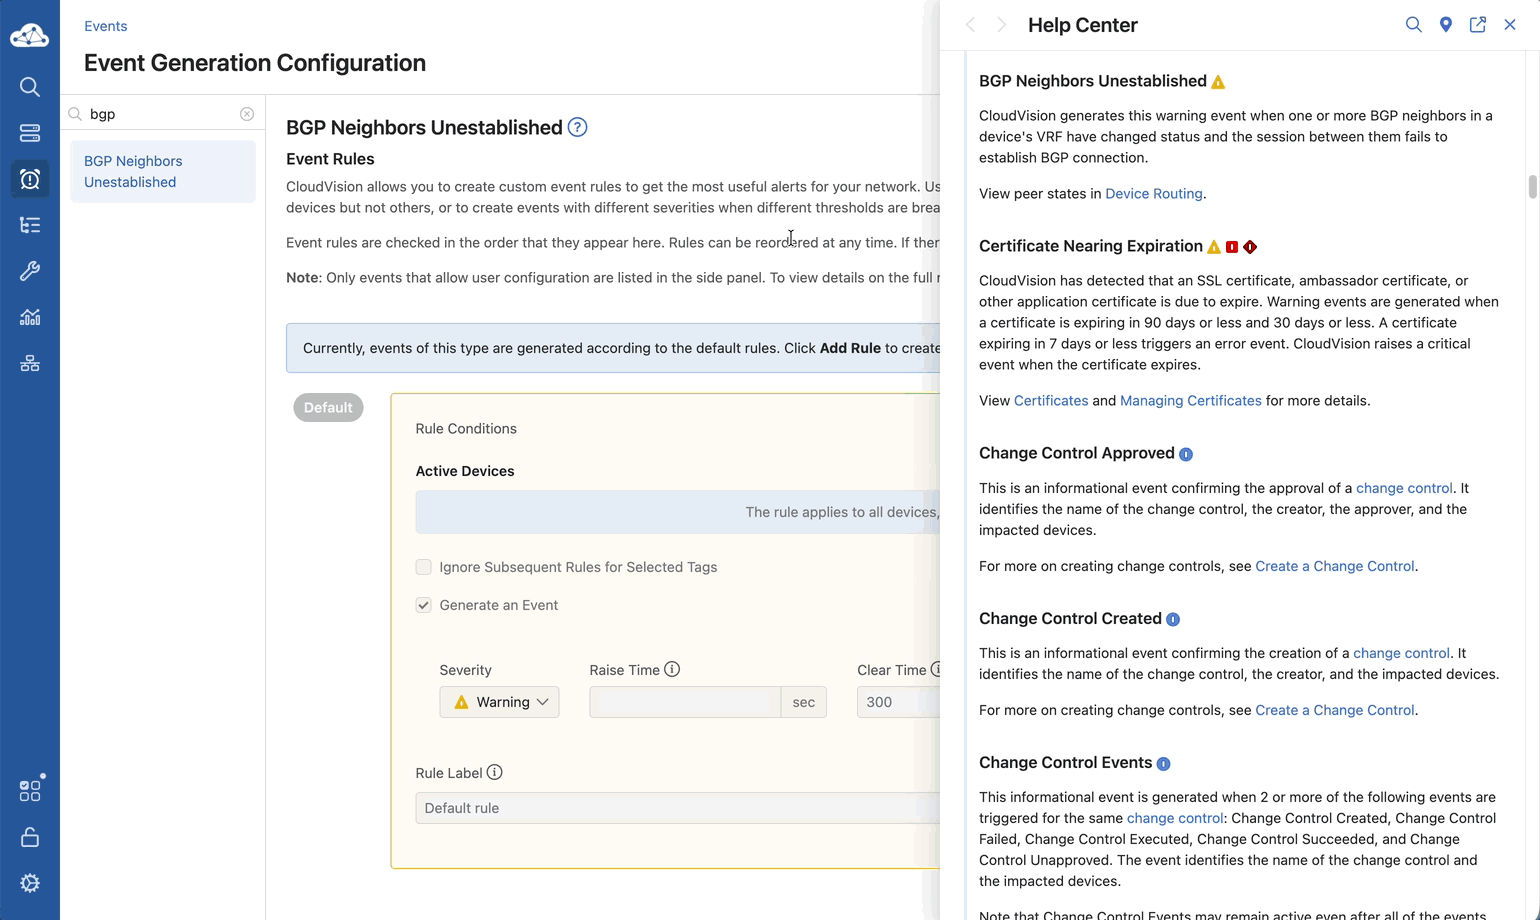
- Locate or search for the BGP Neighbors Unestablished event type from the sidebar.
- Click on the question mark icon
 beside the title to open the help center and find the description of this event.
 - Navigate to the Arista Campus Lab Topology tab.
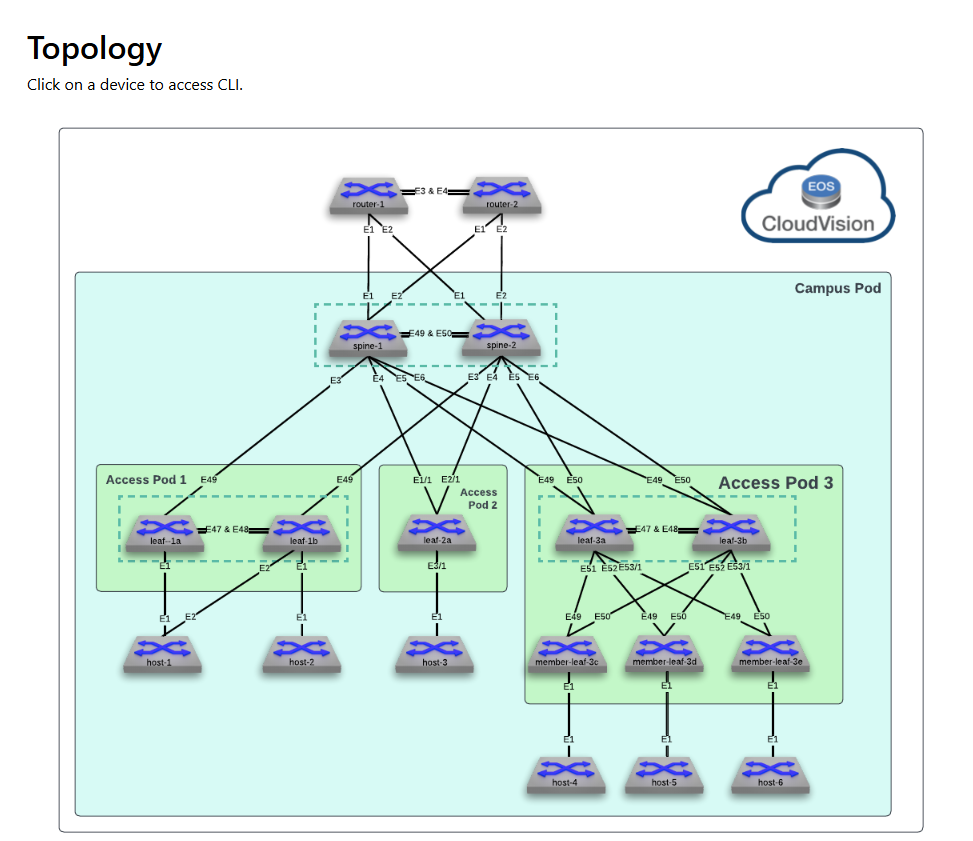
- From the topology, click on the spine-1 icon to access the CLI.
- If prompted, use the credentials provided at the bottom of the Campus Lab Dashboard page.
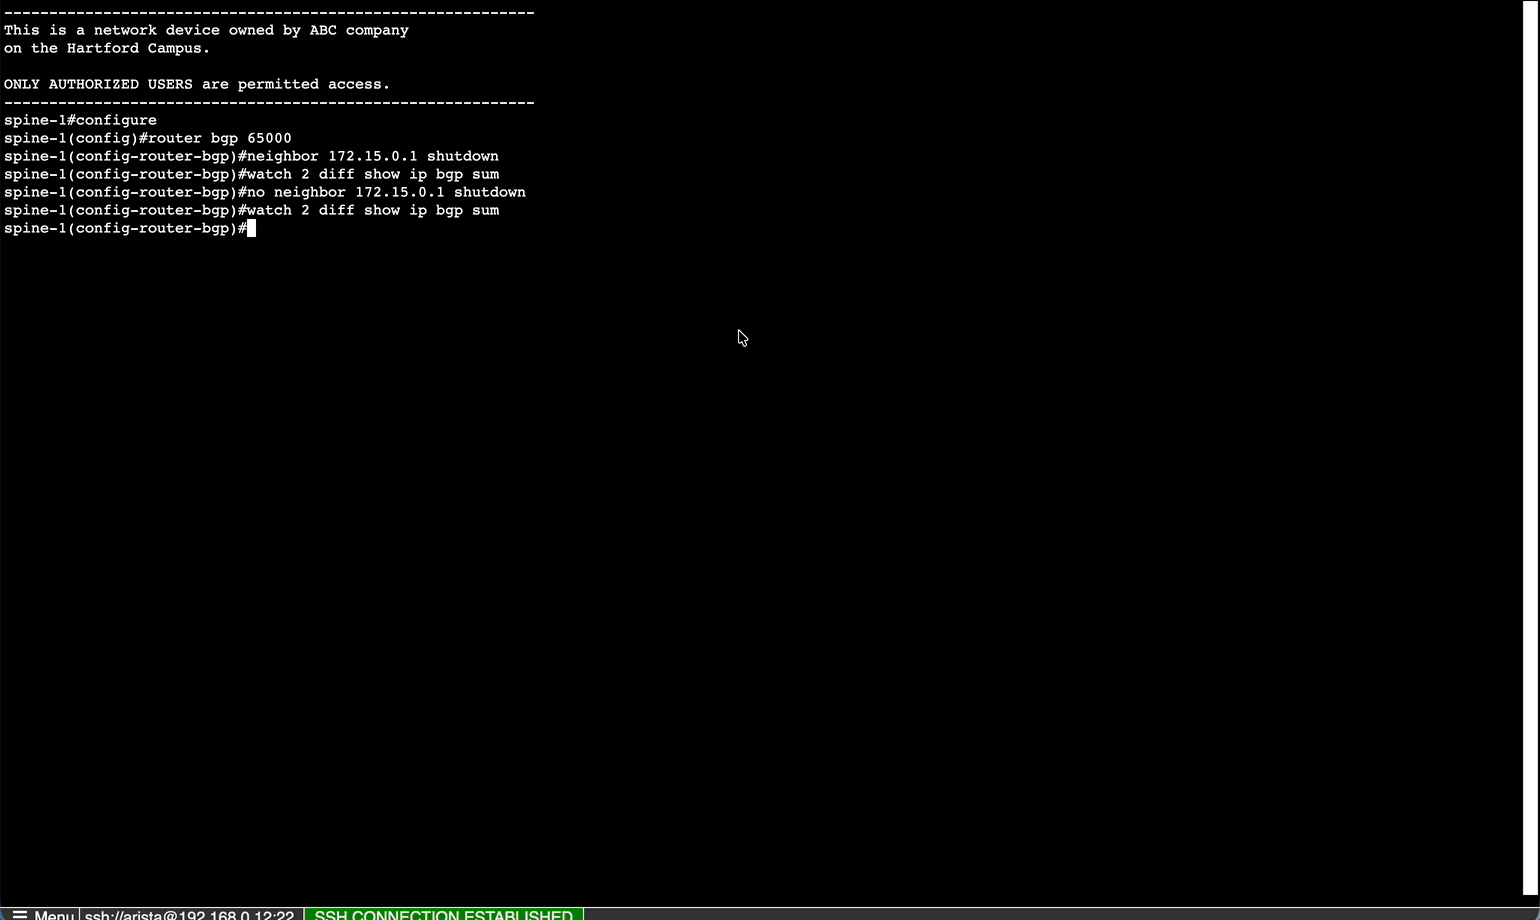
- Once you have access to the CLI, shut down the BGP connection between spine-1 and leaf-1a by executing the following commands:
- Monitor the output to see when neighbor 172.15.0.1 goes Idle (Admin). Use the Ctrl & C keys to terminate the monitor session then issue the following commands:
- Monitor the output to see when neighbor 172.15.0.1 goes Estab. Use the Ctrl & C keys to terminate the monitor session and return to CloudVision.
Lab Tasks – Verify Event in CloudVision
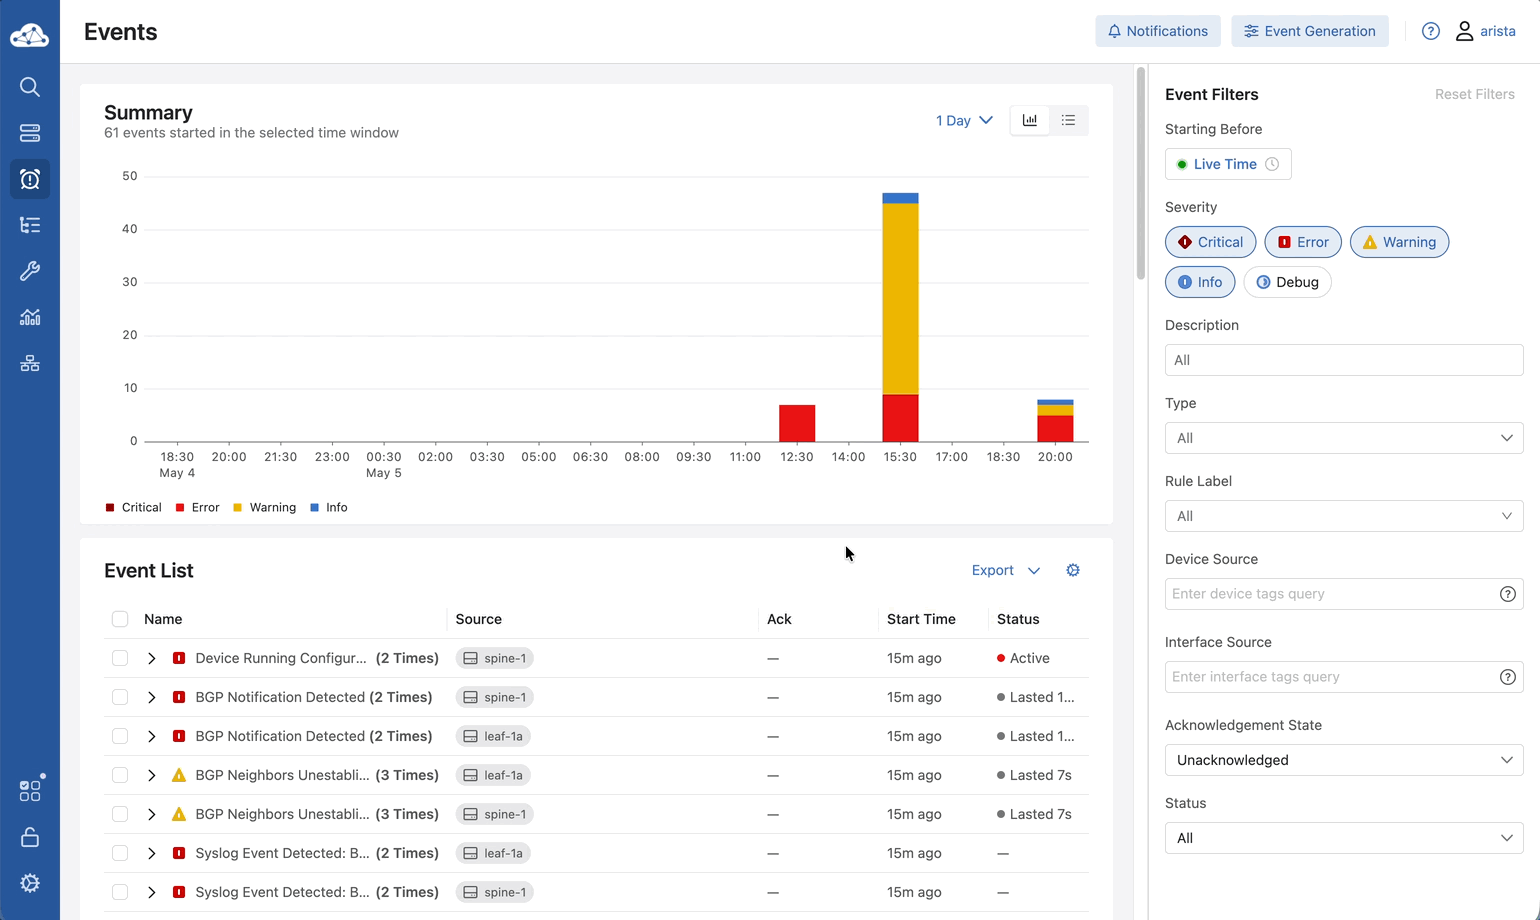
The Events Overview provides a summary of current and past events, allowing you to monitor the ongoing health of your network.
- Return to the Events main page.
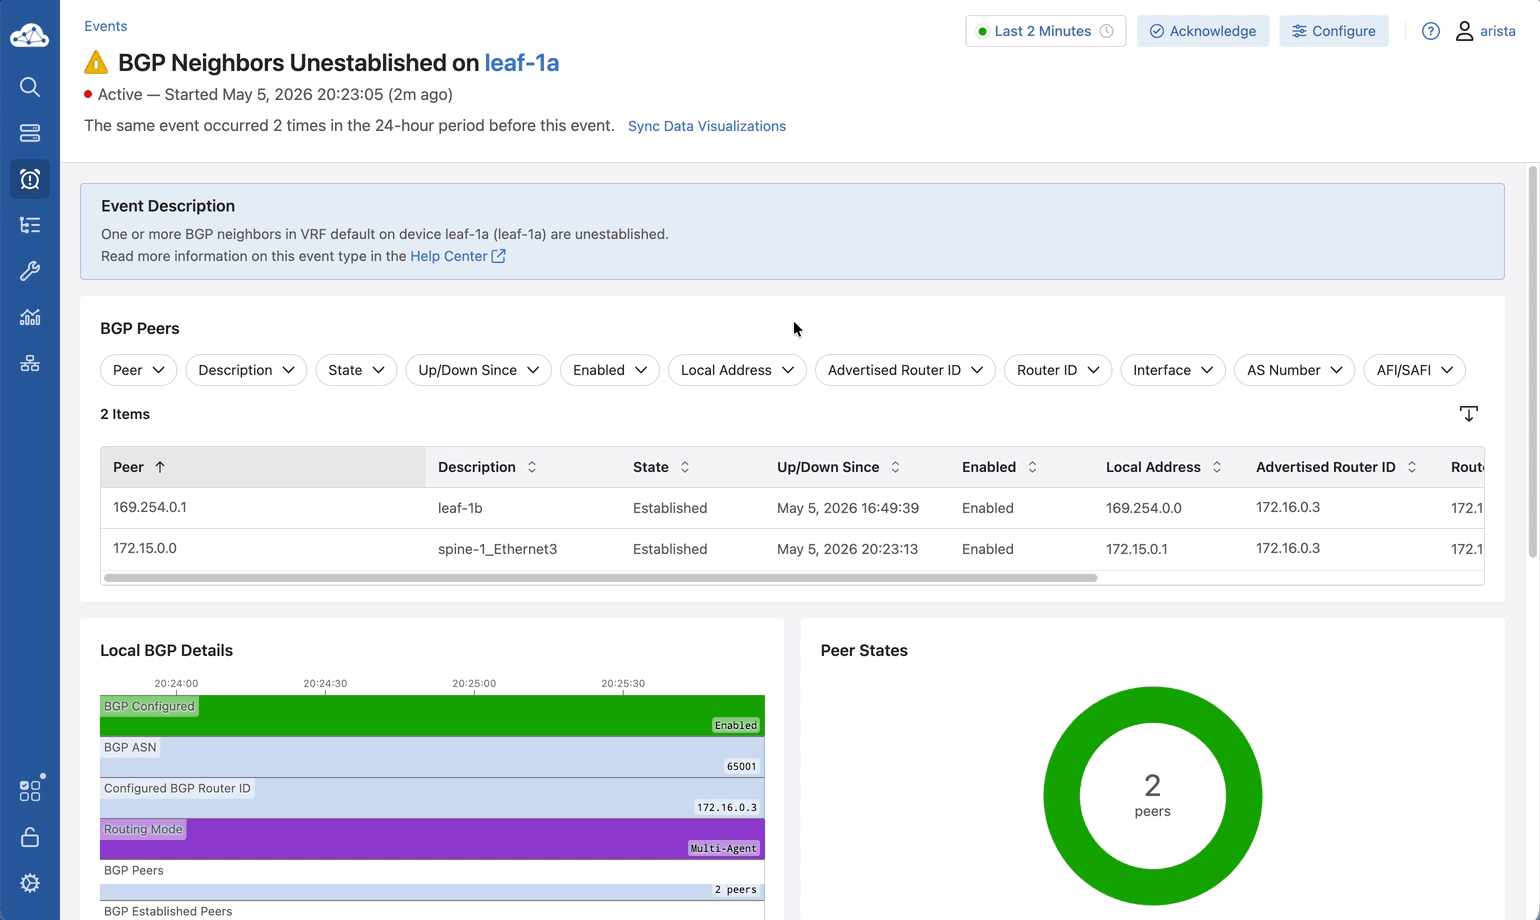
- Find the BGP Neighbors Unestablished in the event list. (If it is not visible, you may have to refresh your browser)
- Click on the event and read the event description.
- Scroll through and observe the tables with BGP details.
Lab Tasks – Create a Custom Syslog Event
We will be creating a custom event to detect an entry that is normally written to the syslog on the switch. In this instance, we want to identify when an Interface is flapping.
In a production environment, when we want to create an event (alert) on a specific incident we need to find the associated entry in the syslog. In this case we are looking for an Interface status change from UP to DOWN and DOWN to UP.
- Navigate back to the Events page within CloudVision.
- Click on the Event Generation button at the top right of the page.
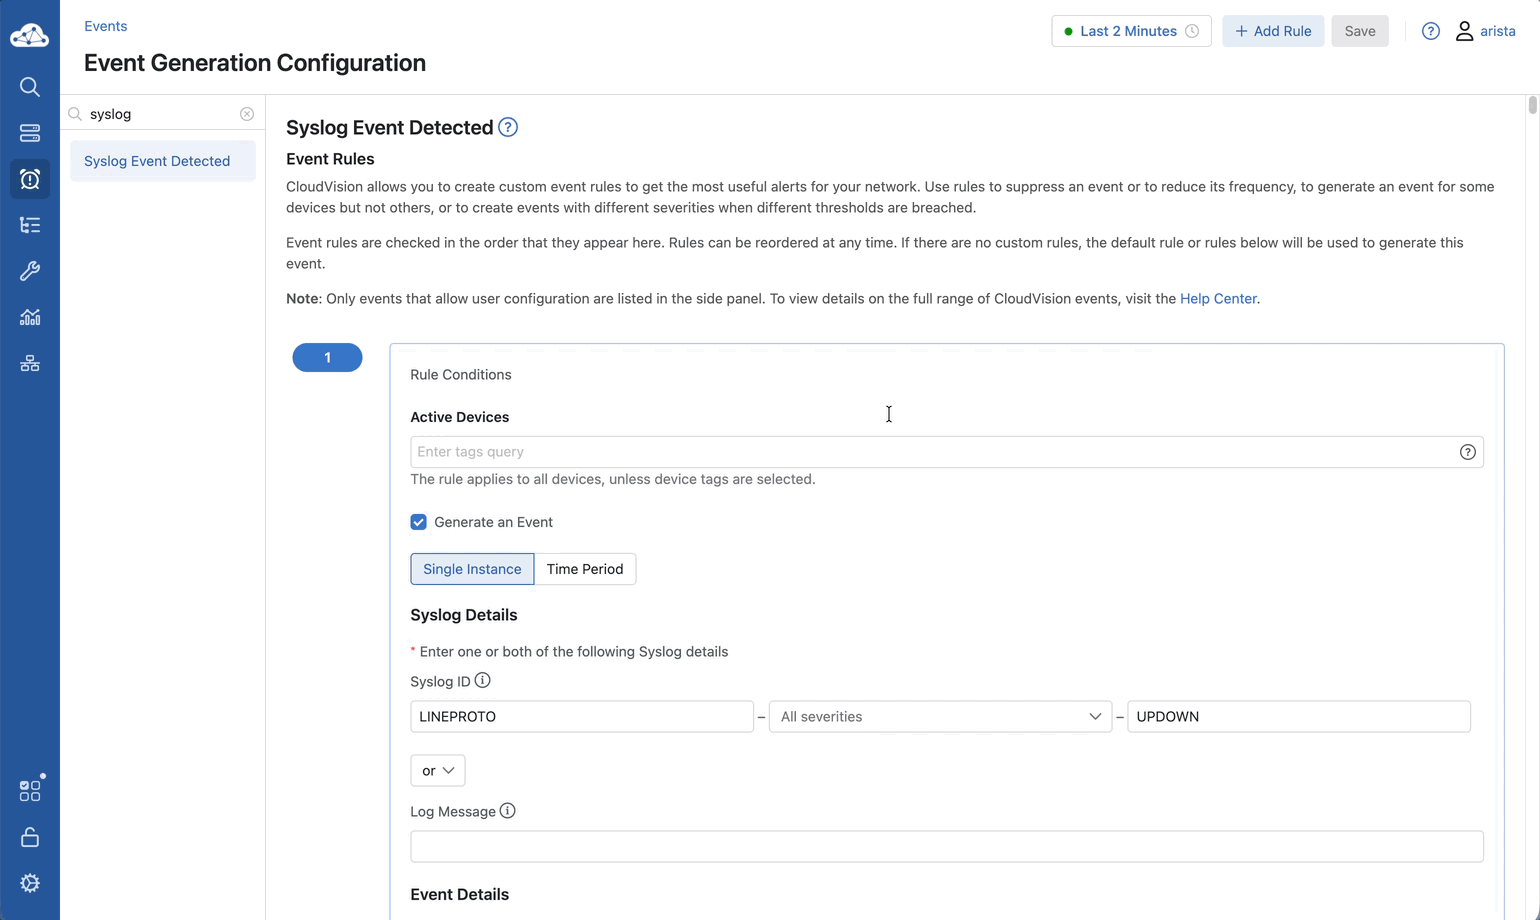
- Search for the Syslog Event Detected on the left and select it.
- Click + Add Rule.
- Under the rule conditions, leave the Active Devices dropdown empty, as it will apply to all devices by default.
- Make sure the Generate an Event checkbox is checked and click Single Instance.
- For our event, we will use the Syslog ID information from this syslog entry.
%LINEPROTO-5-UPDOWN: Line protocol on Interface Ethernet1, changed state to down
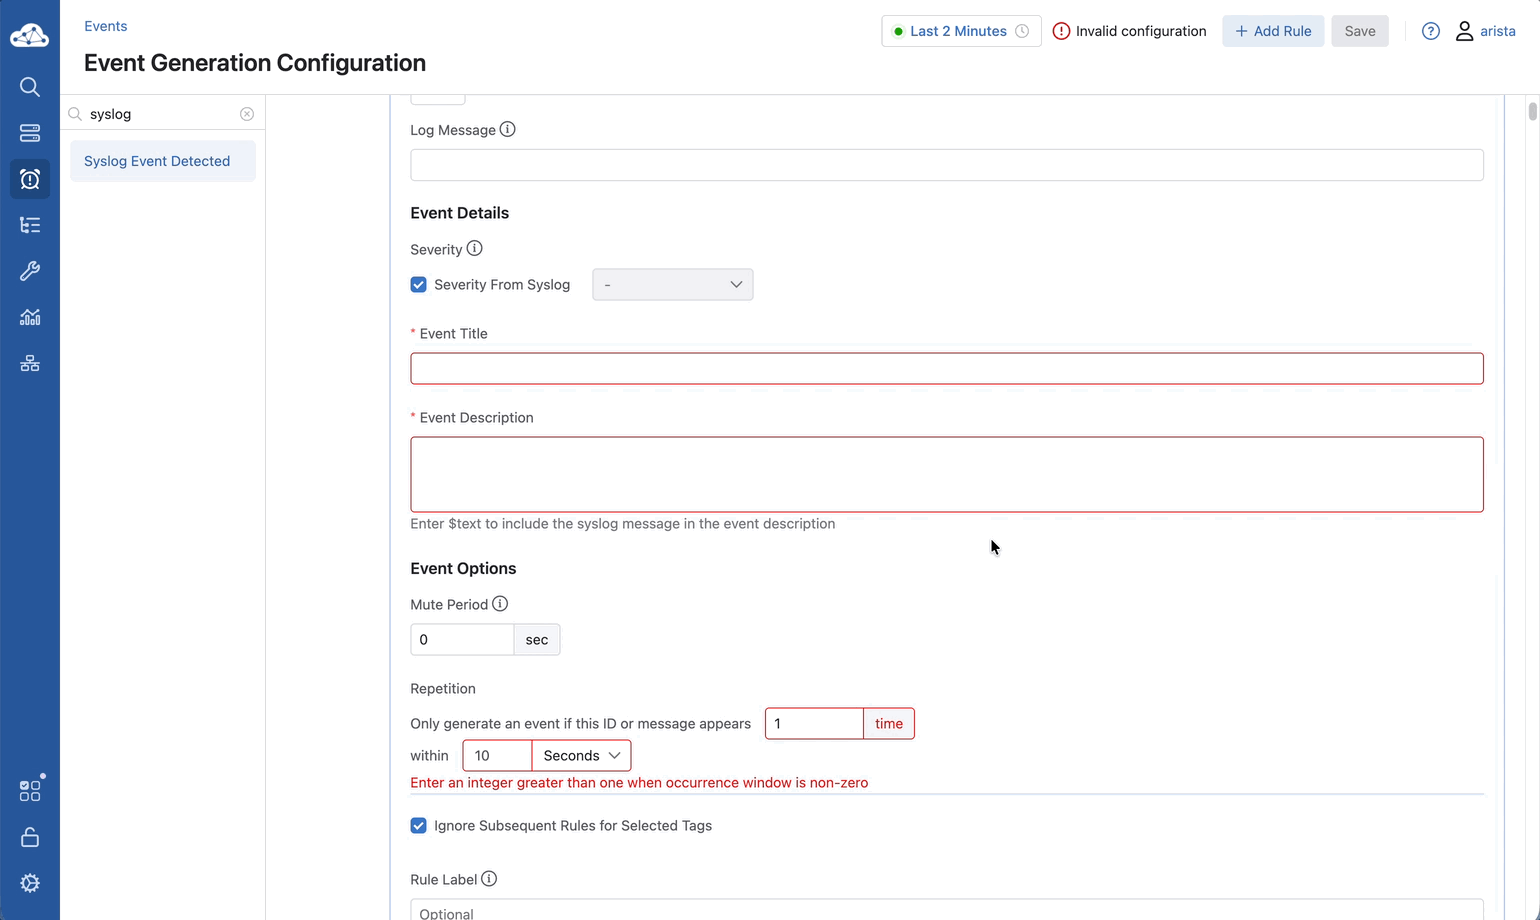
- Under Syslog Details, enter the following information:
- Facility: LINEPROTO (This syslog message is triggered when an interface changes states to up or down.)
- Severity: Blank (You may select as many severity options from the severity dropdown as you like or leave it blank to generate an event for any severity.)
- Mnemonic: UPDOWN
Note* In addition to the syslog, this information can be found in the Syslog Message Guide at Arista.com.
- Configure the options under Event Details with the following parameters:
- Event Title: Interface Flap Alert
- Event Description: Interface state change detected on $deviceId
- Use the Event Options section to limit the frequency of the event:
- Mute Period: 600 seconds (Time before this rule can be used to generate an event again for the same device)
- Repetition: 5 times within 10 minutes
- Click Save at the top right of the screen.
Lab Tasks – Trigger Interface Flaps Below Threshold
We will test the alert by changing the state of our interface from up to down three times. Then two additional times to reach the configured repetition threshold of 5 occurrences within 10 minutes.
- Navigate to the Arista Campus Lab Browser tab.
- Click on the icon for leaf-1a to access the CLI.
- Flap an interface 3 times by executing the following commands:
- Check the CloudVision Events tab. No event should appear because the occurrences are below the configured threshold.
Lab Tasks – Trigger Interface Flaps Exceeding Threshold
- Navigate back to the CLI for leaf-1a and continue flapping the same interface 2 more times to reach a total of 5 flaps.
- Check the CloudVision Events tab again.
- The Interface Flap Alert event should be listed. (If it is not listed, you may have to refresh your browser)
- Click on the Interface Flap Alert event.
- Review the event details.
- Read through the Log Messages that caused the event.
- Verify the timestamp and severity.
If the event was created and all information looks correct, you’re done. Congratulations.