Lab 6 - Static Configuration Studio - Sync vs Reconcile
Eventually, someone is going to touch the CLI.
So, when a device shows out of sync, what do I do? It depends. If you want to restore the configuration to what you planned – Sync. If you want to incorporate the changes you made at the command line – Reconcile.
| Feature | Direction of Config | The "Source of Truth" |
|---|---|---|
| Sync | CloudVision => Switch | CloudVision is the boss (Enforcing the designed config). |
| Reconcile | Switch => CloudVision | The Switch is the boss (Importing manual work). |
Lab Tasks - Edit the Running Config and Analyze Changes
We’re going to simulate this by creating VLAN 500 and VLAN 600 directly on our switches' CLI. When you return to the Devices > Inventory screen, you'll see those red icons next to leaf-1a and the spines. That’s CloudVision’s way of saying, 'Hey, the reality on the ground doesn't match my plan'.
-
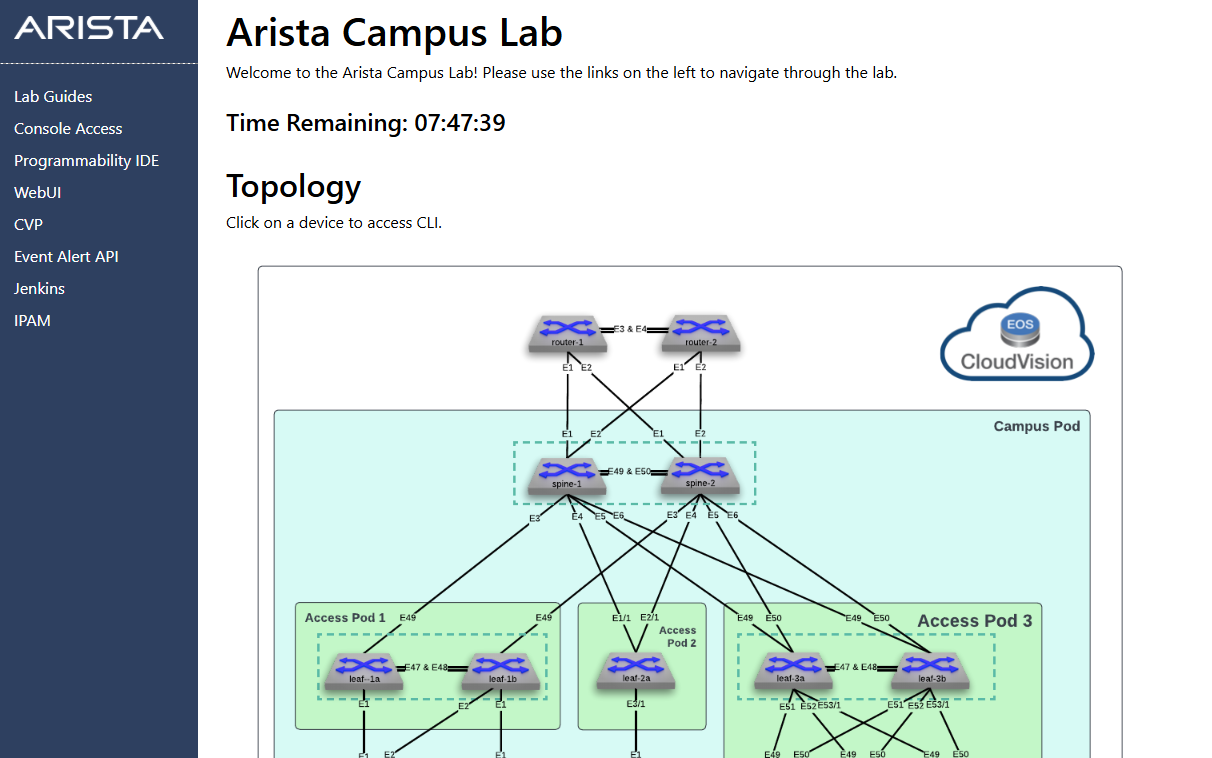
Navigate back to the Arista Campus Lab tab in your browser.
-
Locate Leaf-1a in the Topology diagram and click the icon to access the CLI.
- If you are prompted for user credentials, enter the username arista with the matching password at the bottom of your topology screen.
-
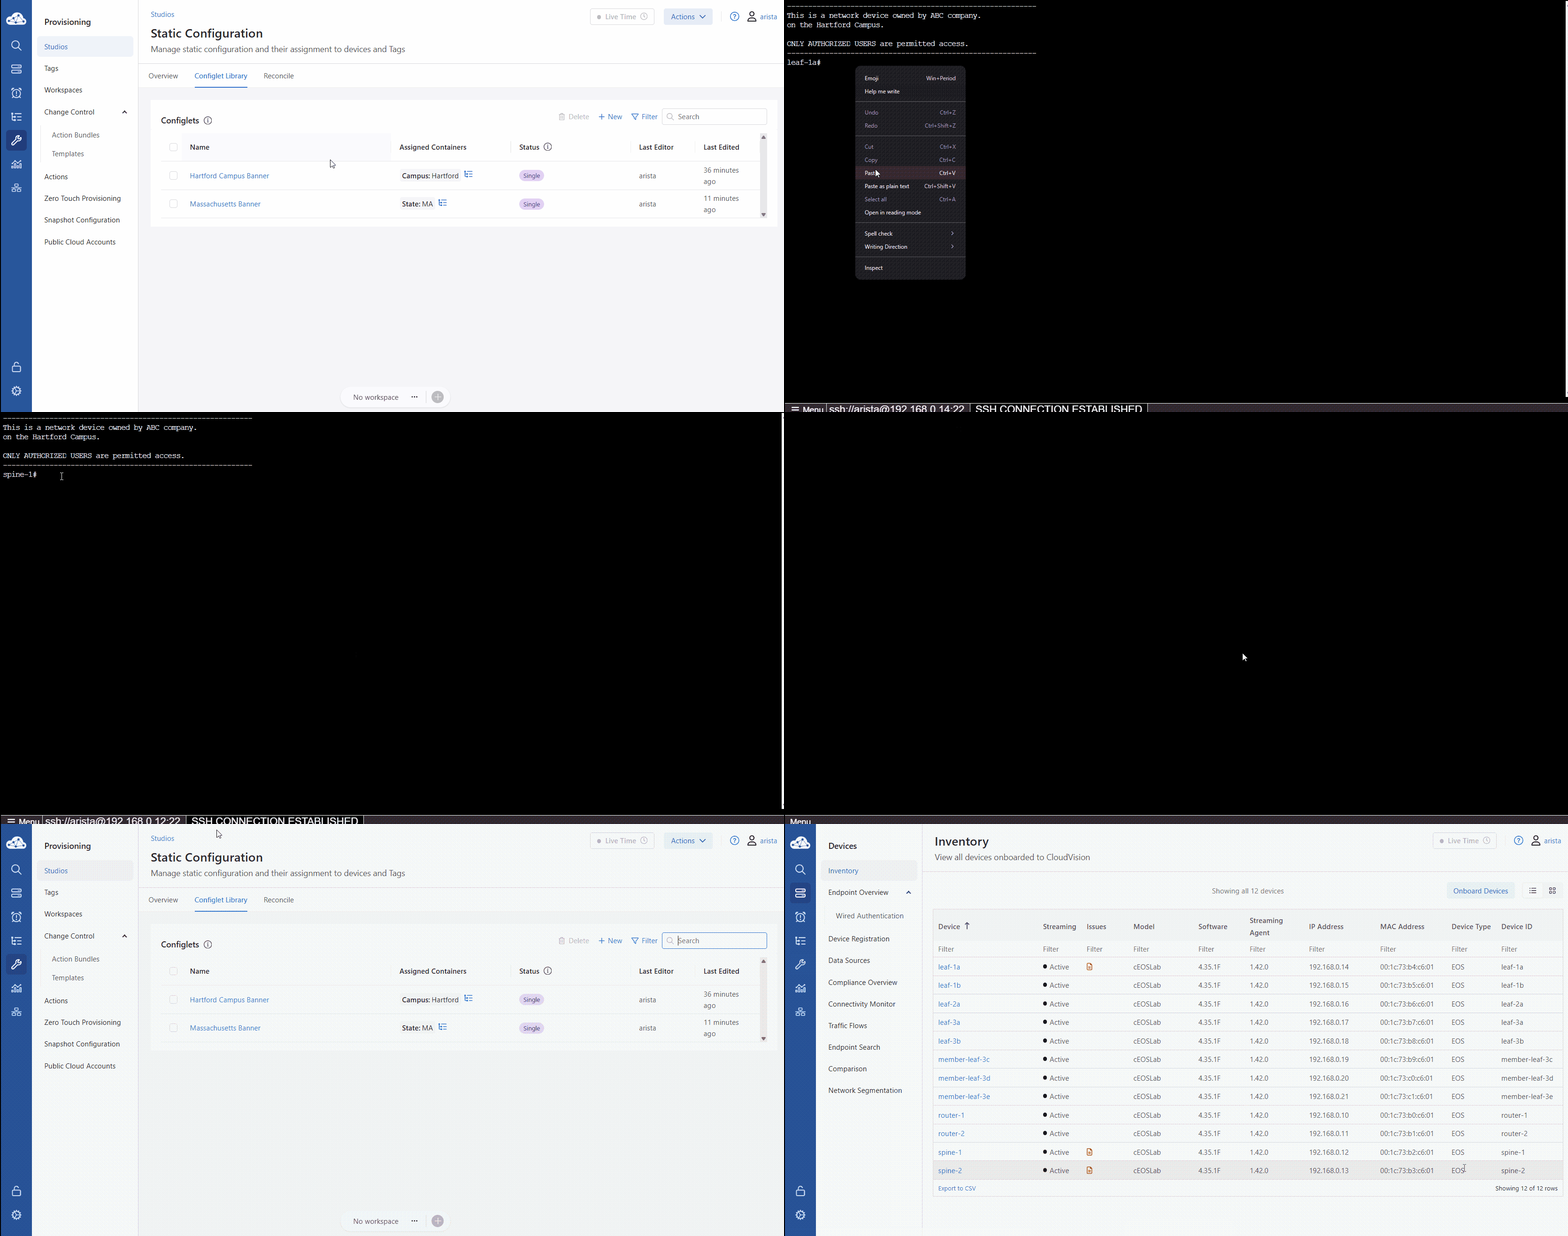
Paste the following commands in the switch.
-
Locate Spine-1 and Spine-2 in the Topology diagram and click the icon to access each CLI.
-
Paste the following commands in both switches.
-
Return to CloudVision.
- From the blue panel, select Devices > Inventory.
-
Notice how leaf-1a, spine-1, and spine-2 show red icons.
- This is informing us that the running config has been changed and does not match our designed config.
Lab Task - Sync Config (CloudVision is the Boss)
First, let's look at leaf-1a. Maybe that manual change was a mistake, or just a temporary test. We want to revert to our original design. We’ll use Sync Config.
In this scenario, CloudVision is the boss. It’s going to push the 'Designed Config' down to the switch, effectively erasing our manual VLAN 500. Once the Change Control executes, the red icon vanishes because the switch is back in line with the master plan.
| Feature | Direction of Config | The "Source of Truth" |
|---|---|---|
| Sync | CloudVision => Switch | CloudVision is the boss (Enforcing the designed config). |
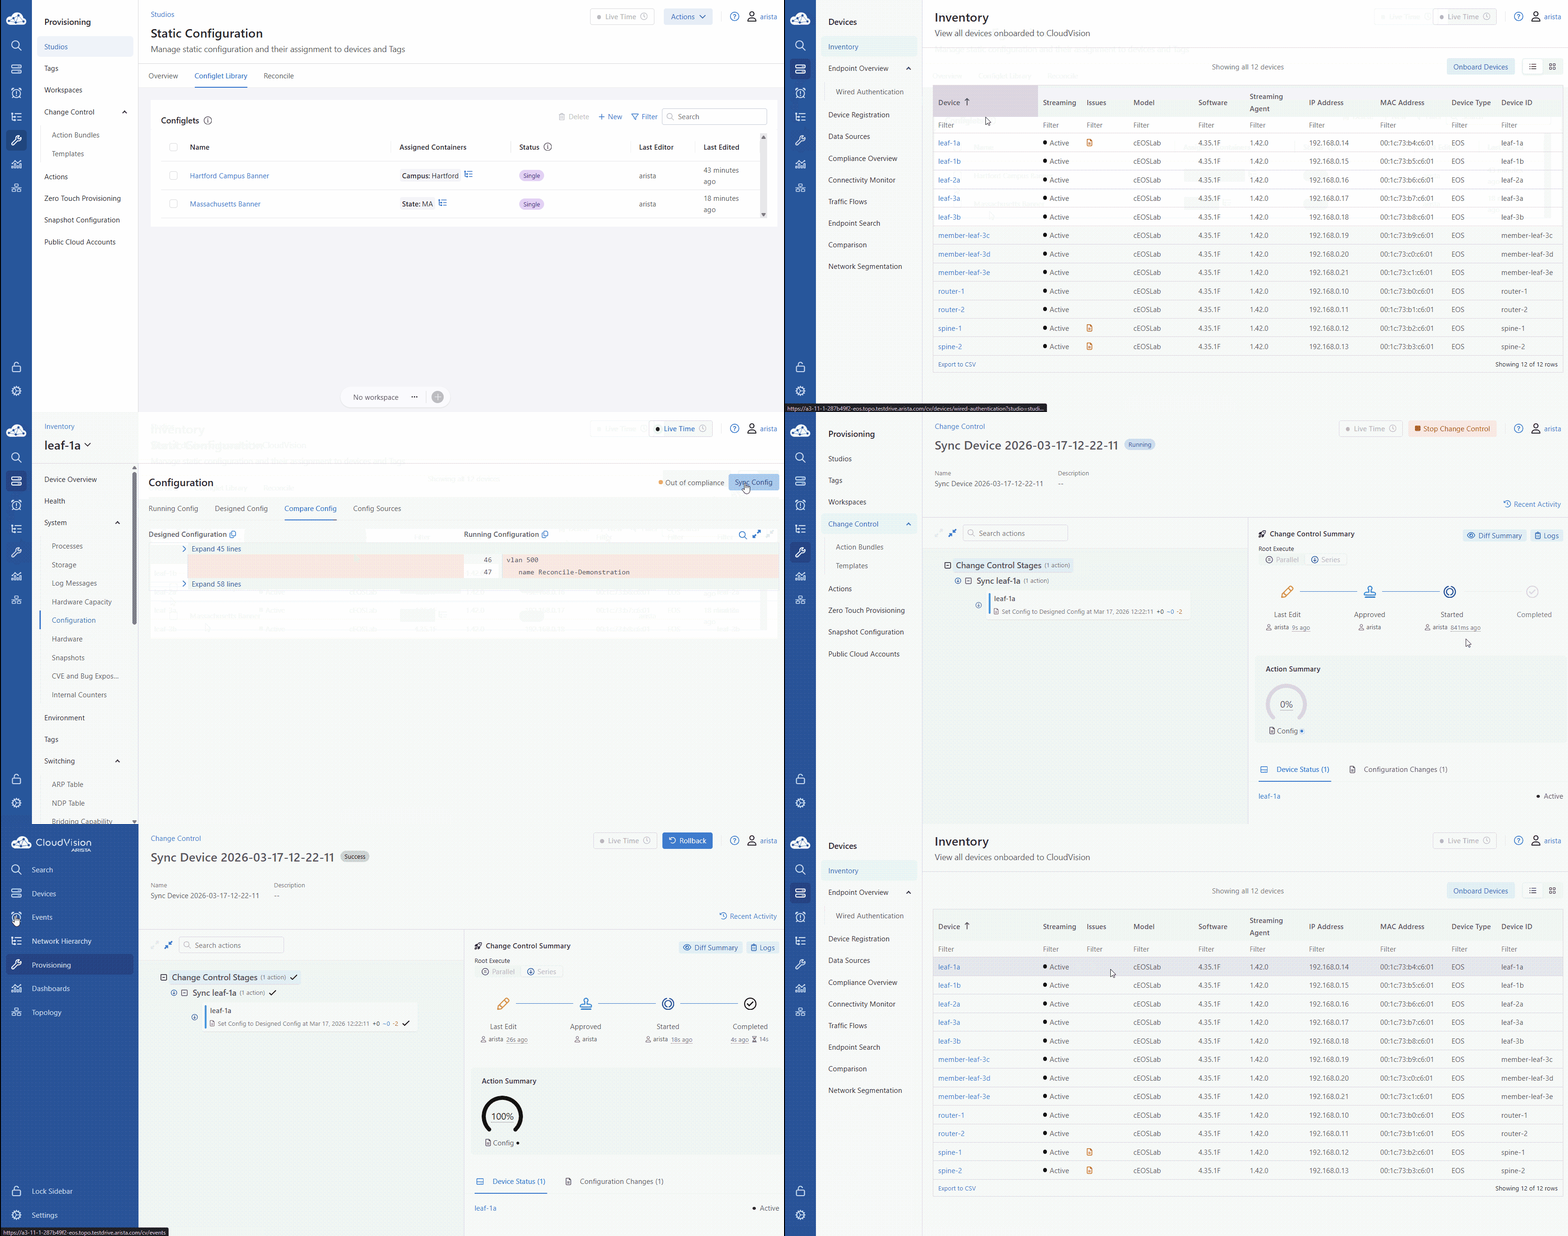
- In Devices > Inventory, click the red icon next to leaf-1a.
- Click Sync Config (top-right).
- In Change Control – click Review and Approve
- Review the changes and click Approve and Execute
-
Return to Devices > Inventory and verify that leaf-1a is no longer out of compliance – the red icon is gone.
Lab Task - Reconcile (The Switch is the Boss)
Now for the spines, let's take the opposite approach. Let's say that manual VLAN 600 was a critical fix we want to keep. If we just 'Synced,' CloudVision would delete it. Instead, we use Reconcile.
Here, the switch is the boss. We use Auto-Reconcile to pull those manual lines into CloudVision. CloudVision creates a special Reconcile Configlet so it 'remembers' these changes. The device turns green again because CloudVision now 'knows' about the manual work and has incorporated it into the design.
| Feature | Scope | Best For... |
|---|---|---|
| Reconcile | Line-by-line | Precise changes or troubleshooting |
| Auto-Reconcile | All changes at once | Large-scale changes |
Note
CloudVision creates a Reconciled Configlet.
The "Designed Config" is updated to include manual changes.
The device turns Green (In Compliance) because CloudVision now "knows" about those changes.
- Go to Provisioning > Studios > Static Configuration.
- Click Reconcile > Auto-Reconcile. (Note: spine-1 and spine-2 are in scope).
- Select Reconcile All Lines and click Start Reconcile.
- On the Workspace Island, click Review and Submit. (There are no device configuration changes because the configuration is being left as it is.)
- Click Submit Workspace
- Click Clear Workspace
- Return to the Provisioning > Studios > Static Configuration studio.
- Click Configlet Library. If necessary click Configlets to see that Reconcile configlets were created for spine-1 and spine-2.
- Navigate to Devices > Inventory.
- Notice how Spine-1 and Spine-2 are no longer out of compliance.
- Click on spine-1 and go to Configuration > Config Sources
- Notice how part of its designed configuration is being pulled from the reconcile configlet (bottom configlet)
Note
It is best practice to place all designed configuration in named configlets (non-reconcile).
A typical next step would be to pull the lines of configuration from the reconcile and place them in a named configlet, then remove the reconciled configlets.
Reconciling provides a safeguard for critical CLI modifications, preventing them from being accidentally overwritten by Syncing.
All tasks are finished! Time to move on.