Lab 1 - Timeline Foundations
Timeline Foundations, where we move from basic inventory to the "Time Machine" capabilities of Arista CloudVision.
We’ll explore the critical distinction between what we want the network to do and what it is actually doing.
Lab Tasks - Planned vs. Current State (Designed vs. Running)
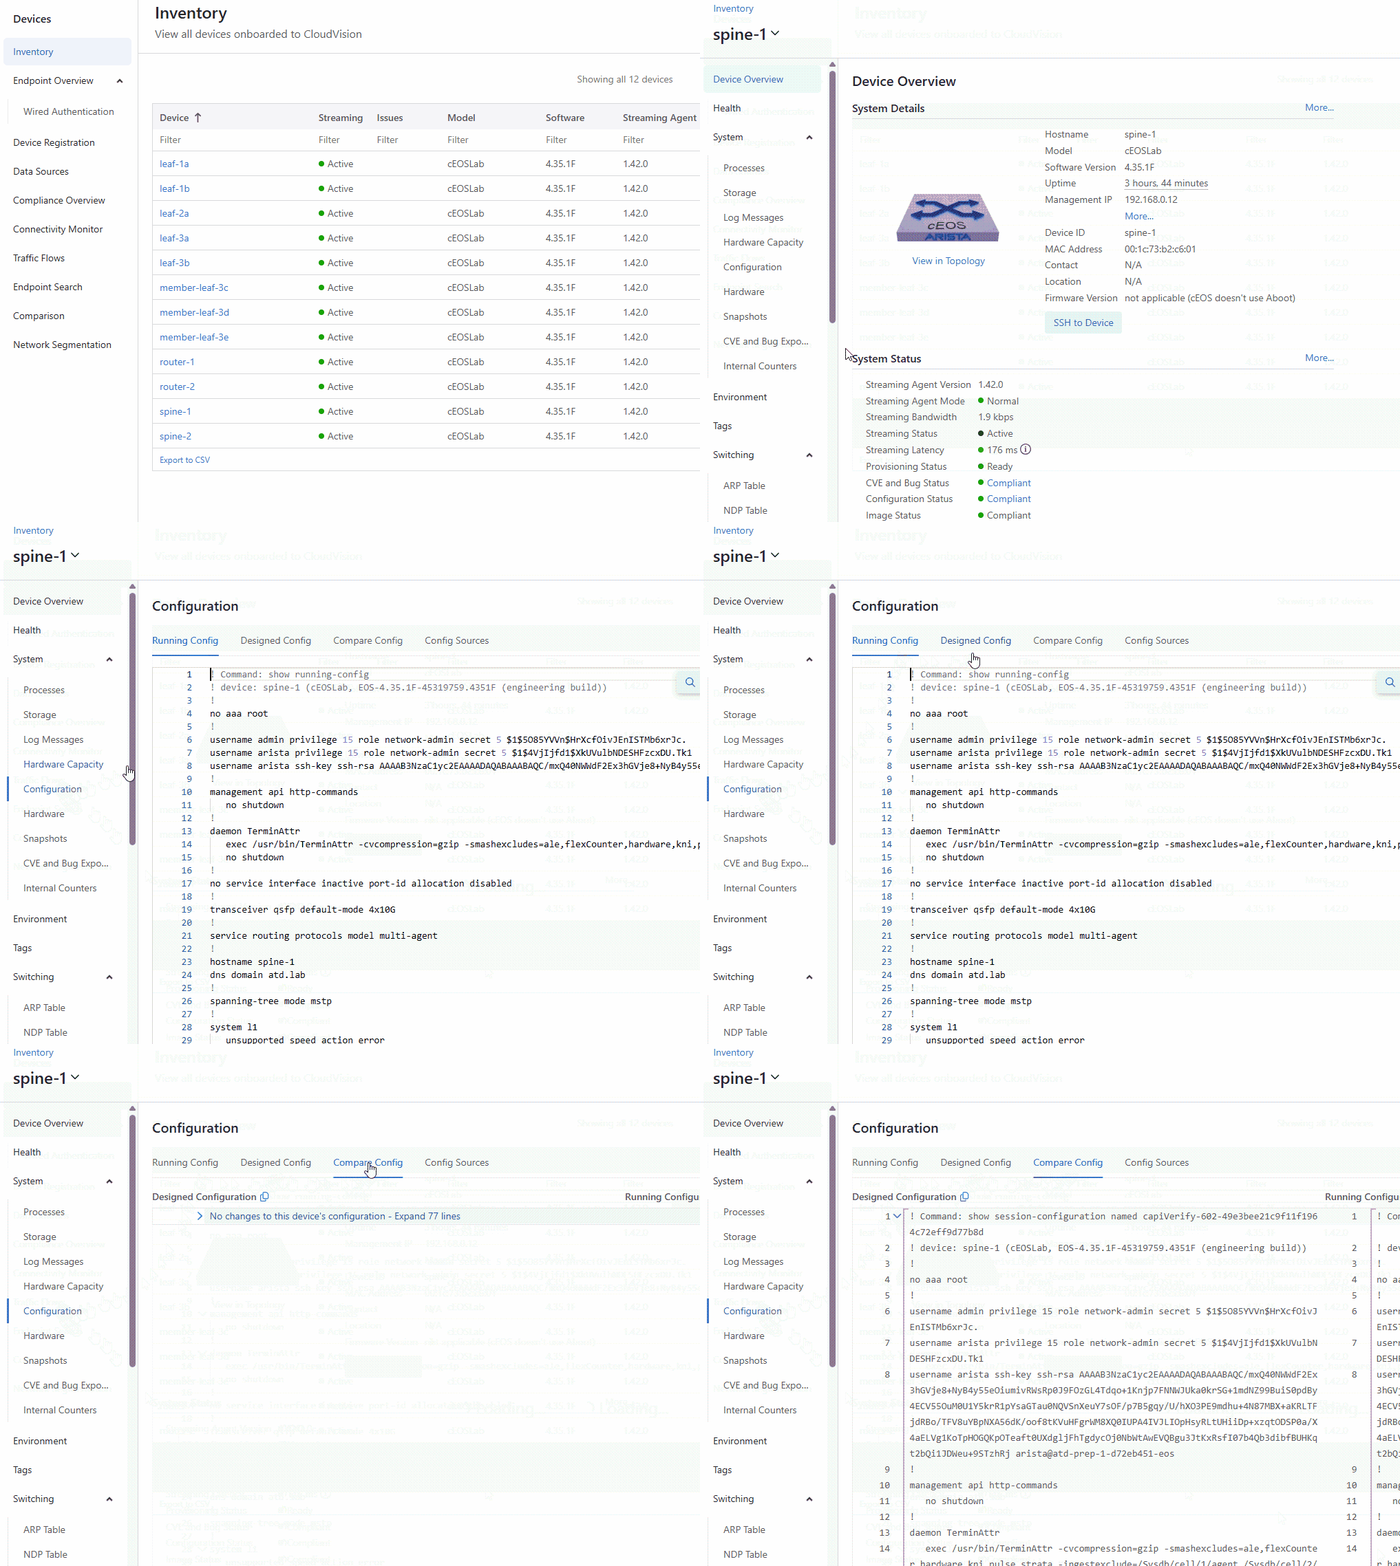
We’re starting in the Devices > Inventory screen.
Think of the Designed Config as the 'Target State' and the Running Config as the 'Current State'.
When you look at spine-1, the diff should be empty because, right now, reality matches our intent.
But in a moment, we’re going to intentionally break that harmony to see how CloudVision reacts.
- Click the Cloud Icon (top-left) at any time to return to the home screen.
- Hover over the blue panel on the left and select Devices.
- Click Inventory if necessary.
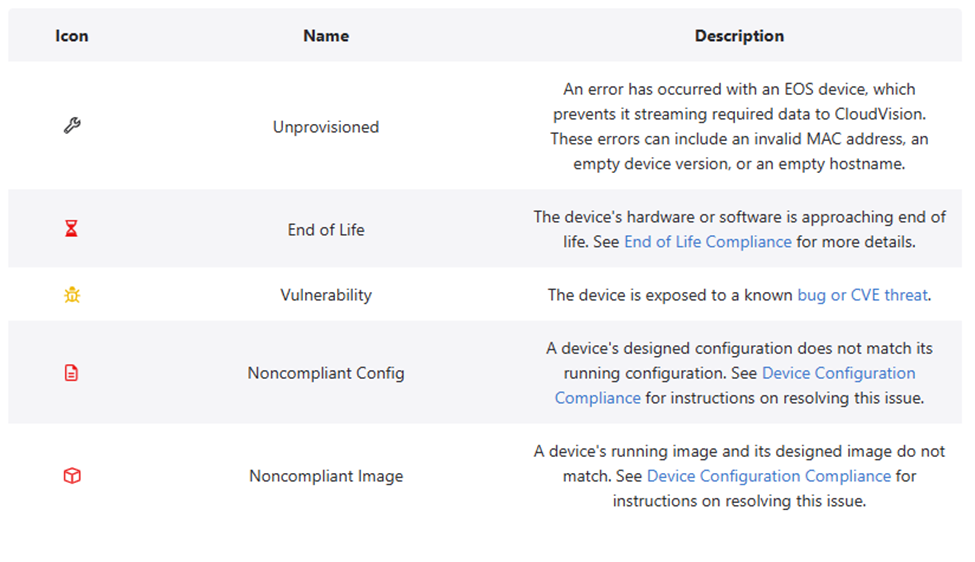
Observe the data presented. If there were issues with a device the following indicators would be present.
- Click spine-1 > Configuration.
- Click the Compare Config tab to diff the Running Config against the Designed Config.
- Note: The diff should be minimal or empty as no changes have been made yet.
Lab Tasks - Edit the Running Config and Analyze Changes
We’re going to jump into the CLI of spine-1 and act like a rogue admin.
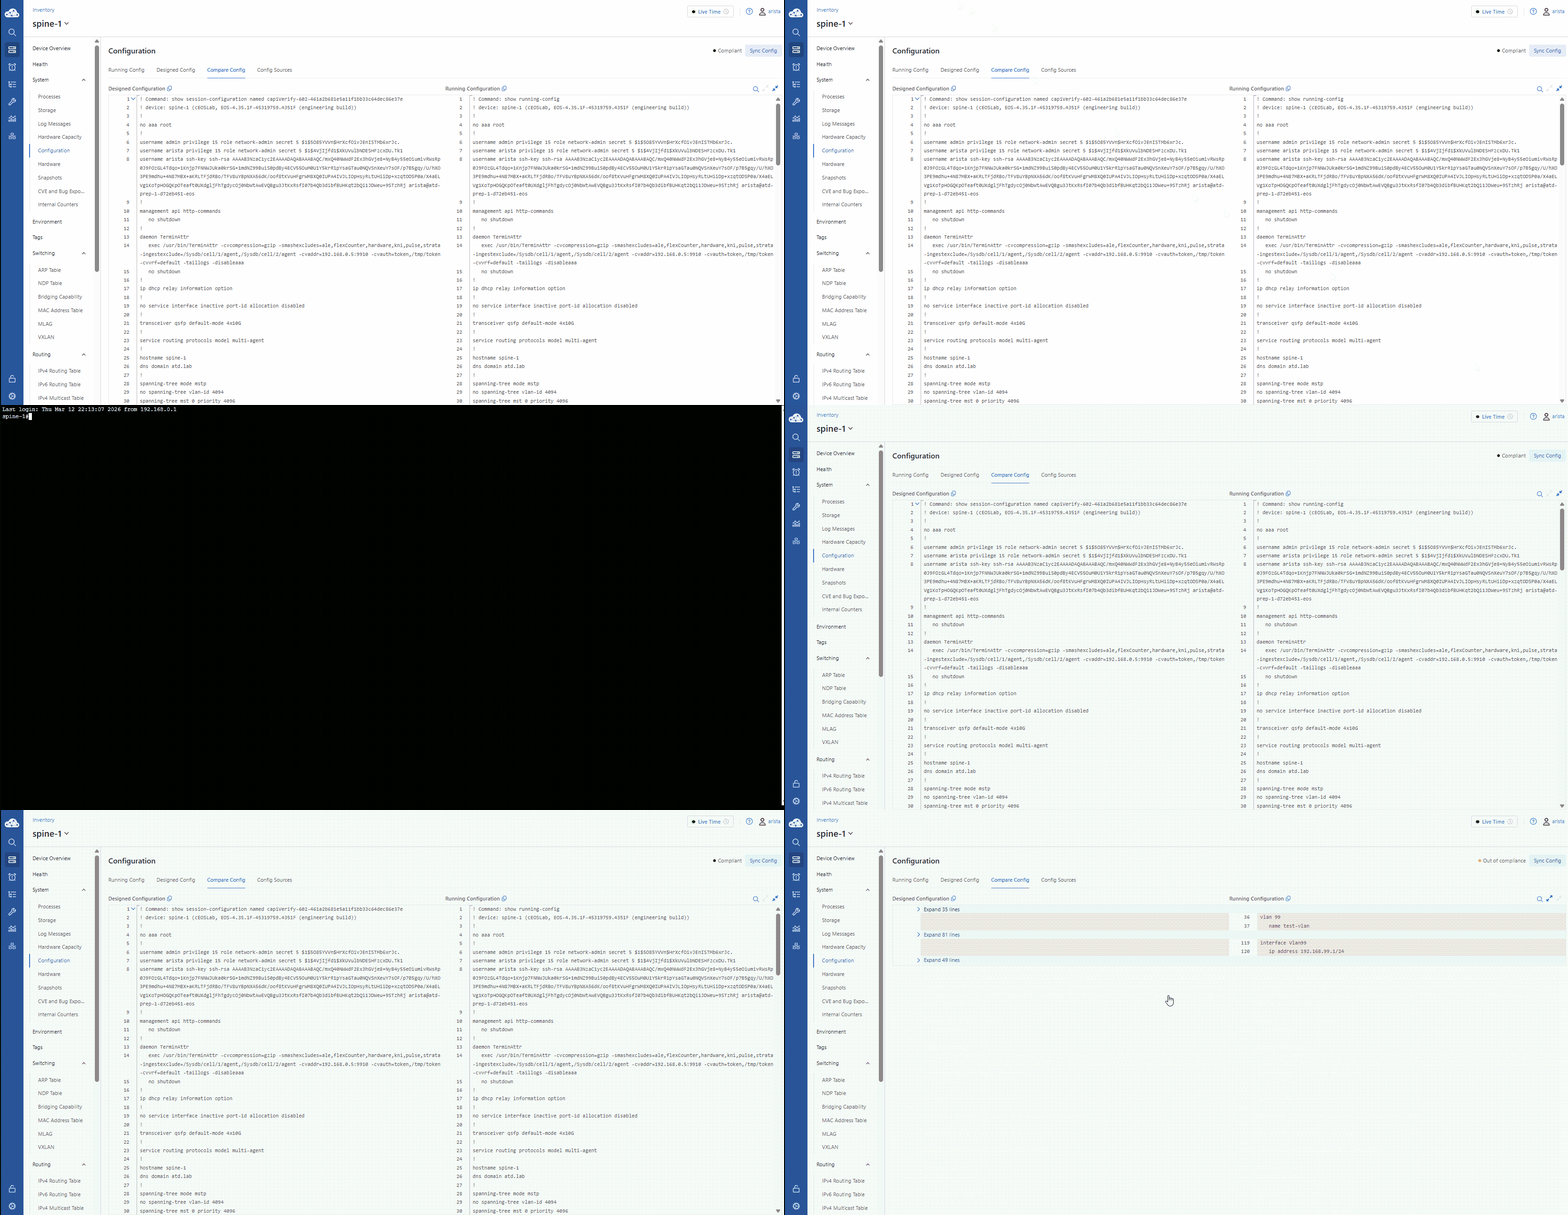
We're adding VLAN 99 and an IP address directly on the box, bypassing the CloudVision UI.
Then, look back at CloudVision. Notice that red 'Out of compliance' icon? CloudVision just caught us.
It compared its database (the blueprint) to the actual switch and realized someone went 'off-script.'
This is your early warning system against configuration drift.
-
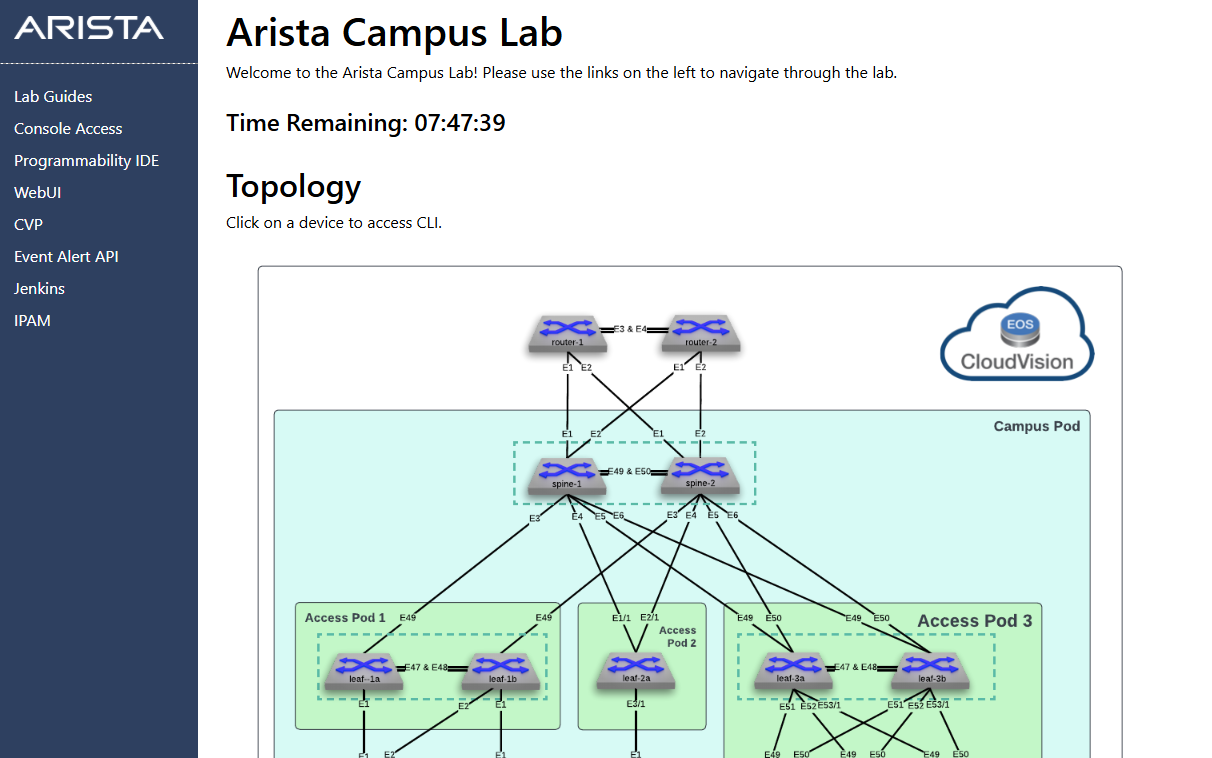
Return to the Arista Campus Lab tab in your browser.
-
Locate spine-1 in the Topology diagram and click the icon to access the CLI.
- If you are prompted to log in, use the arista/[password] credentials under the network topology where you clicked the switch.
-
Copy these commands and paste them in the switch console to create and name vlan 99 and an SVI with IP address 192.168.99.1/24
-
Return to CloudVision and click the Compare Config tab. (Refresh the page if the changes don't appear immediately).
- Observe that spine-1 is now "Out of compliance" in the top-right corner because the Running Config no longer matches the Designed Config.
Lab Tasks - Config Sources
We’re going to click on the Config Sources tab.
The running config of a switch is generated from multiple config sources, compiled together to generate the ultimate Designed Config.
It has three different configlets assigned to it.
One might handle the basic management, another handles the campus fabric automation, and a third might be a custom snippet we wrote ourselves.
This view is essential for troubleshooting because it tells you exactly 'who' owns a specific line of code.
- Click the Config Sources tab.
- Notice how there are three configlets assigned to this device.
- We can search these to find where a specific configuration line originates from.
- Search for "name" in the search box and review the results.
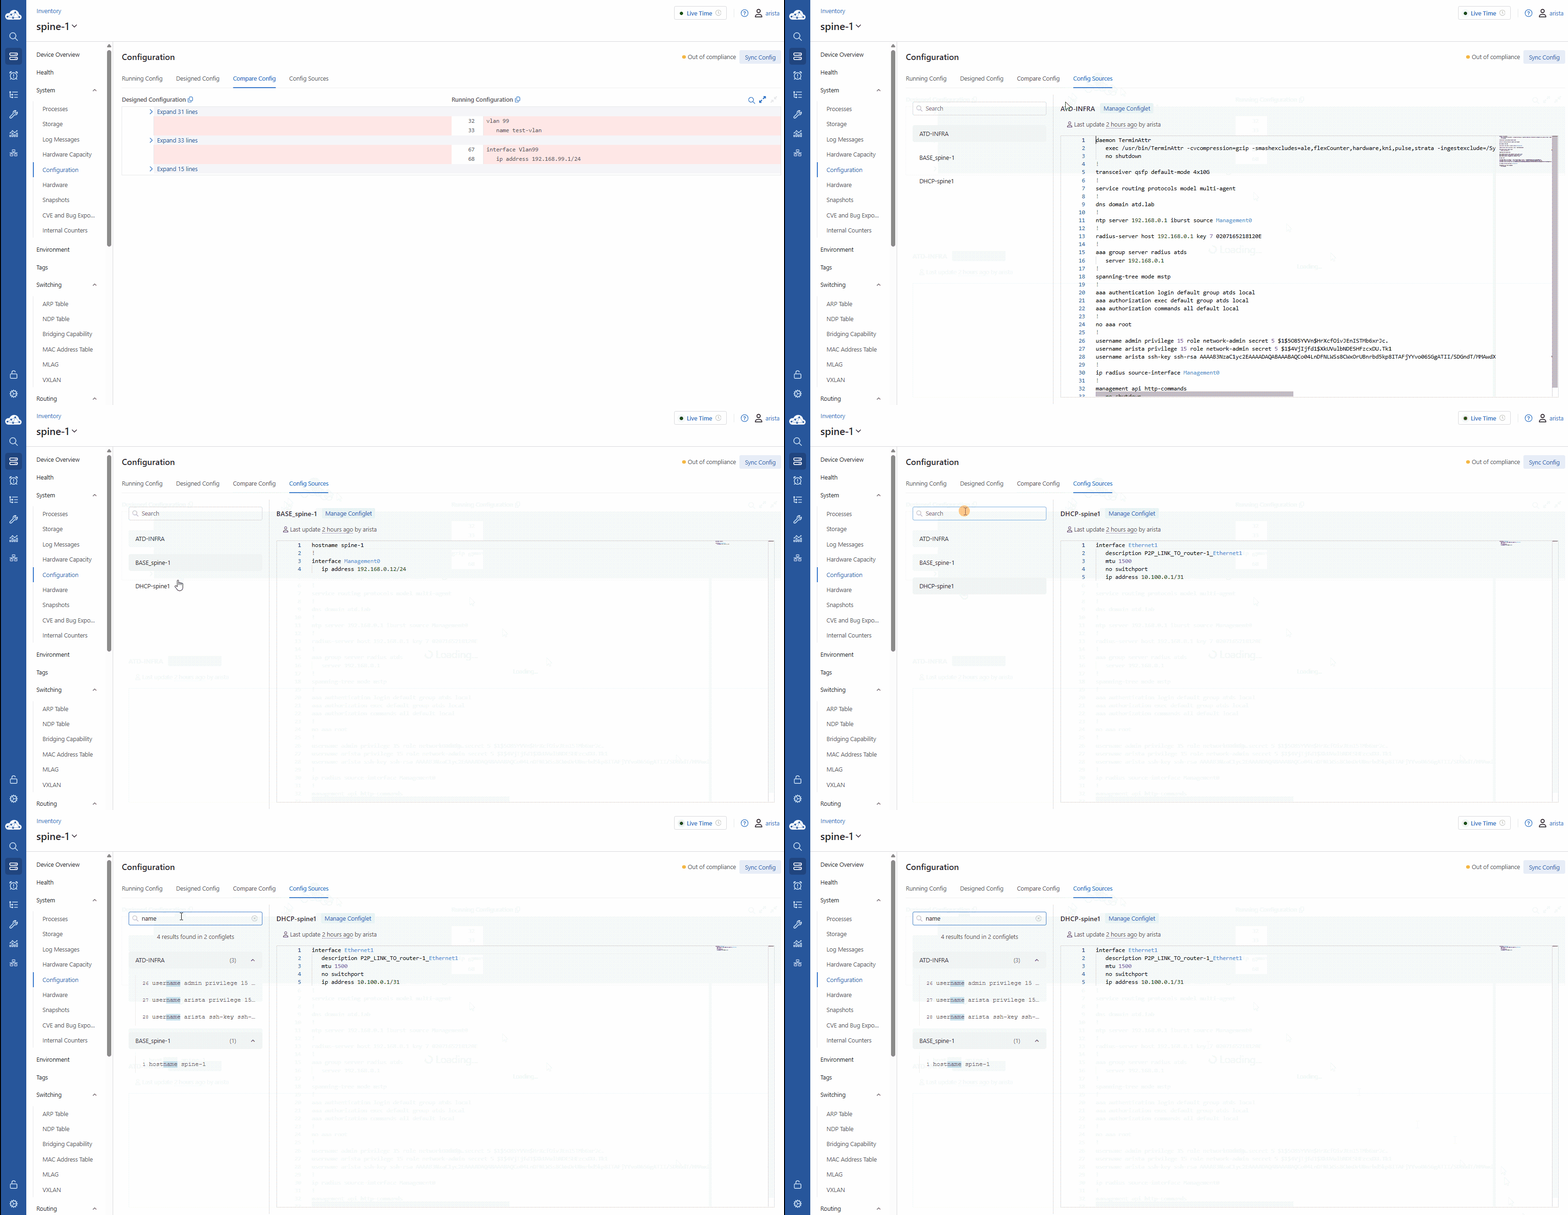
Lab Tasks - Timeline & Change History (The "DVR" of Networking)
One of the hardest parts of troubleshooting is knowing what changed and when.
CloudVision is essentially a DVR for your network.
By using the Time Picker, we can travel back in time—to 30 minutes ago, or even back to last December.
We aren't just looking at old text files; we are looking at the actual state of the network at that exact moment.
Use the color-coding to spot the differences: Red is deleted, Green is added, and Blue is modified.
This is how you answer the age-old question: 'What changed last night at 2 AM?'
- Under spine-1 > Configuration > Compare Config, click the Live Time button on the top right
- Under Quick Times click 30 mins ago to see how our running config matched the designed config, then return to Now.
- Click the Live button under Custom time and select a date a few months in the past; Dec 1, 2025, 00:00:00 and click OK.
- Observe the differences, then return to the current time by selecting Now from the Custom Time selection.
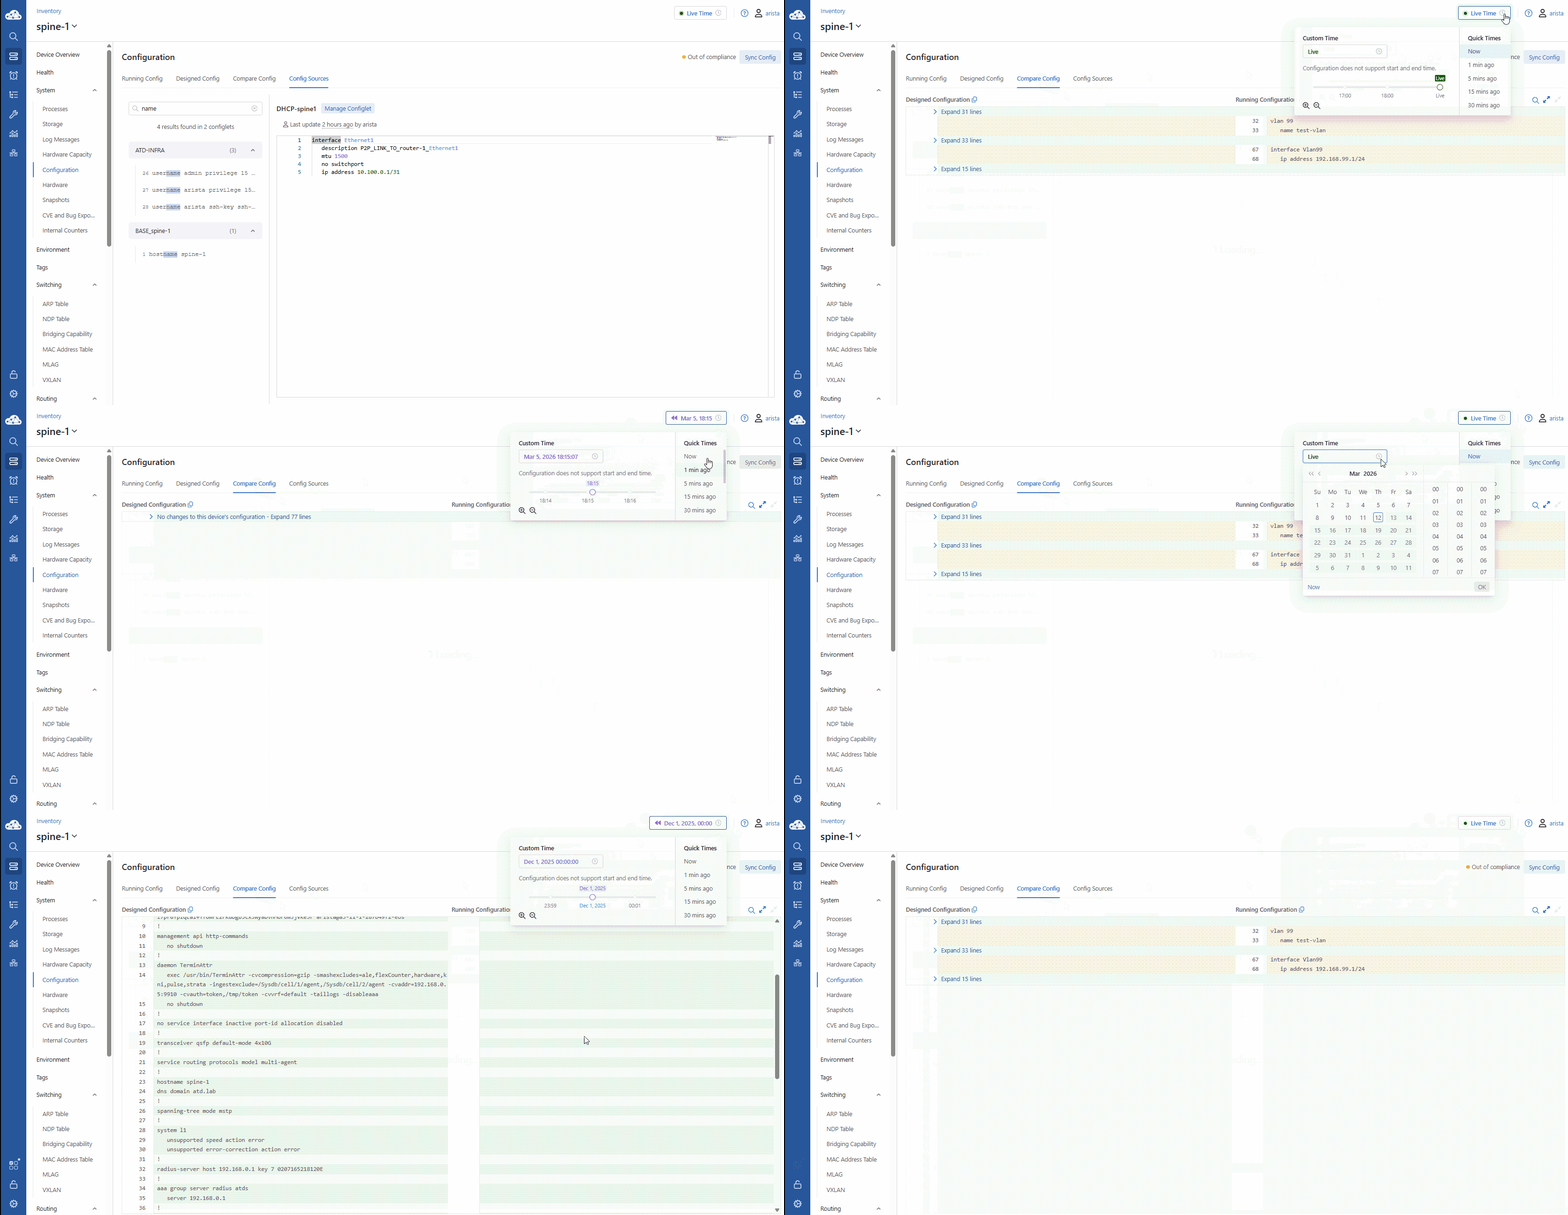
CVaaS stores a complete record of EVERY change that was made for at least 90 days.
- Click the Running Config button and notice the Change History panel on the right of the screen.
- This allows you to audit the historical evolution of spine-1.
- Click the oldest timestamp to view and compare historical changes.
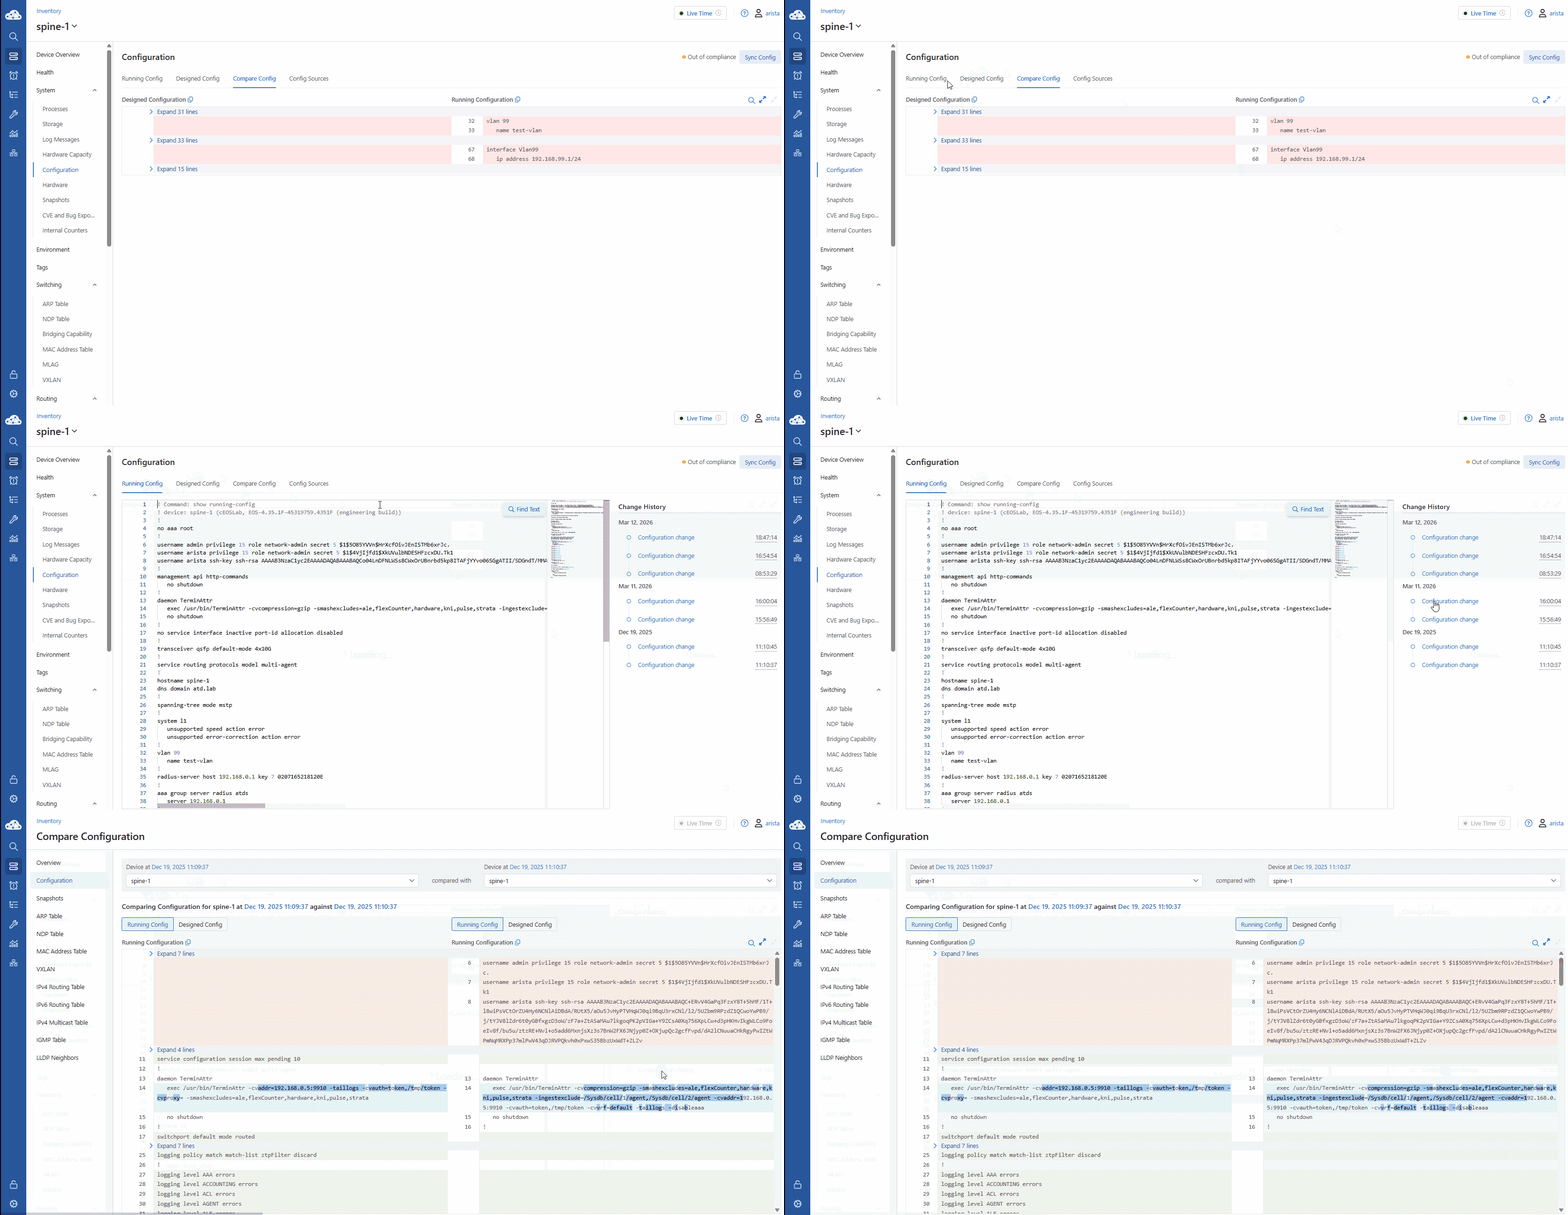
When comparing these two versions, use the color-coding to explain the "intent" of the changes (Red=Deleted, Green=Added, Blue=Modified).
Lab Tasks - Compliance Verification
Compliance isn't just about typos in a config. The Compliance Overview is your mission control for security.
It automatically checks your hardware and software against known Bugs, CVEs (vulnerabilities), and End-of-Life notices.
- Hover over the blue panel and select Devices.
- Locate spine-1 in the Inventory list.
- Notice the red page icon, which informs you the running config is out of compliance.
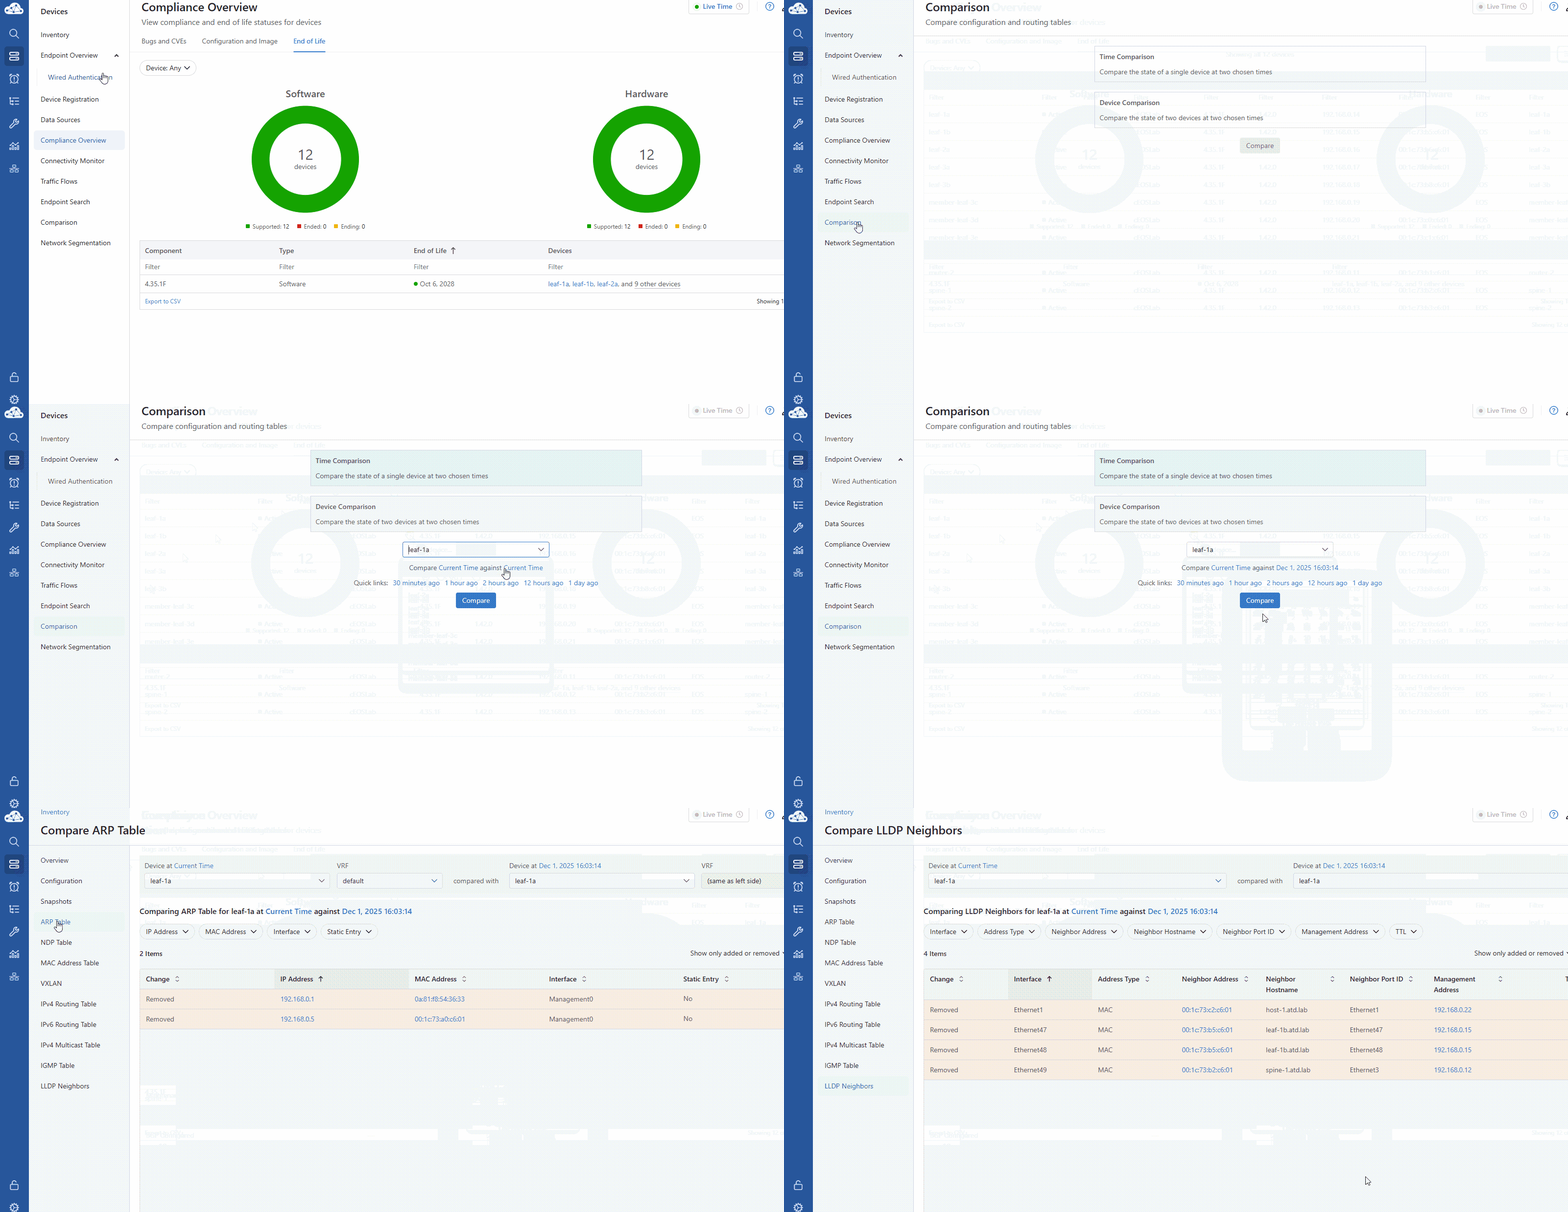
- Click Compliance Overview in the Devices Panel.
- Review Bugs and CVEs, Configuration and Image, and End of Life tabs.
- Confirm all are green/In Sync (except for spine-1).
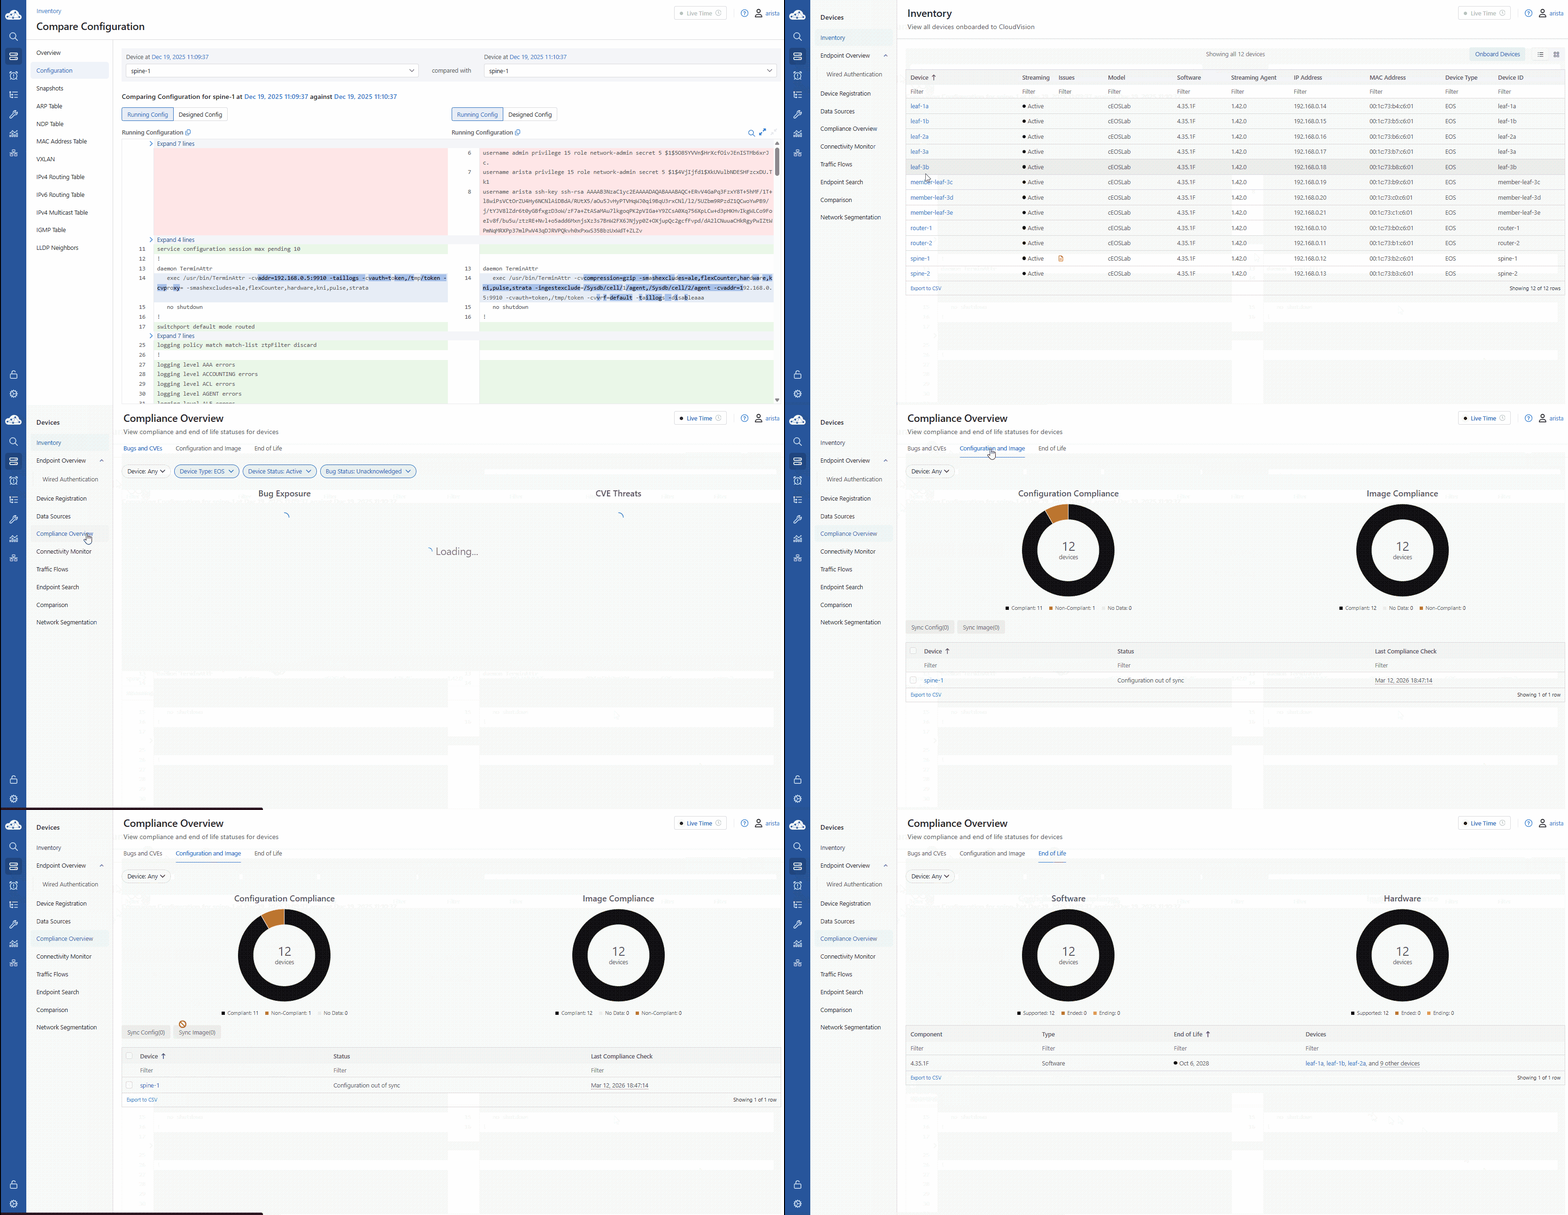
This page can be used to track known vulnerabilities and bugs, configuration and image compliance and devices and software that is approaching End of Life across your entire Arista footprint.
Lab Tasks - Time and Device Comparison (Fabric Visibility)
Finally, let's use the Comparison tools. We can do a Time Comparison to see how leaf-1a has evolved over the last few months.
Or, even better, we can do a Device Comparison.
If you’re wondering why leaf-1a is behaving differently than leaf-2a, you can put them side-by-side.
You can compare their MAC tables, their ARP entries, and their configurations simultaneously.
It’s the ultimate 'spot the difference' tool for network architects.
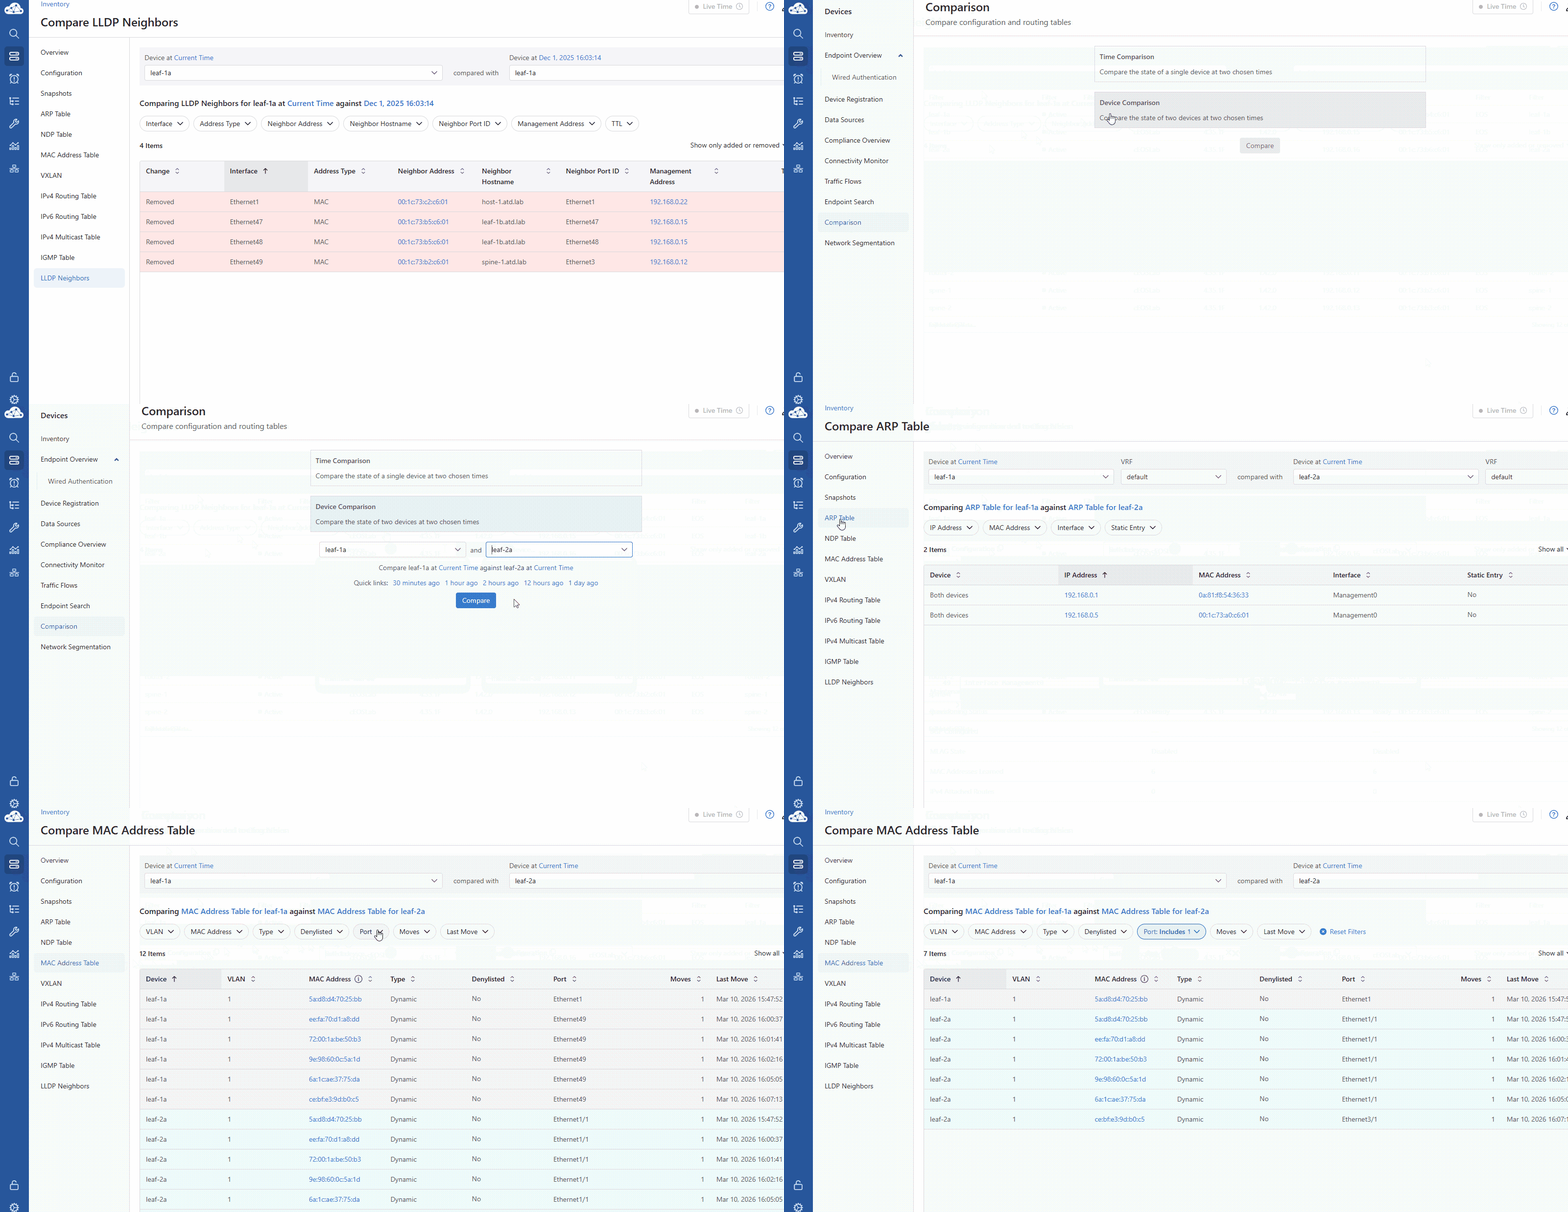
- Click Comparison in the Devices Panel, then choose Time Comparison.
- Select leaf-1a
- Click the second Current time, which allows us to compare to a time in the past.
- Select a date several months in the past; for example. Dec 1, 2025.
- Click the blue Apply and then the blue Compare.
- Explore the Configuration, ARP Table, MAC Table, and LLDP Neighbors sections on the left side of this view.
- Click the Inventory link on the top left of the page
- Click Comparison in the panel
- Click Device Comparison
- Select leaf-1a and leaf-2a, then click Compare.
- Explore the Configuration and ARP Table sections on the left side.
- For the MAC Address Table: Sort by the Device column, then filter the Port column by entering 1 in the search box above the table.
You have completed the Timeline Foundations lab!! You are ready for the next lab.