Lab 2 - Workspaces and Inventory
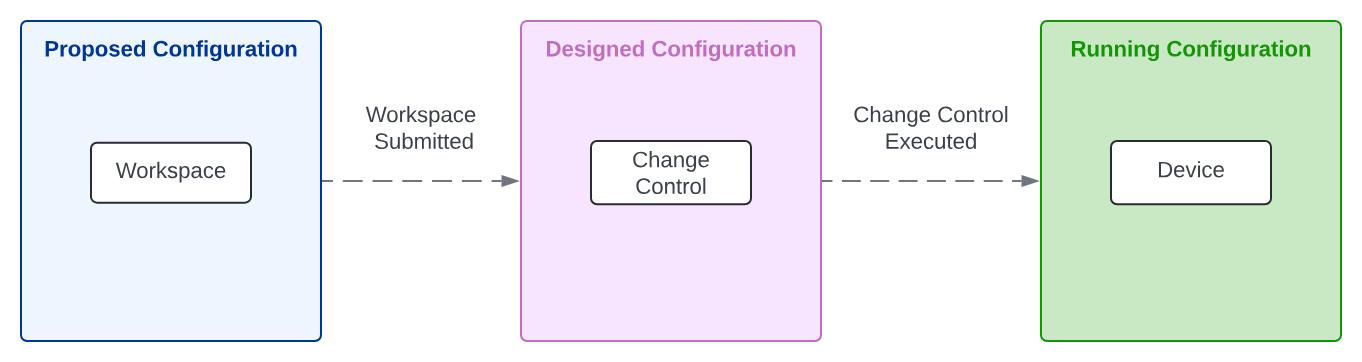
We’re starting with Workspaces. Think of these as your personal drafts.
Submitting the workspace places it in a Pending state, it’s fully editable and invisible to the production switches.
Once you're satisfied and hit Execute Change Control, that configuration moves into the Designed Config, becoming the new 'Source of Truth' for the network.
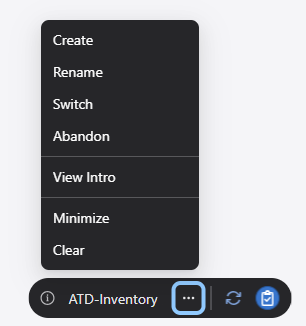
If you decide a change was a bad idea, you can simply Abandon it, and it’s like it never happened.
It is when you finally hit Execute that the Designed Config is transferred to the switch.
Lab Tasks - Workspaces
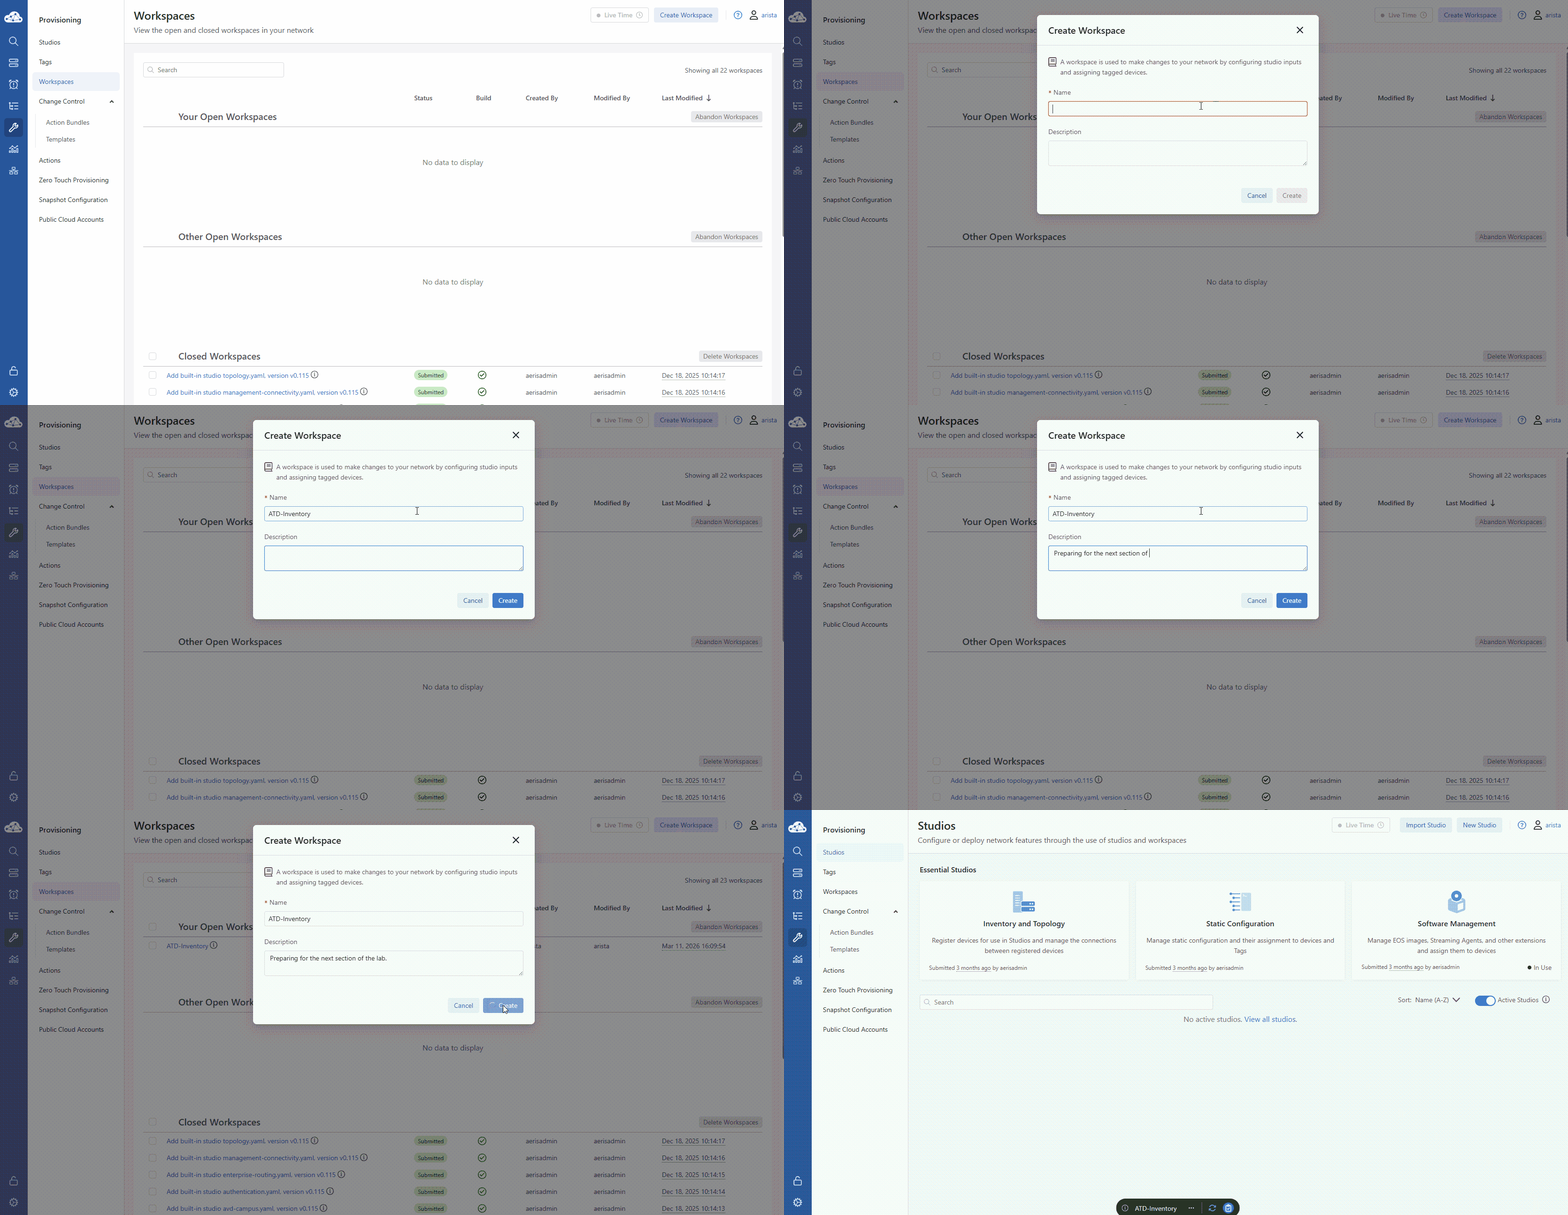
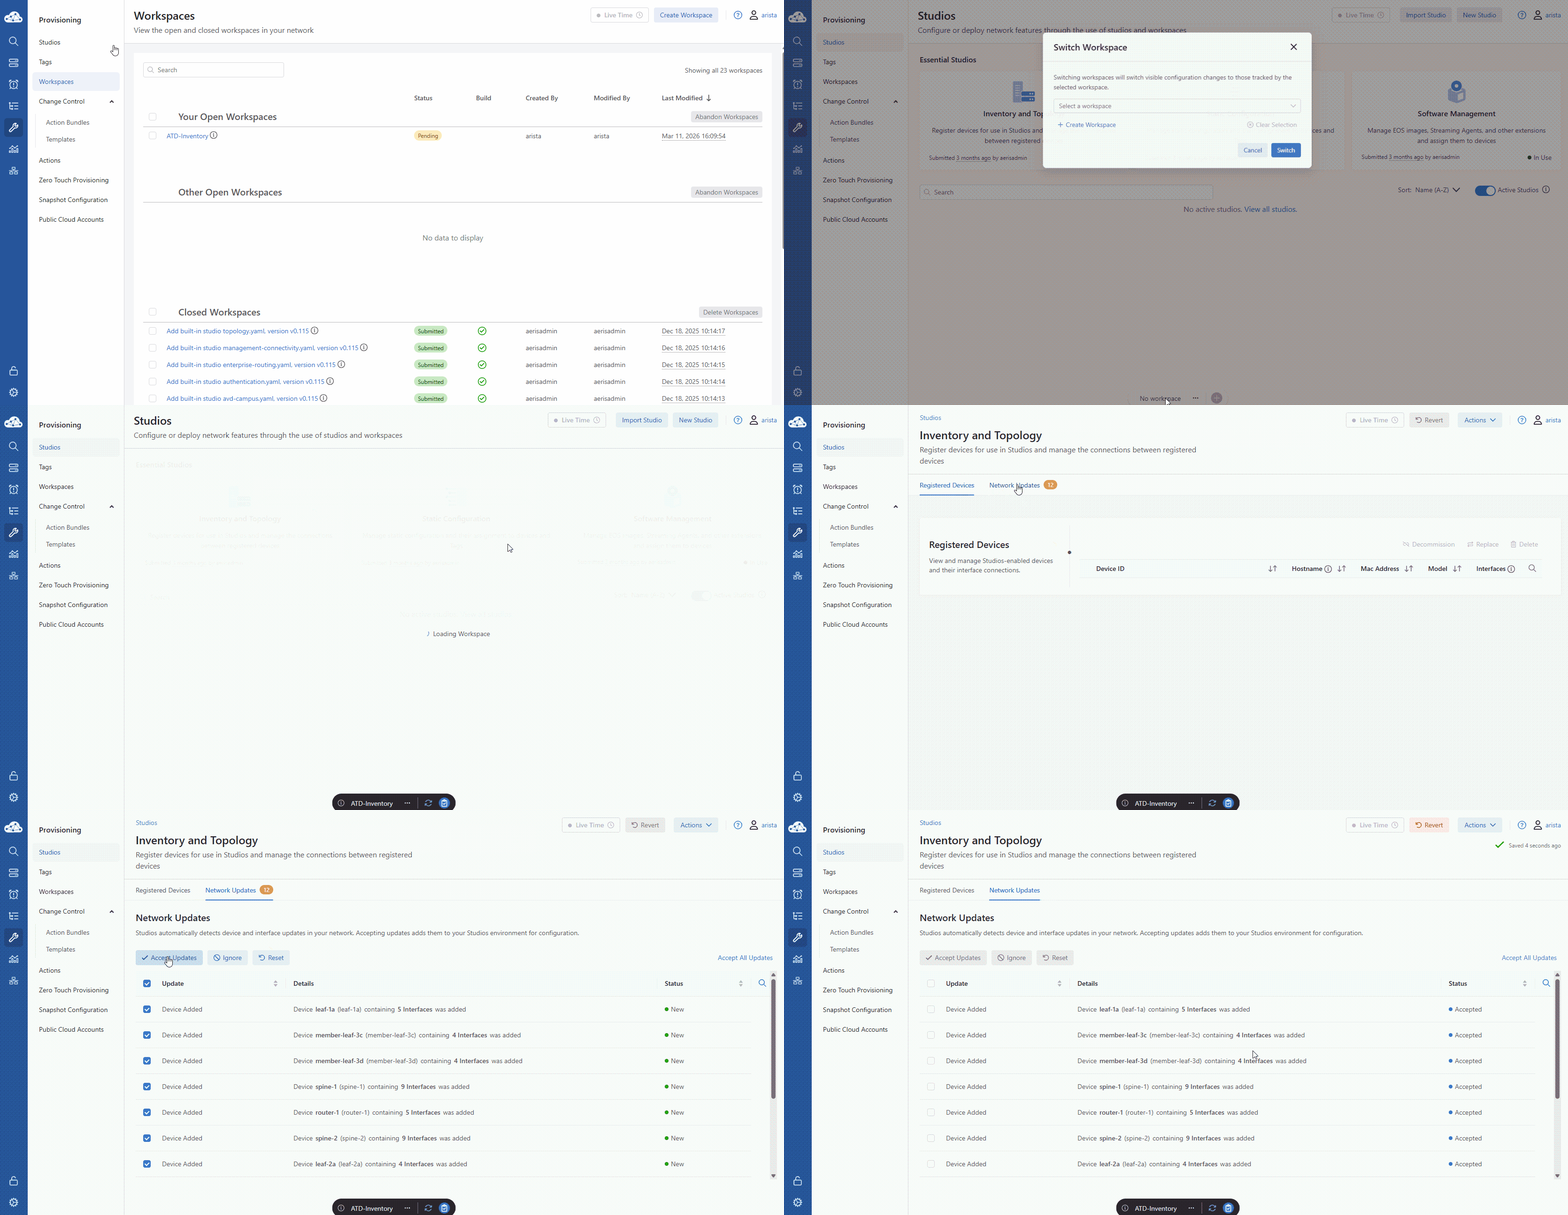
Navigate to Provisioning > Workspaces and click Create Workspace. We’re naming this ATD-Inventory.
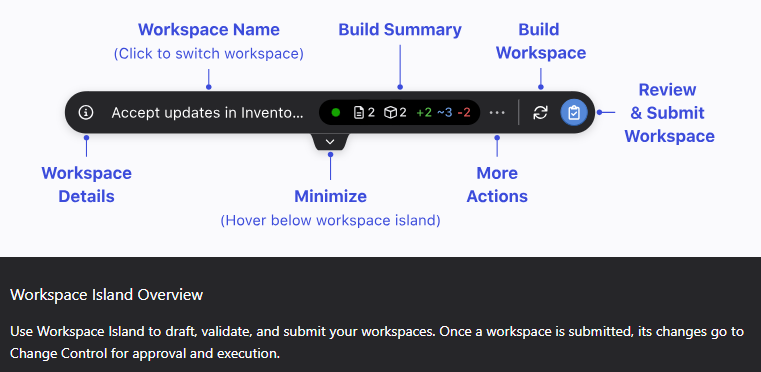
Once you hit create, look at the bottom of your screen. That’s the Workspace Island.
This is your constant companion—it tells you exactly which project you're working on and gives you a one-click way to validate your work no matter where you are in the UI.
- Hover over the left panel and select Provisioning > Workspaces.
- Click Create Workspace on the top right of the UI.
- Name it ATD-Inventory and set the description to: Preparing for the next section of the lab.
- Click Create.
- Note the Workspace Island at the bottom of the screen; it now displays your active workspace.
Workspace Visibility:
- Your Open Workspaces: Your active, personal drafts. You can manage multiple simultaneously.
- Other Open Workspaces: Workspaces currently being edited by other users.
- Closed Workspaces: Archived sessions available for viewing only; these cannot be modified.
Workspace States:
- Abandoned: Inactive, deleted from active use.
- Pending: In-progress and fully editable.
- Submitted: Read-only. The configuration has been validated and integrated into CloudVision’s Designed Config.
Lab Tasks - Inventory & Topology Studio (The Gatekeeper)
Now, we're heading into the Inventory & Topology Studio.
Here is the golden rule: If a switch isn't registered in this studio, it doesn't exist to any other part of the CloudVision automation.
We call the Inventory & Topology Studio The Gatekeeper because it acts as Admission Control.
- On the Workspace Island, ensure ATD-Inventory is active (if it says "No Workspace," switch to it).
- Navigate to Provisioning > Studios and click the Inventory & Topology studio.
- Click Network Updates.
- Select the Update checkbox on the top left of the table to select all devices, then click Accept Updates.
- Click Accept.
Lab Tasks – Change Control Review and Submission
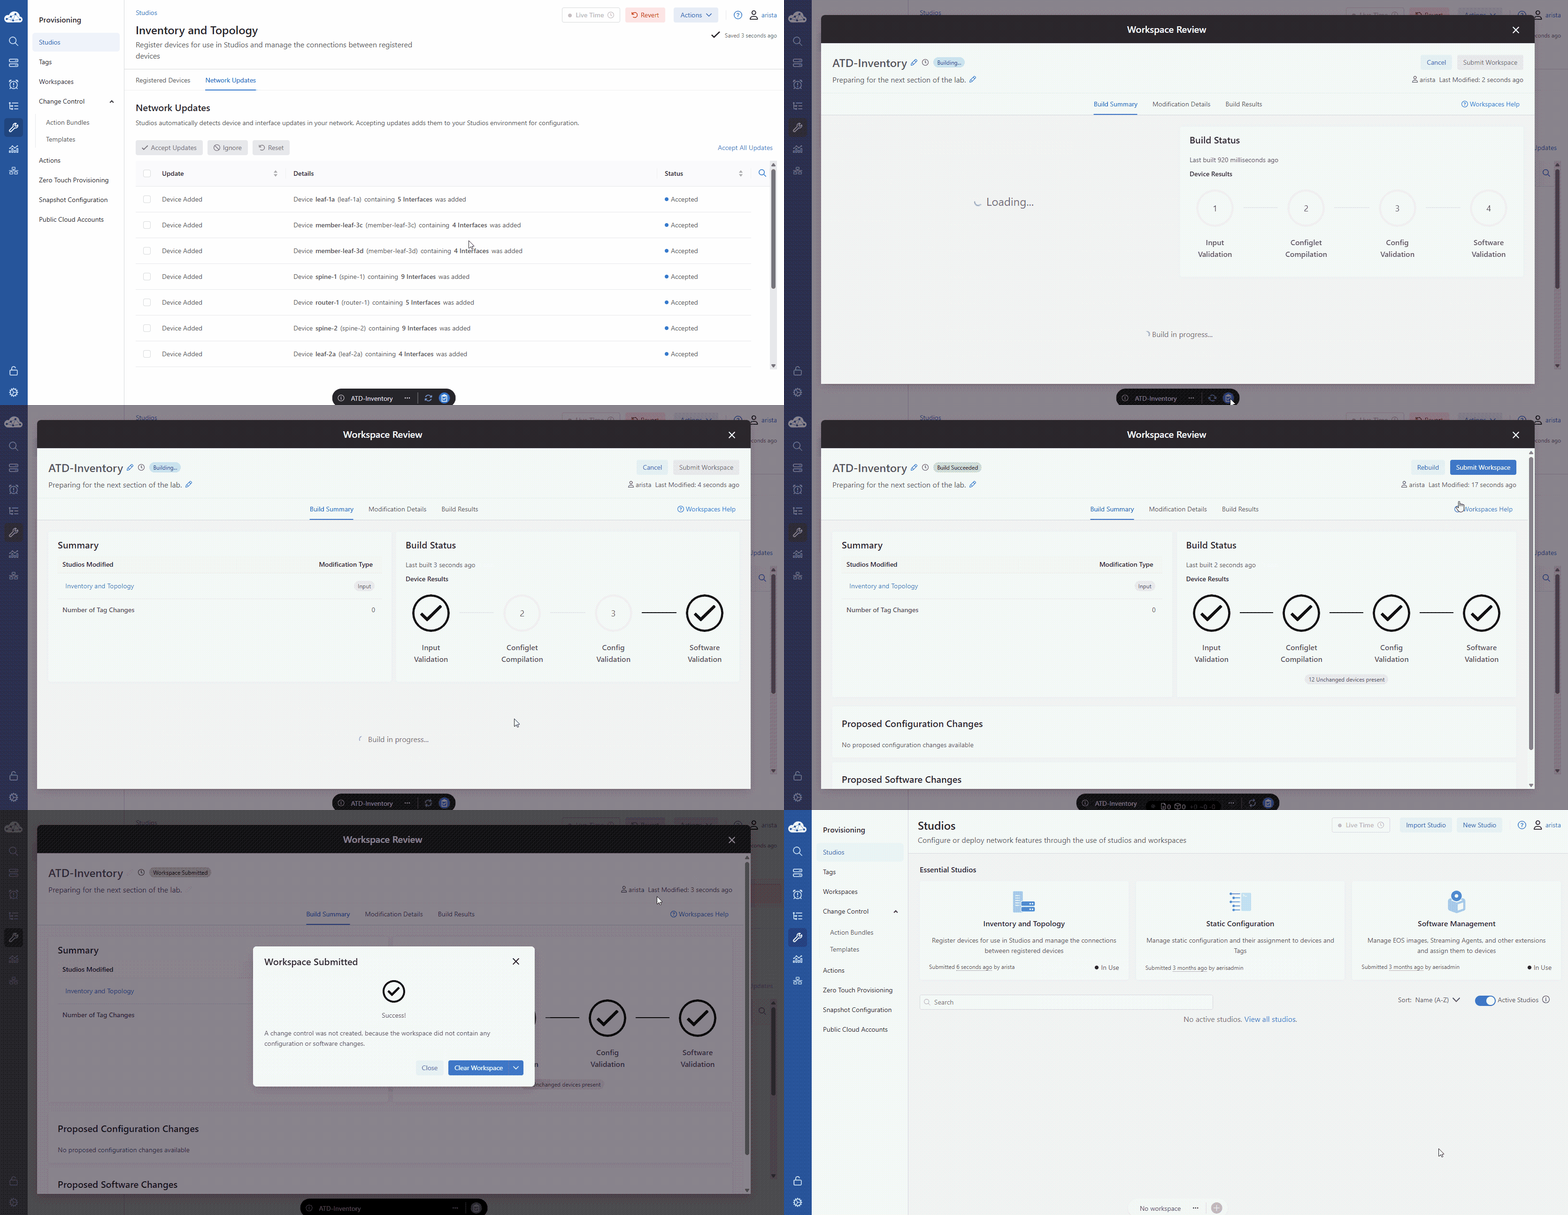
On your Workspace Island, click that blue clipboard icon to Review and Submit.
CloudVision is now running a 'Build'. It’s checking the logic to make sure your changes don't conflict with anything else in the fabric.
We’re looking for those four green circles before moving on to Submit Workspace and Clear Workspace.
- On the Workspace Island, click the Review and Submit button (blue clipboard icon).
- Confirm all four Build Status circles are green, then click Submit Workspace.
- In the dialog box, click Clear Workspace.
Congratulations, you have successfully completed your tasks. You can move on to the next lab.