Event API
In this lab we will be creating custom log events on one of our virtual switches, then using the Event API link on our lab landing screen to view them. This demonstrates how simple it is to create a new Event rule in CVP to forward alerts to a webhook or other receiver.
Lab Tasks
-
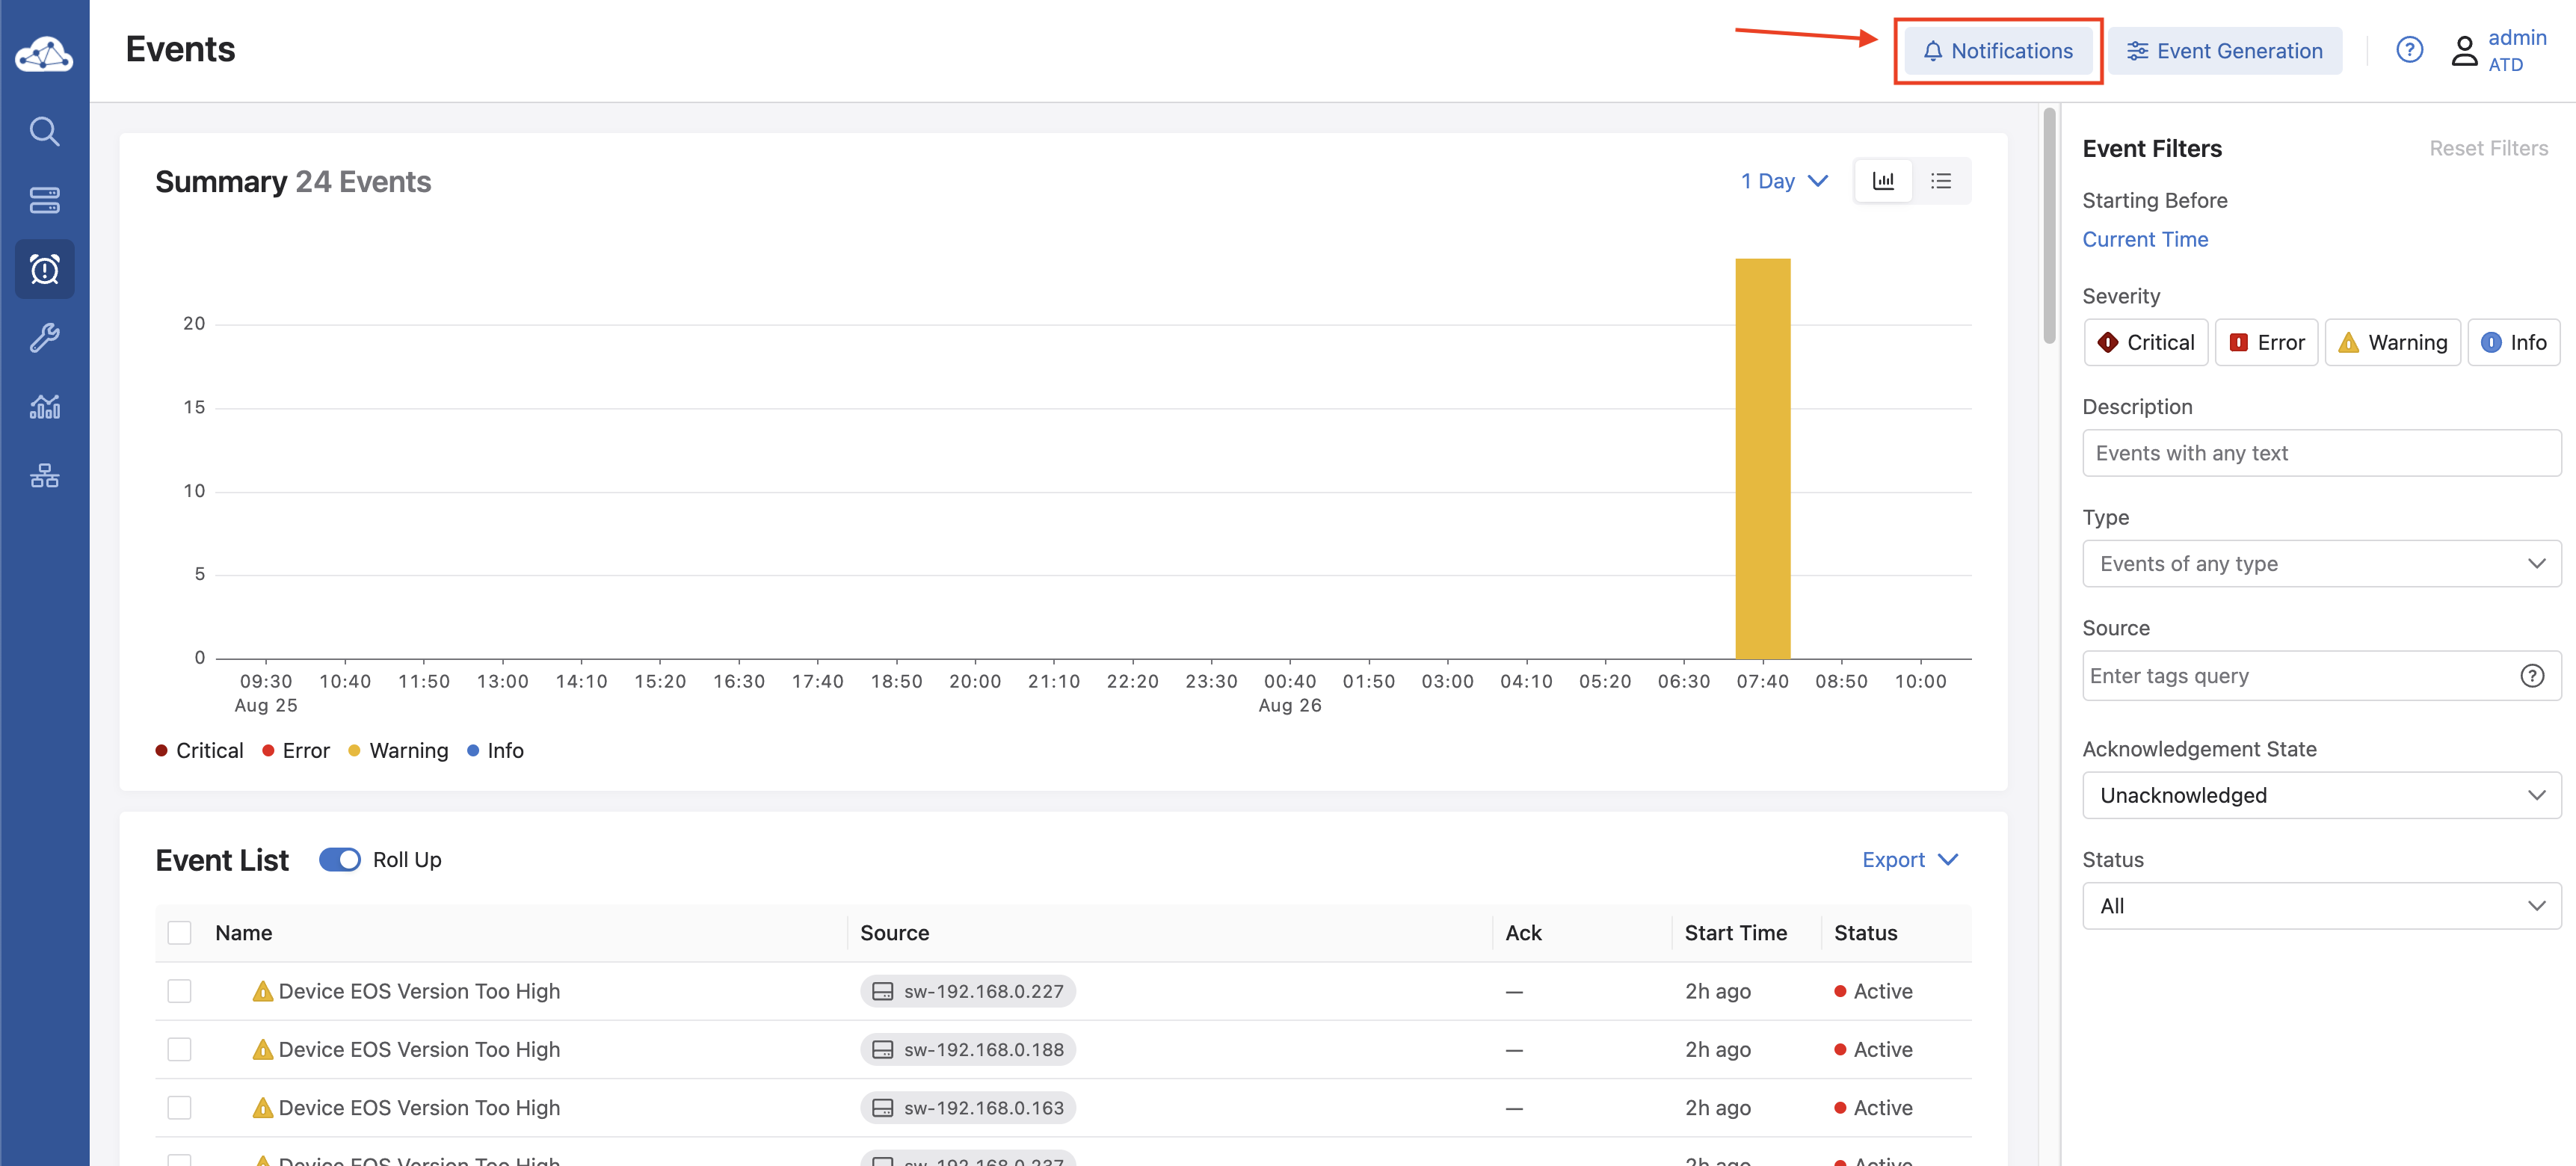
Start by logging into CVP (if you aren’t already) and clicking on Events on the left navigation bar.
-
Now click on Notifications on the upper right, to customize Event Notification settings.
-
Click on Receivers on the left.
-
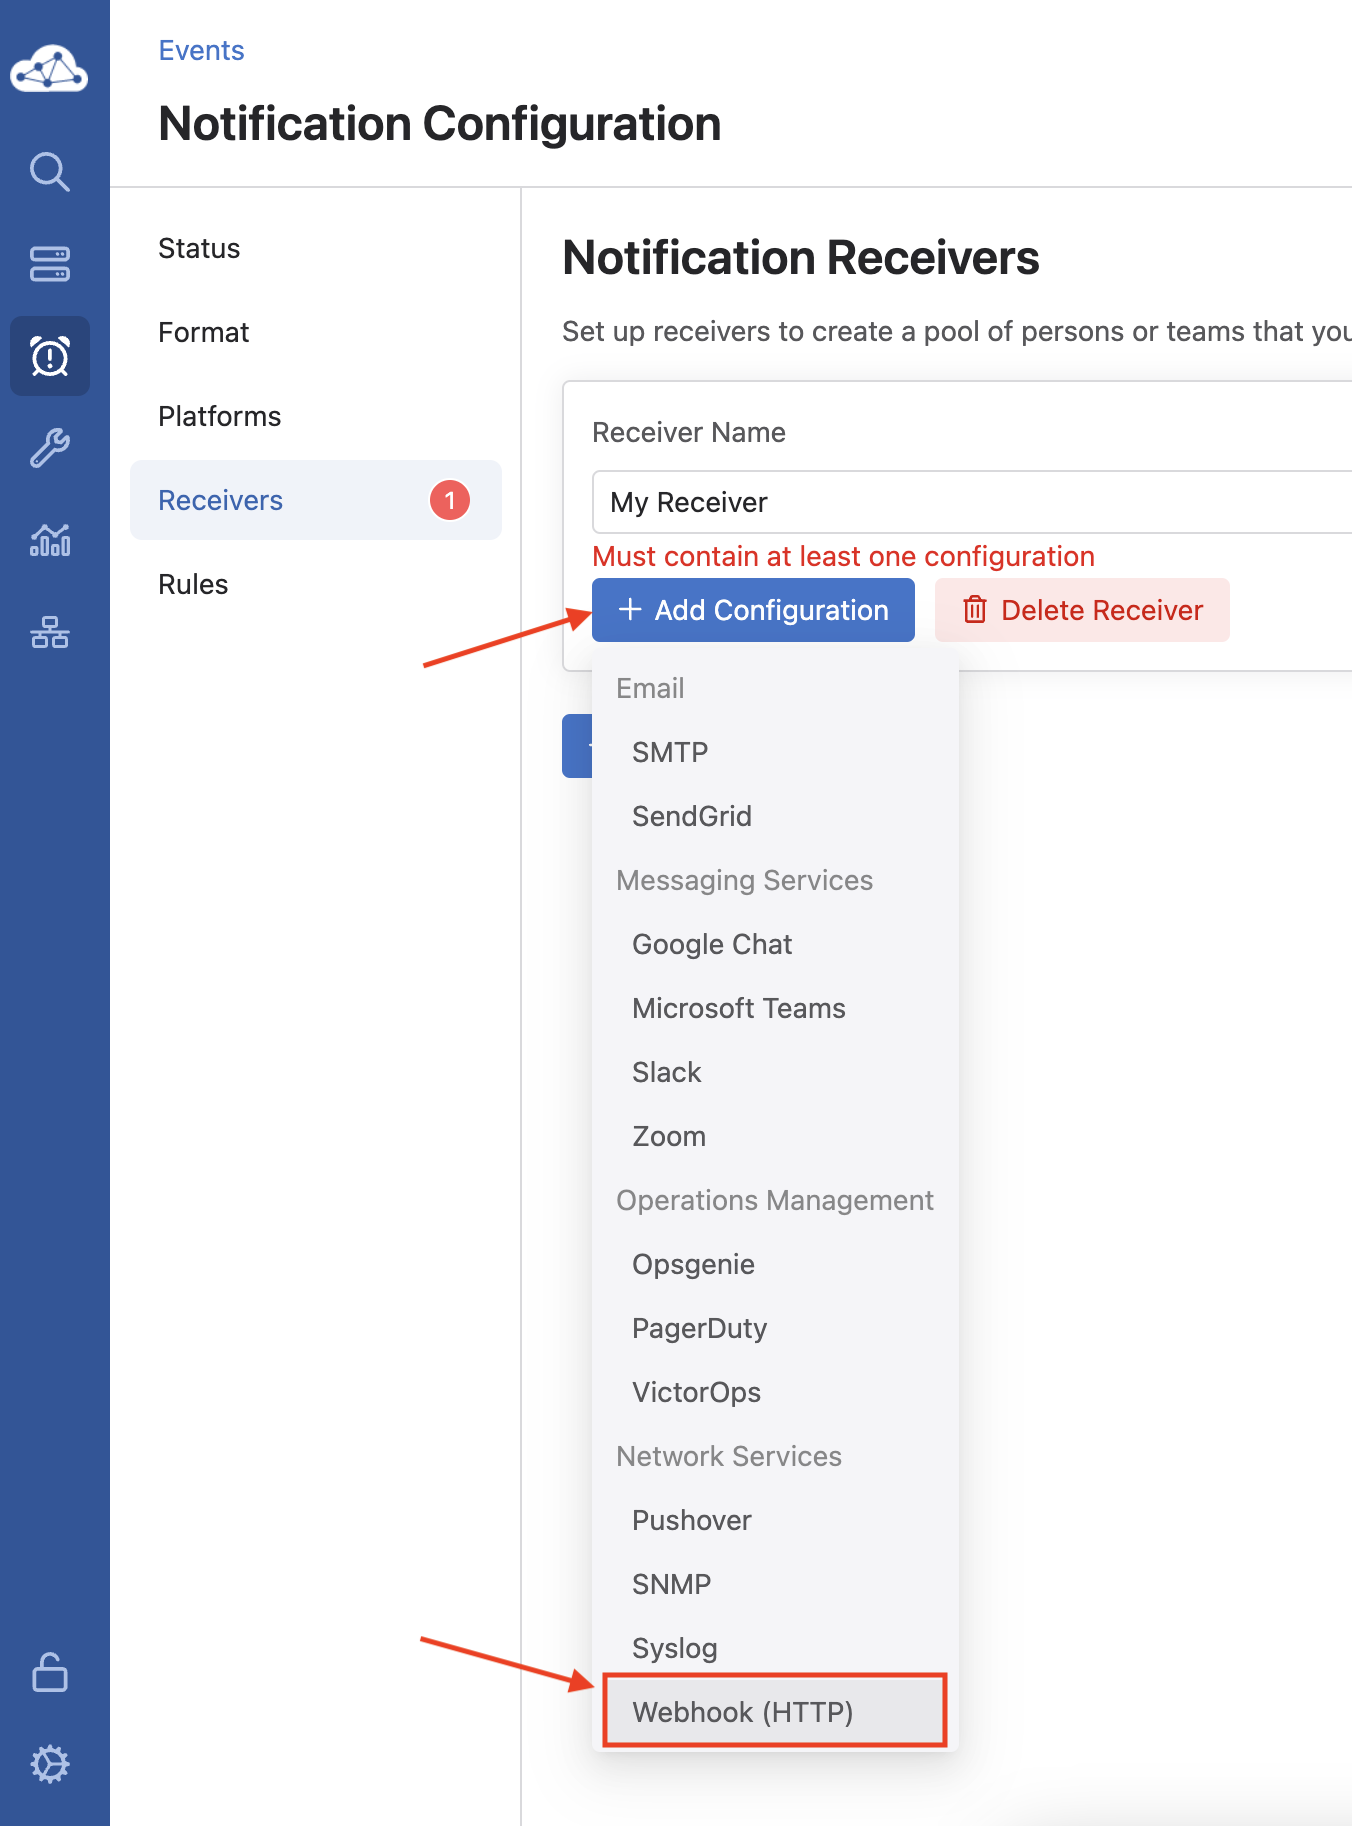
Now click on + Add Receiver and name it
My Receiver. -
Click on + Add Configuration, then choose
Webhook (HTTP). -
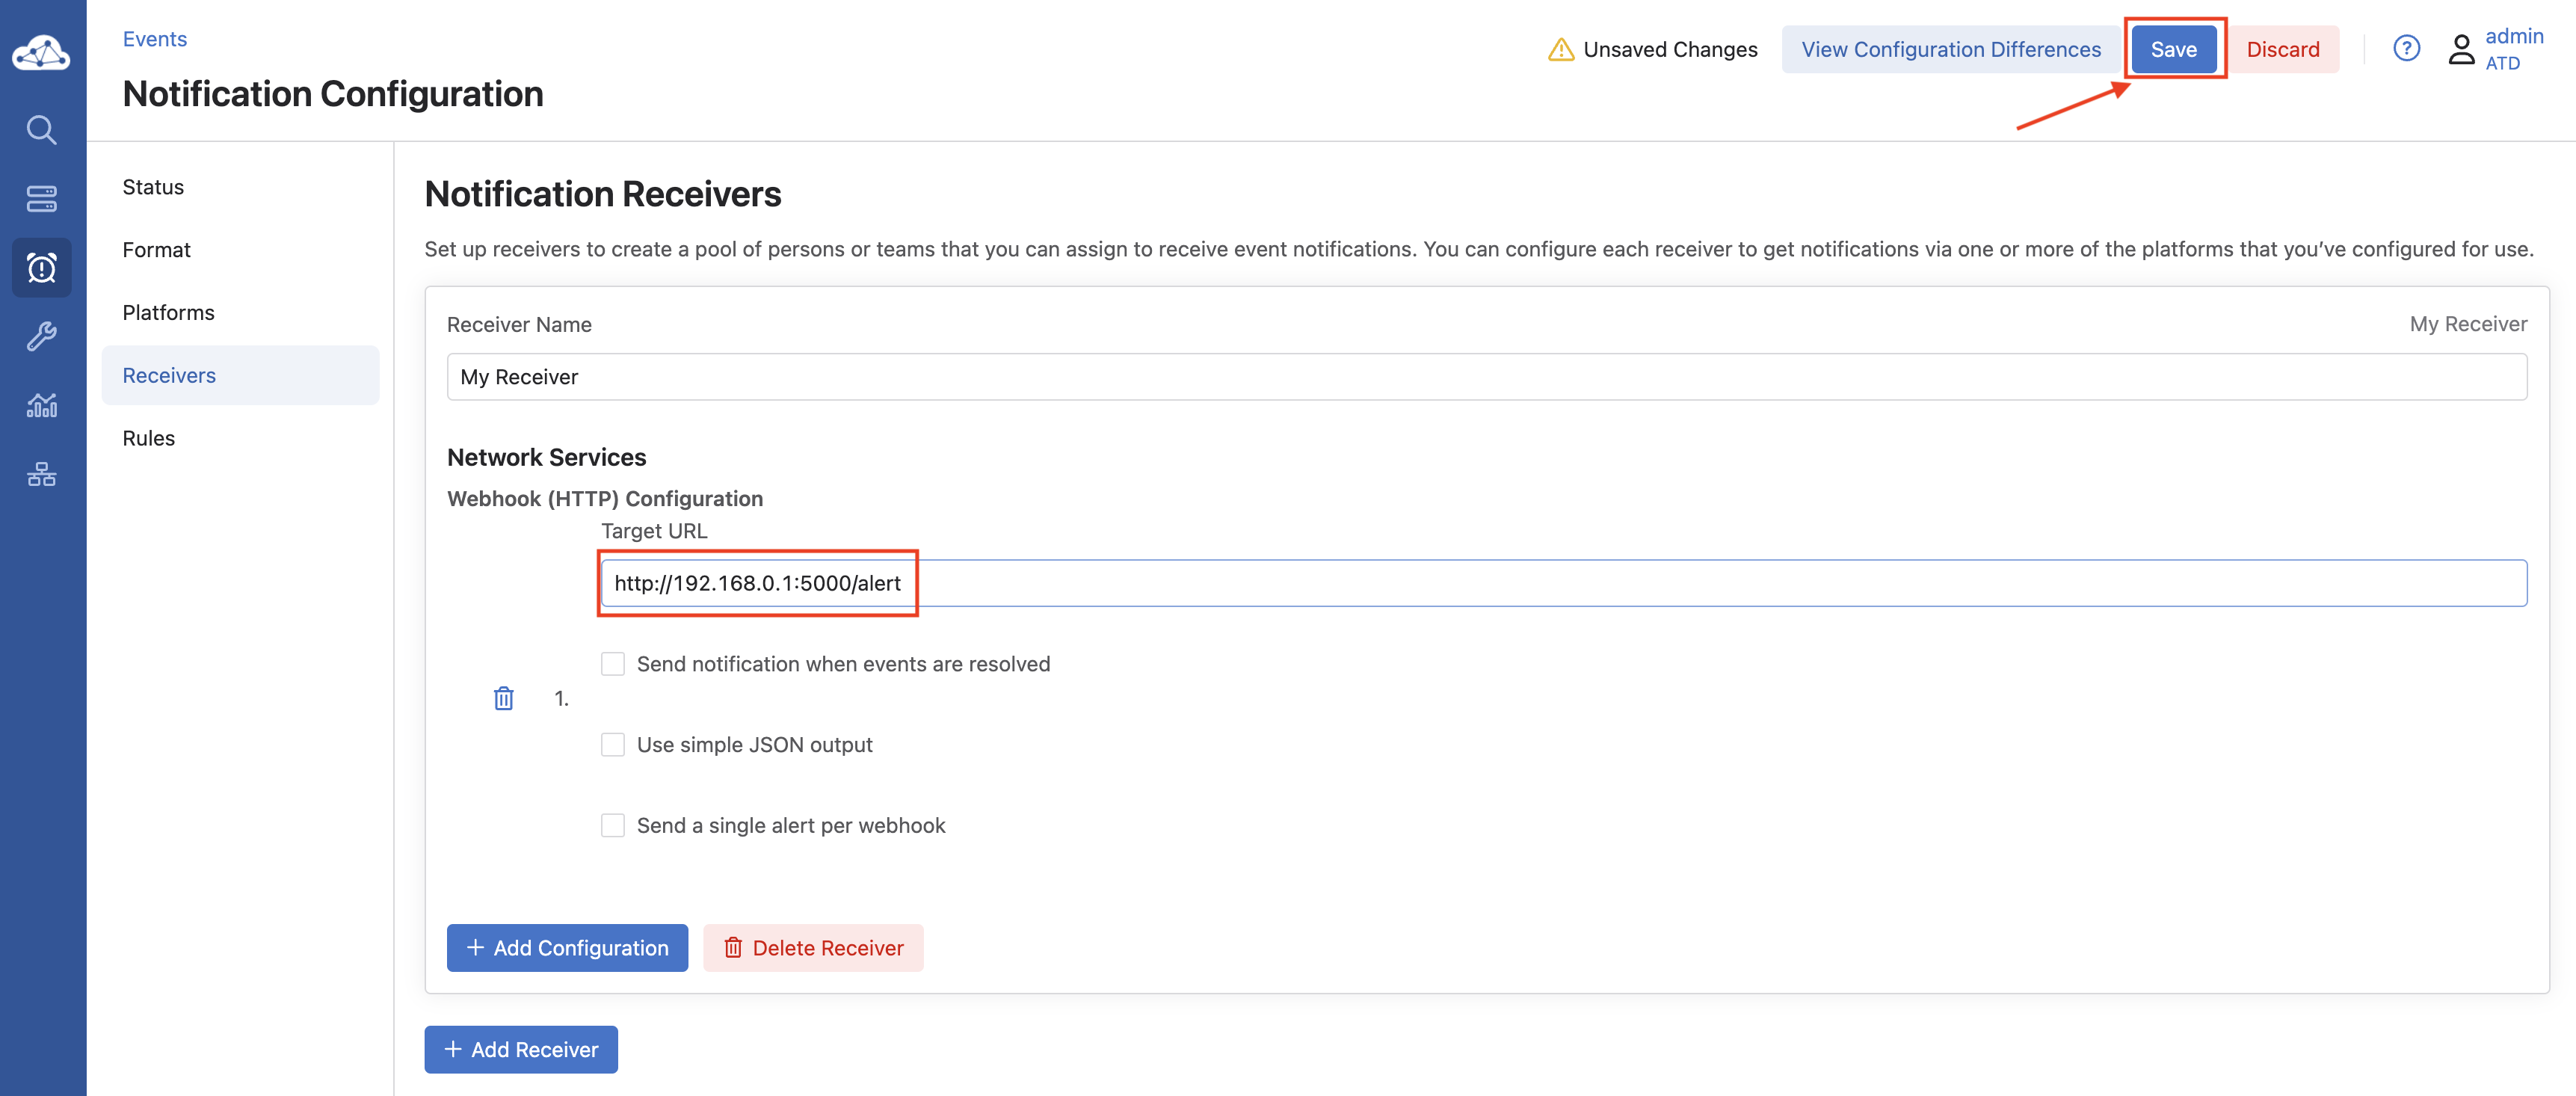
In the Target URL field, paste the following:
-
Leave the other options unchecked and click Save on the upper right side of the screen.
-
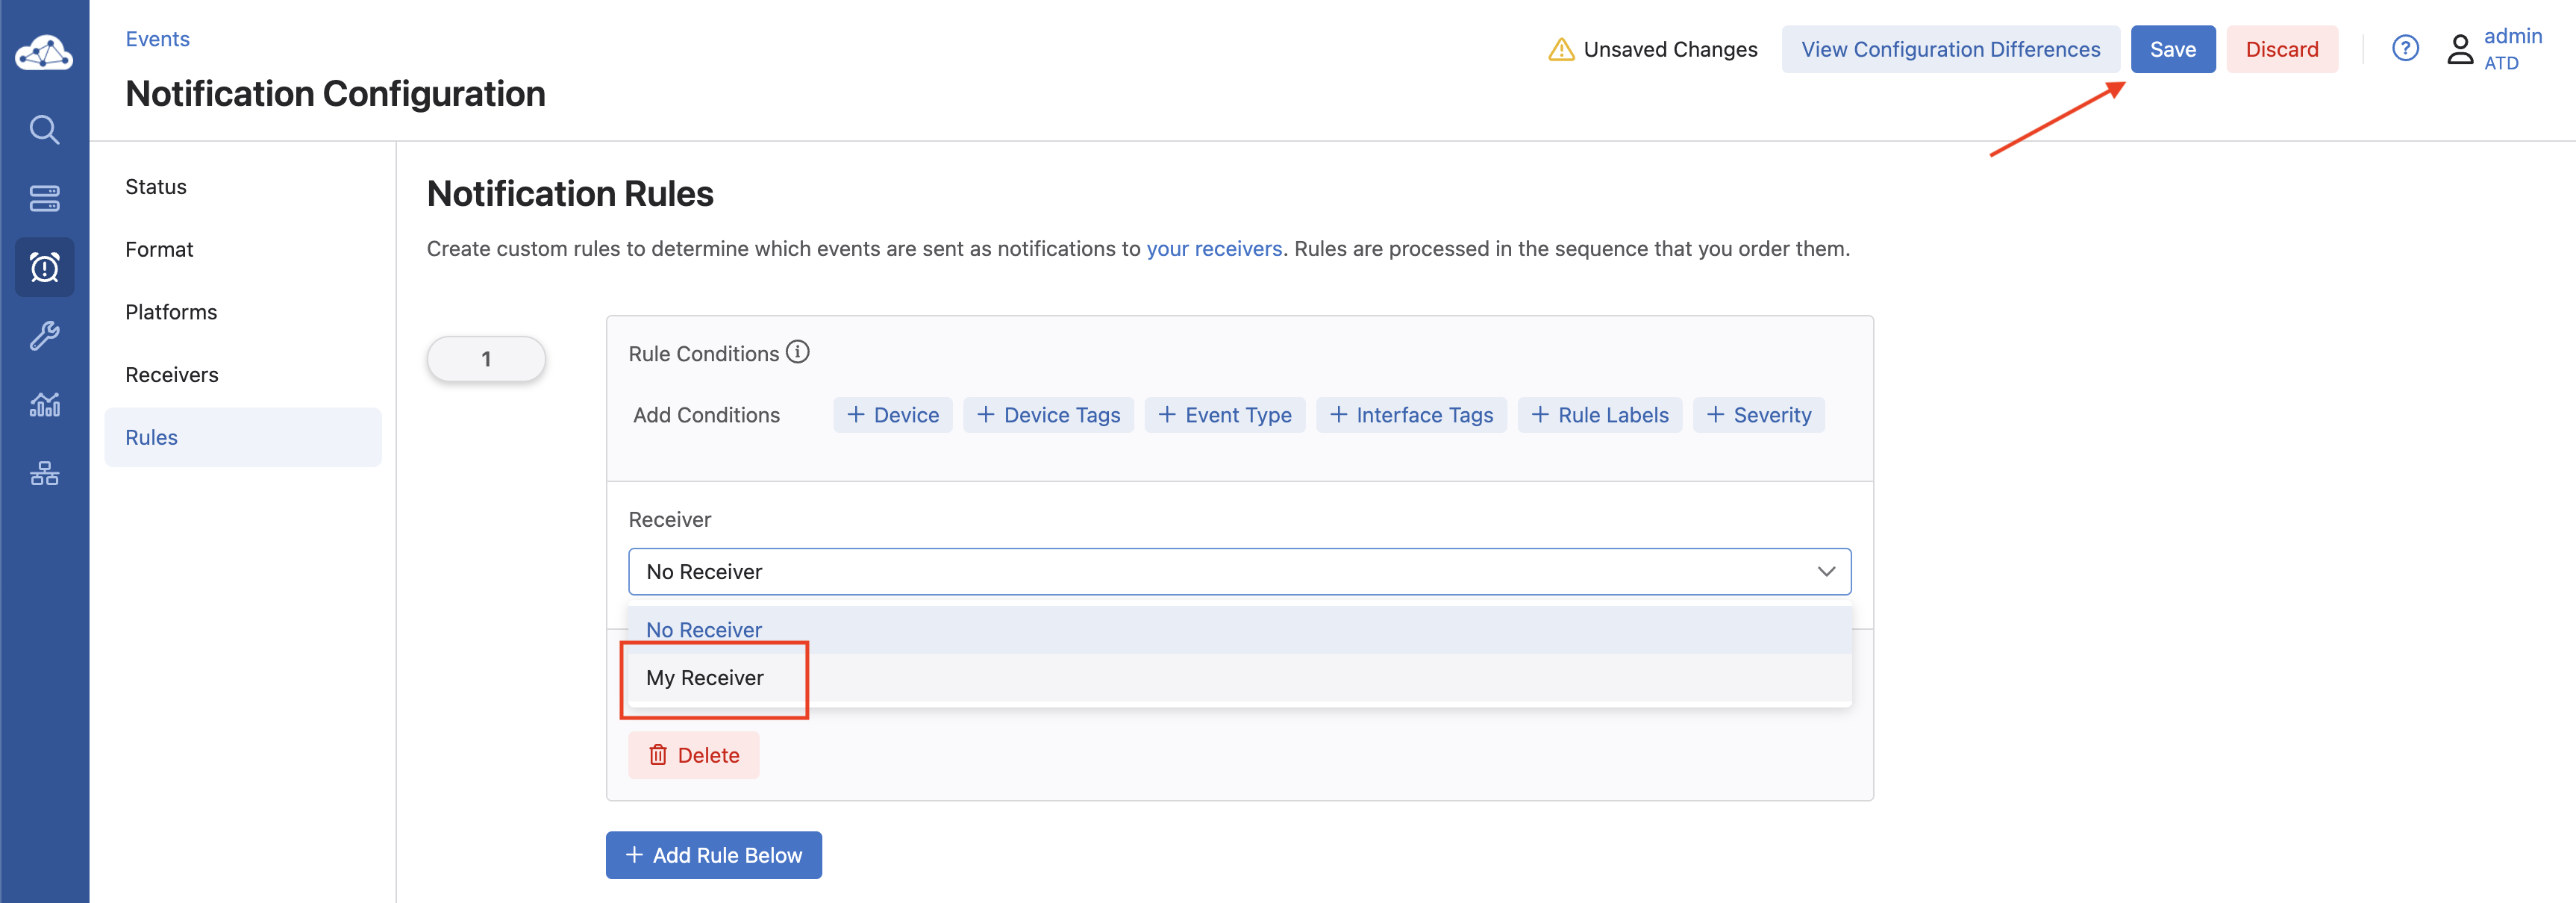
Now that we have a receiver to send our events to, we have to configure a rule to tell CVP what to send to this receiver.
Testing
That’s it! Now we can create a test alert to make sure it works.
-
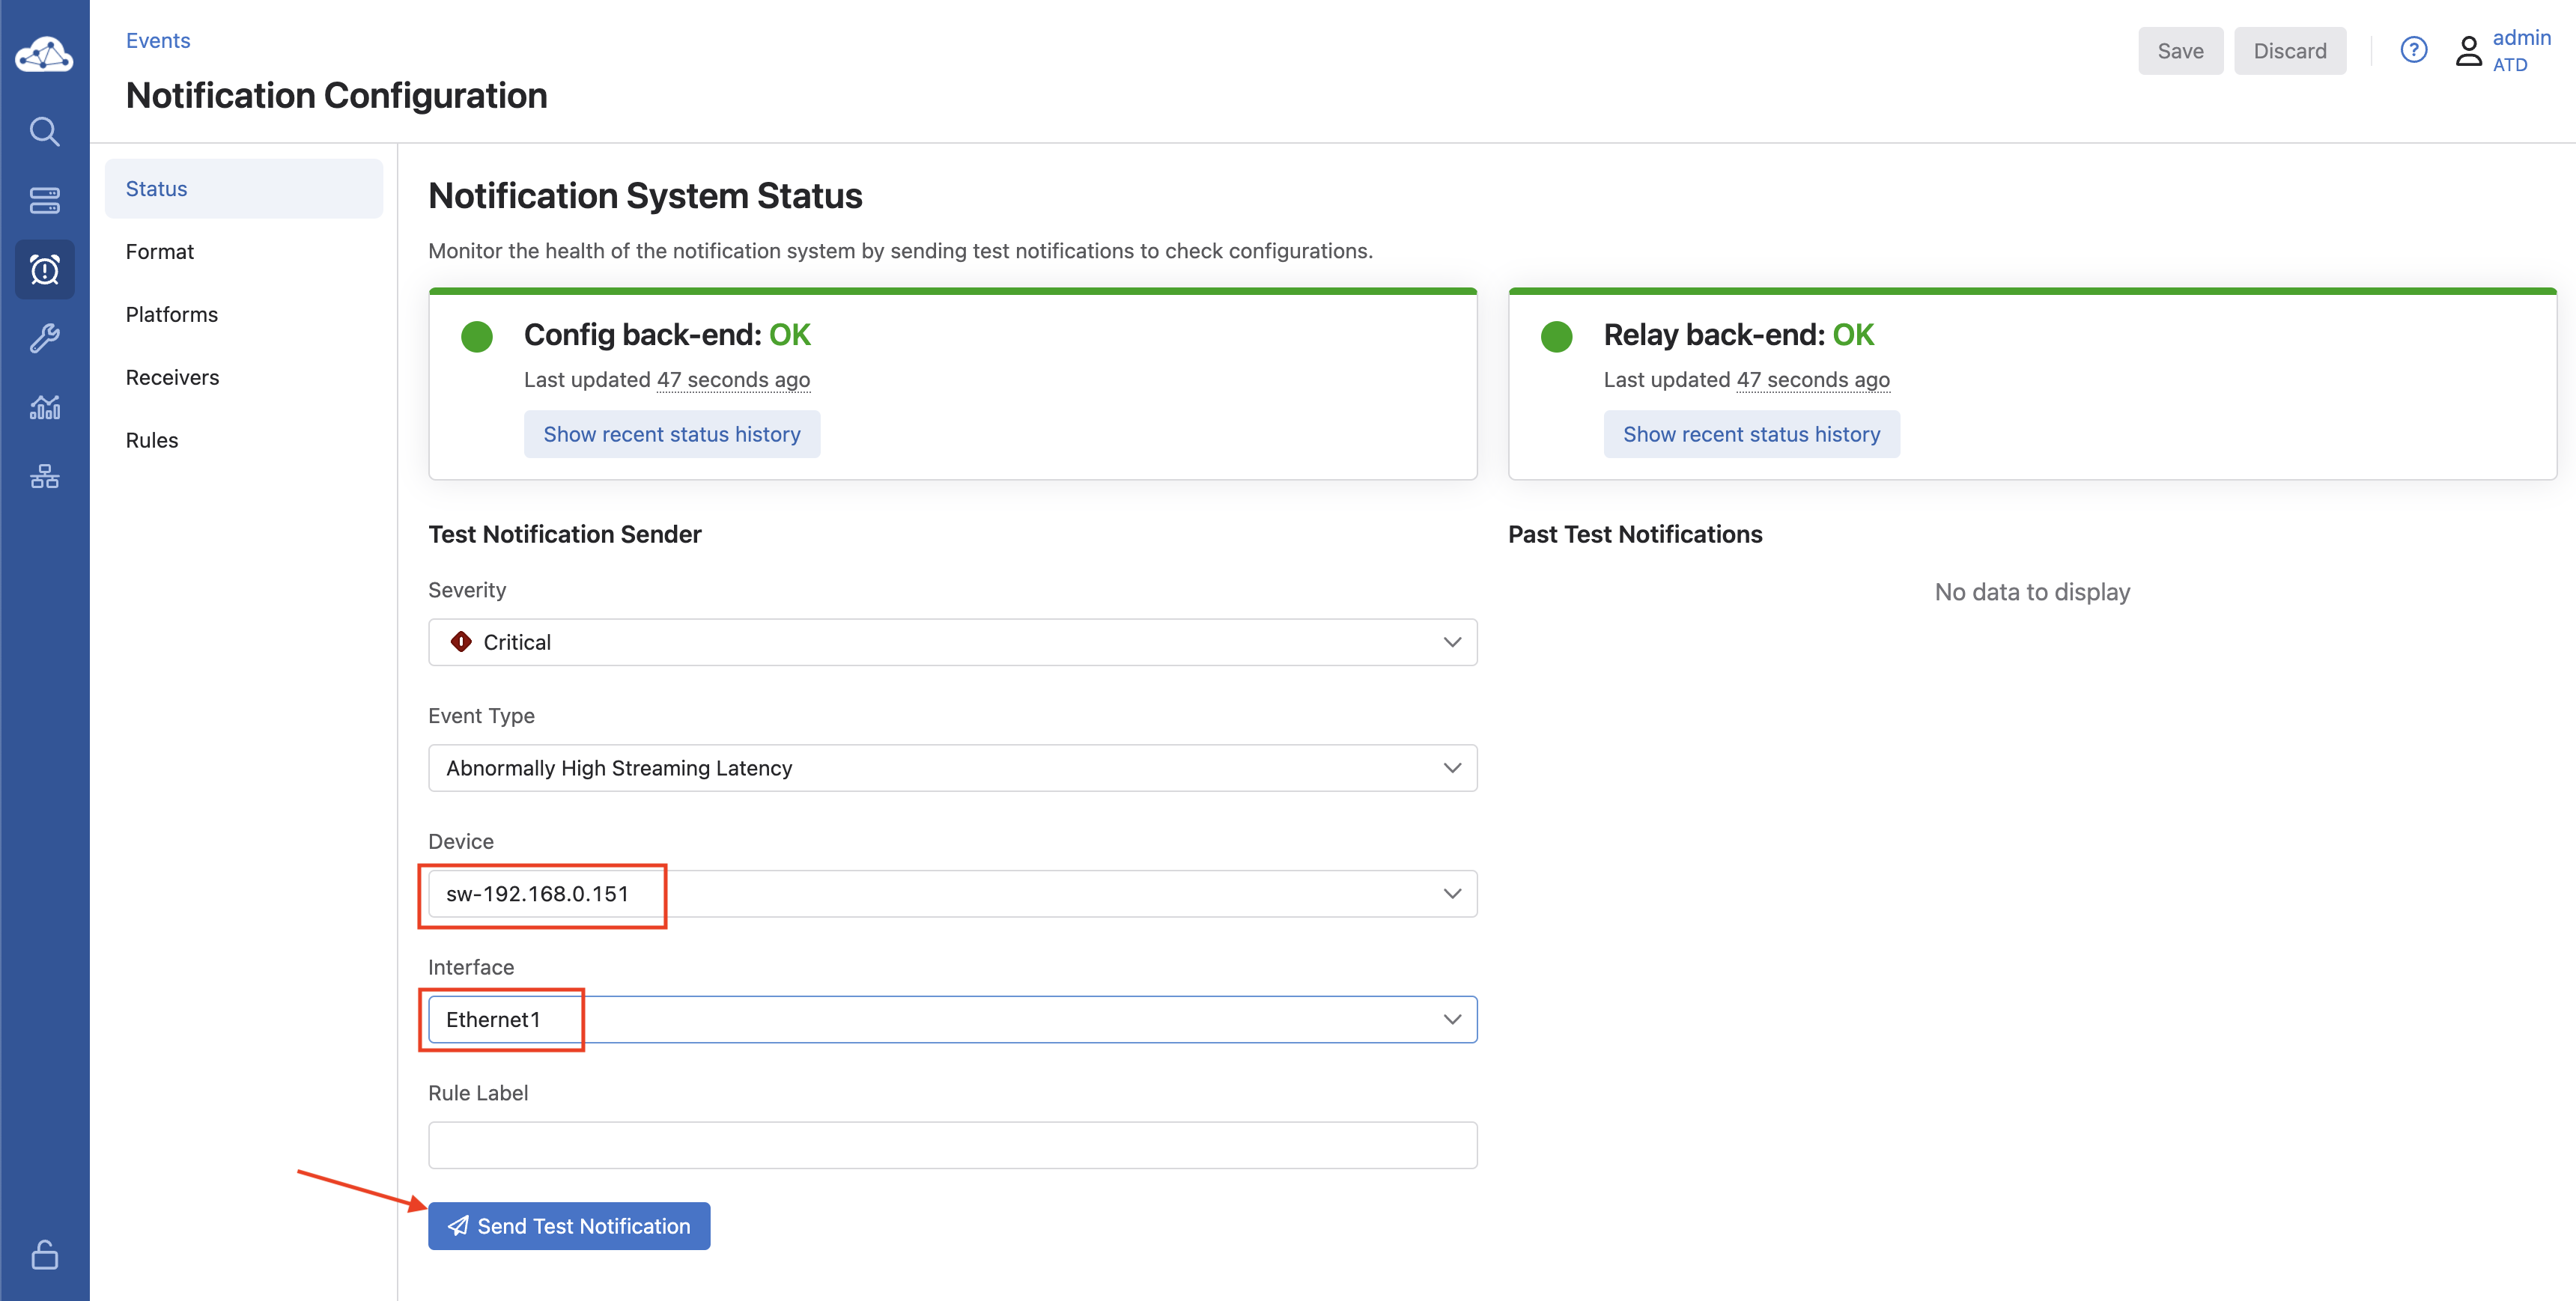
Click on Status on the left.
-
In the Test Notification Sender section, select any
severity, andevent type, anydevice, anyinterface, and then click Send Test Notification. -
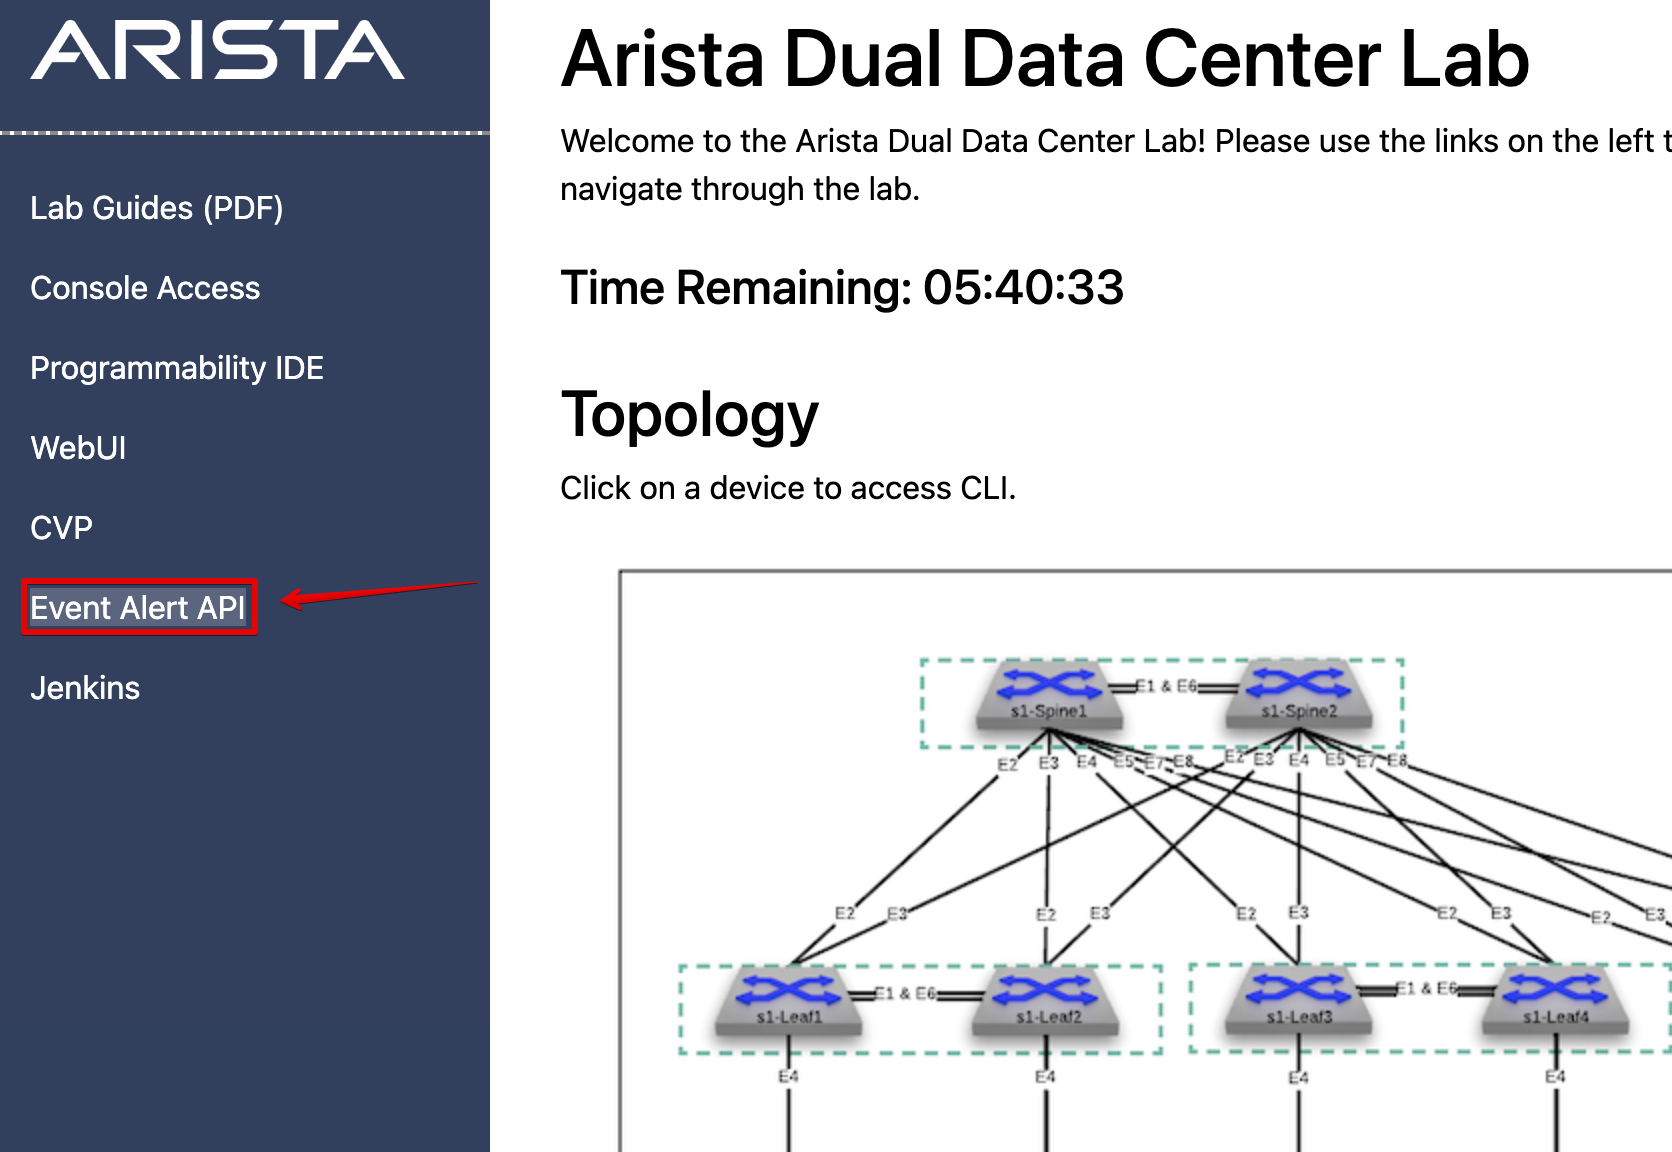
Now go back to your lab landing page and click on Event Alert API link.
-
You may need to refresh the page a few times but you should see your test alert come through after a minute or two.
Success
Lab Complete!
