CloudVision Studios - Day 2 Operations Lab Guide
Goal
The goal of this lab is to make changes to an existing L3LS deployment using Studios. This will highlight the flexibility and abstraction capabilities of CloudVision Studios. We will continue the work from the previous L3LS and EVPN lab. We will modify the default settings and customize them for our deployment. You will first verify the existing configuration, then modify the Spine and Leaf Router IDs, BGP ASN, and the existing VRF.
Note
It is expected you have already completed the previous lab, CloudVision Studios - Layer 3 Leaf-Spine.
Network Verification with CloudVision
-
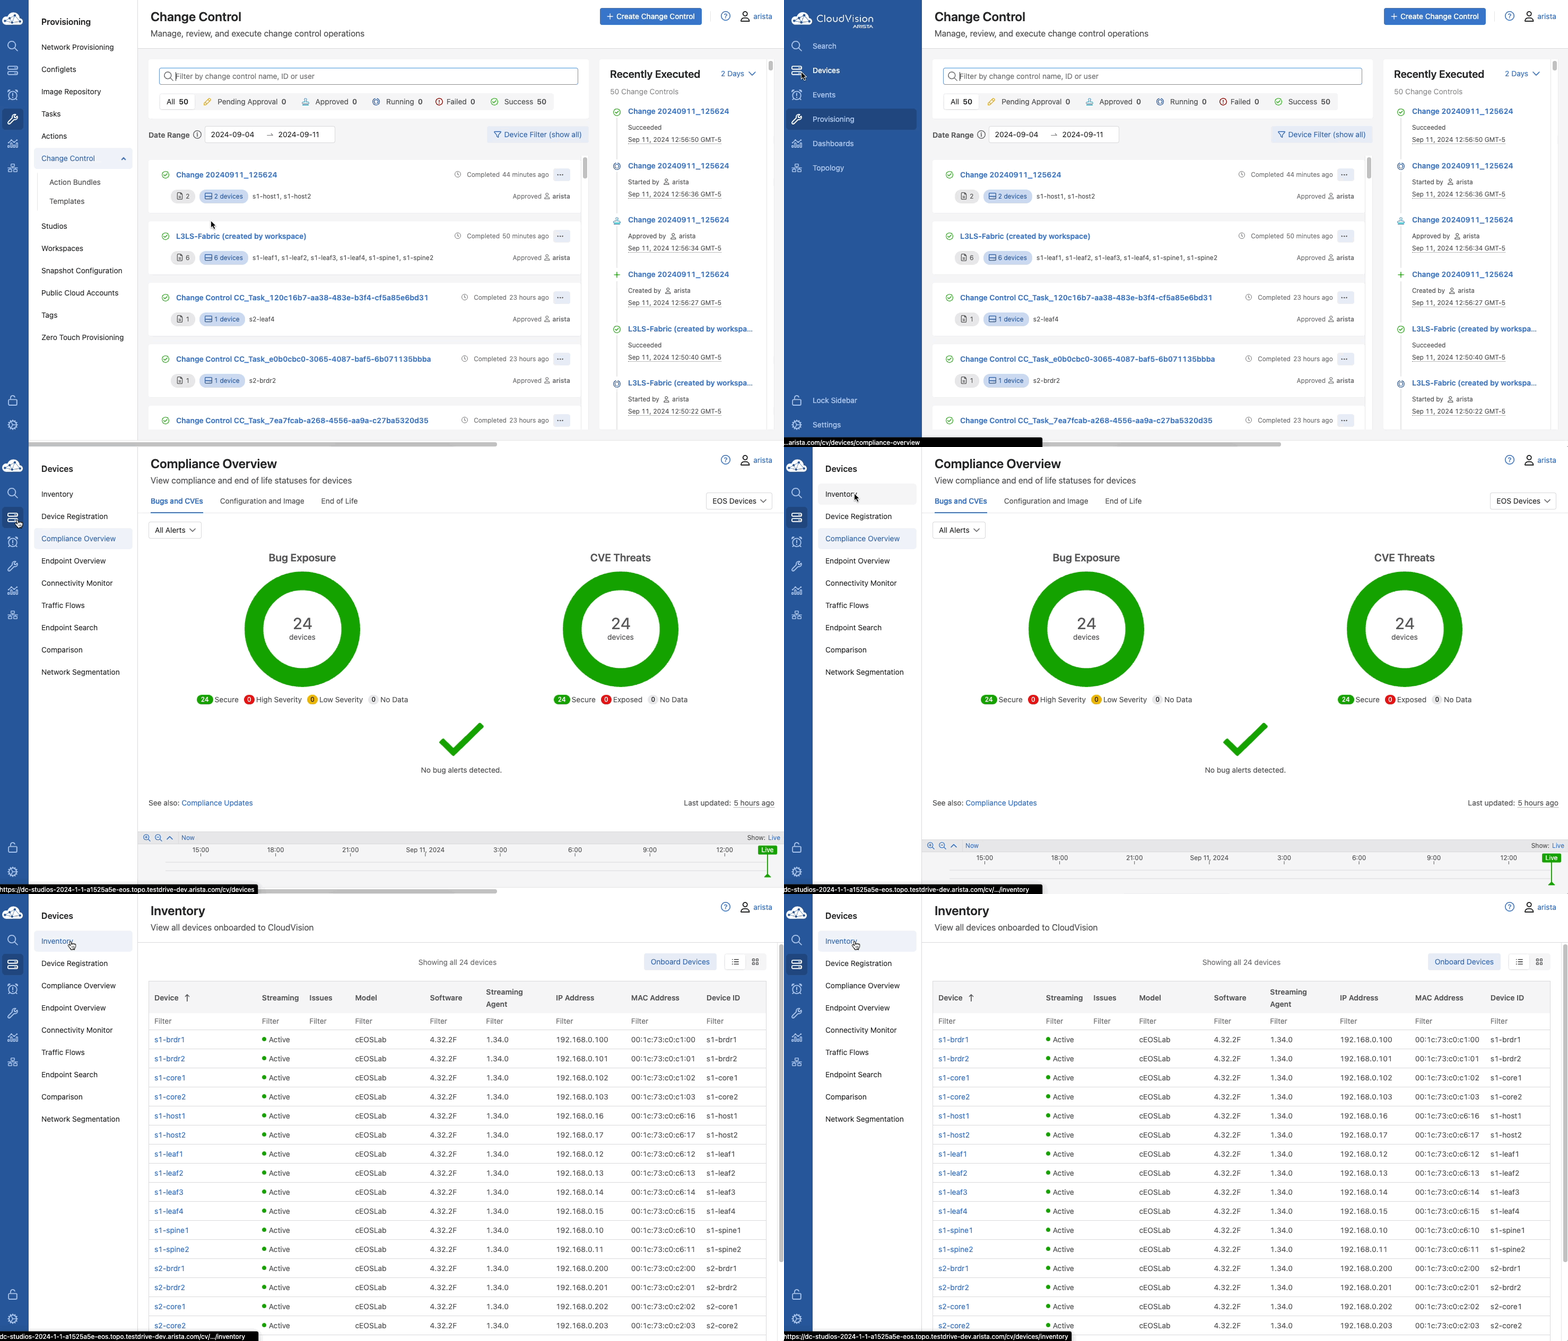
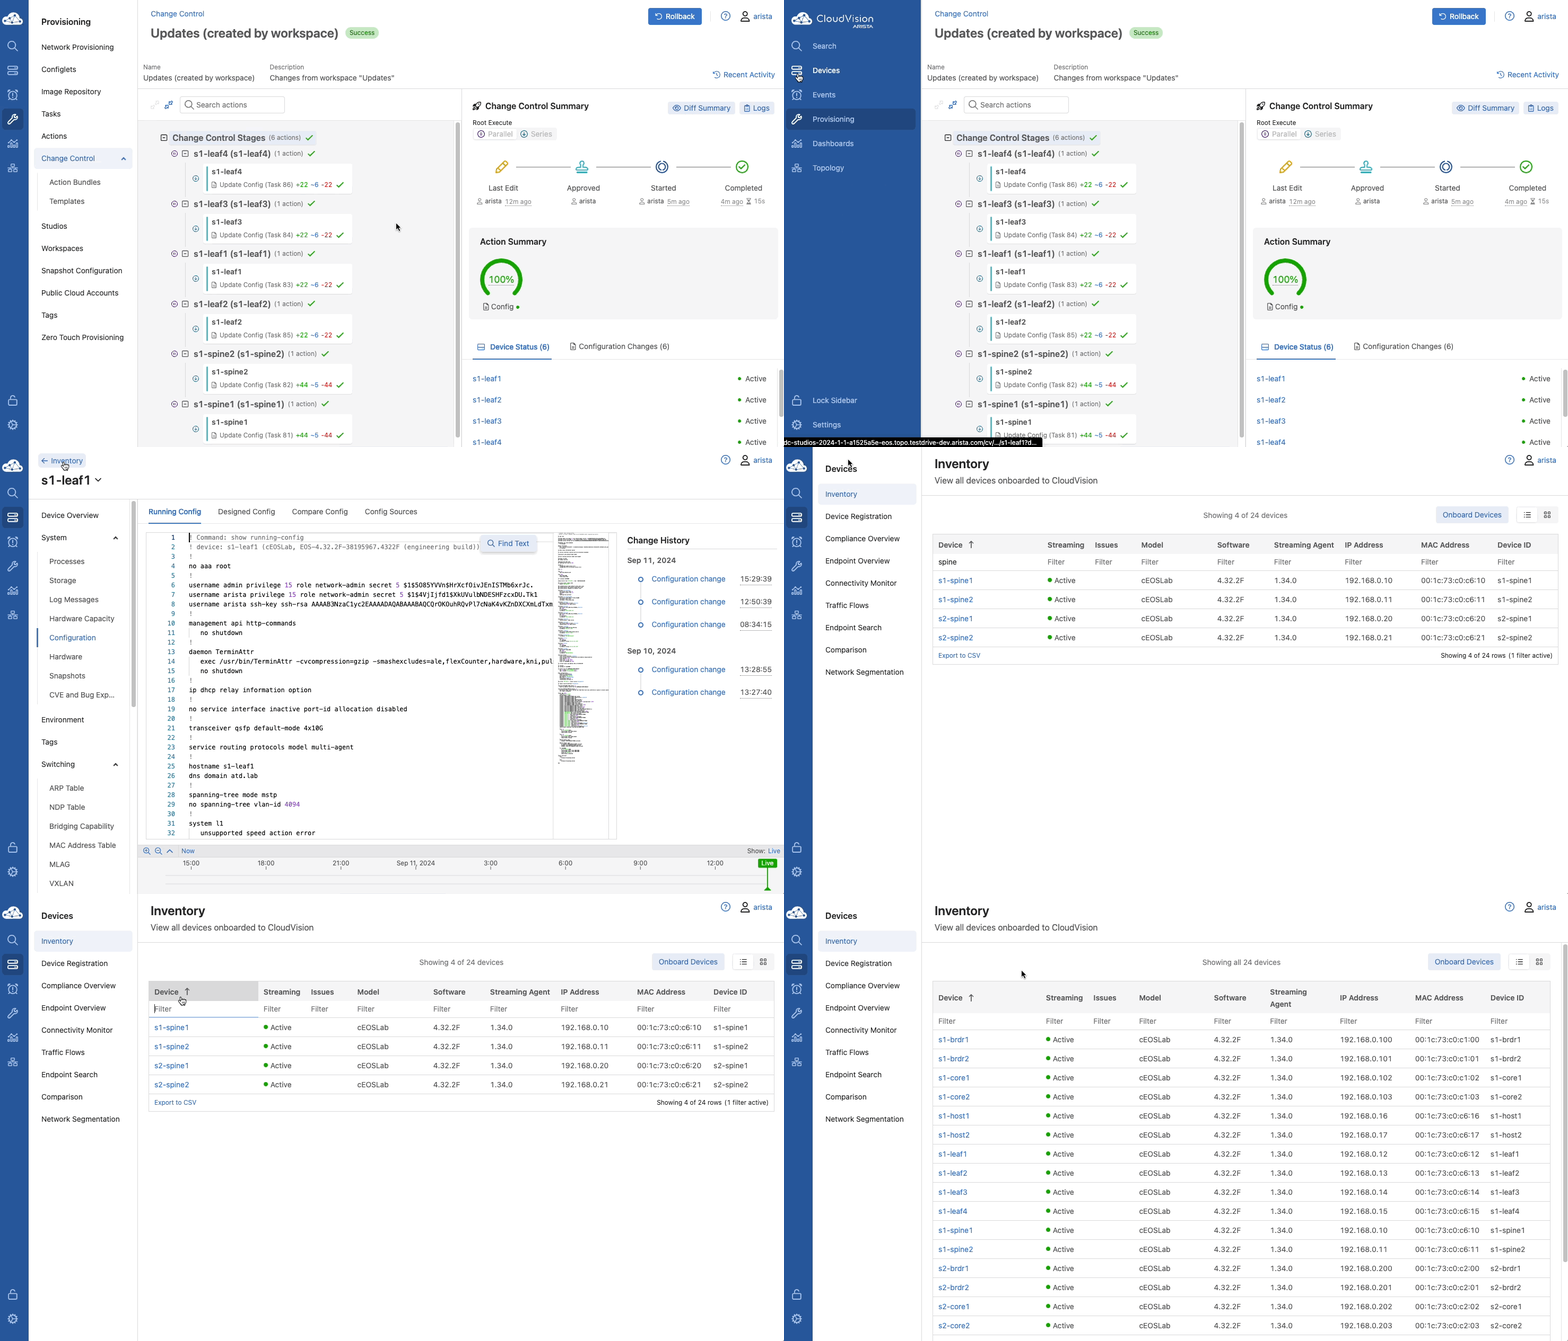
While logged in to CloudVision, click Devices, then Inventory.
-
Find (or search for)
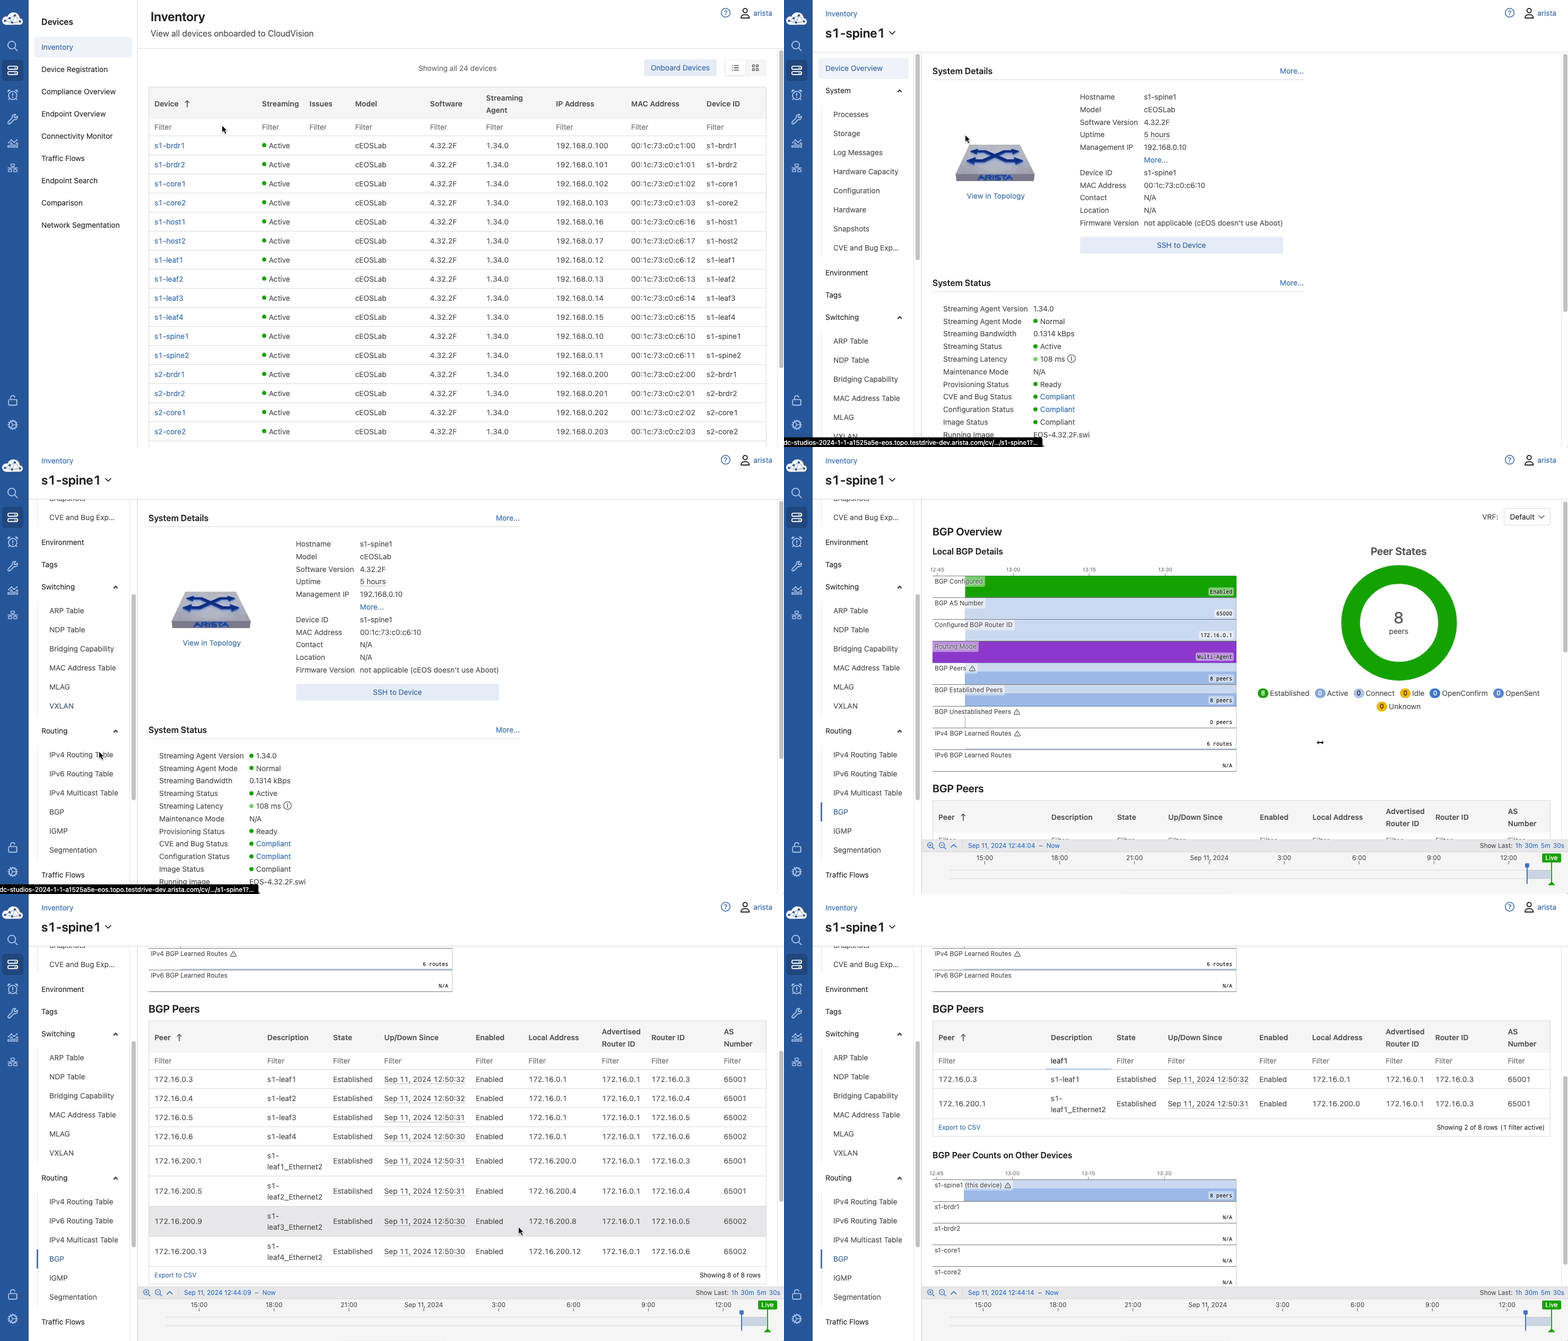
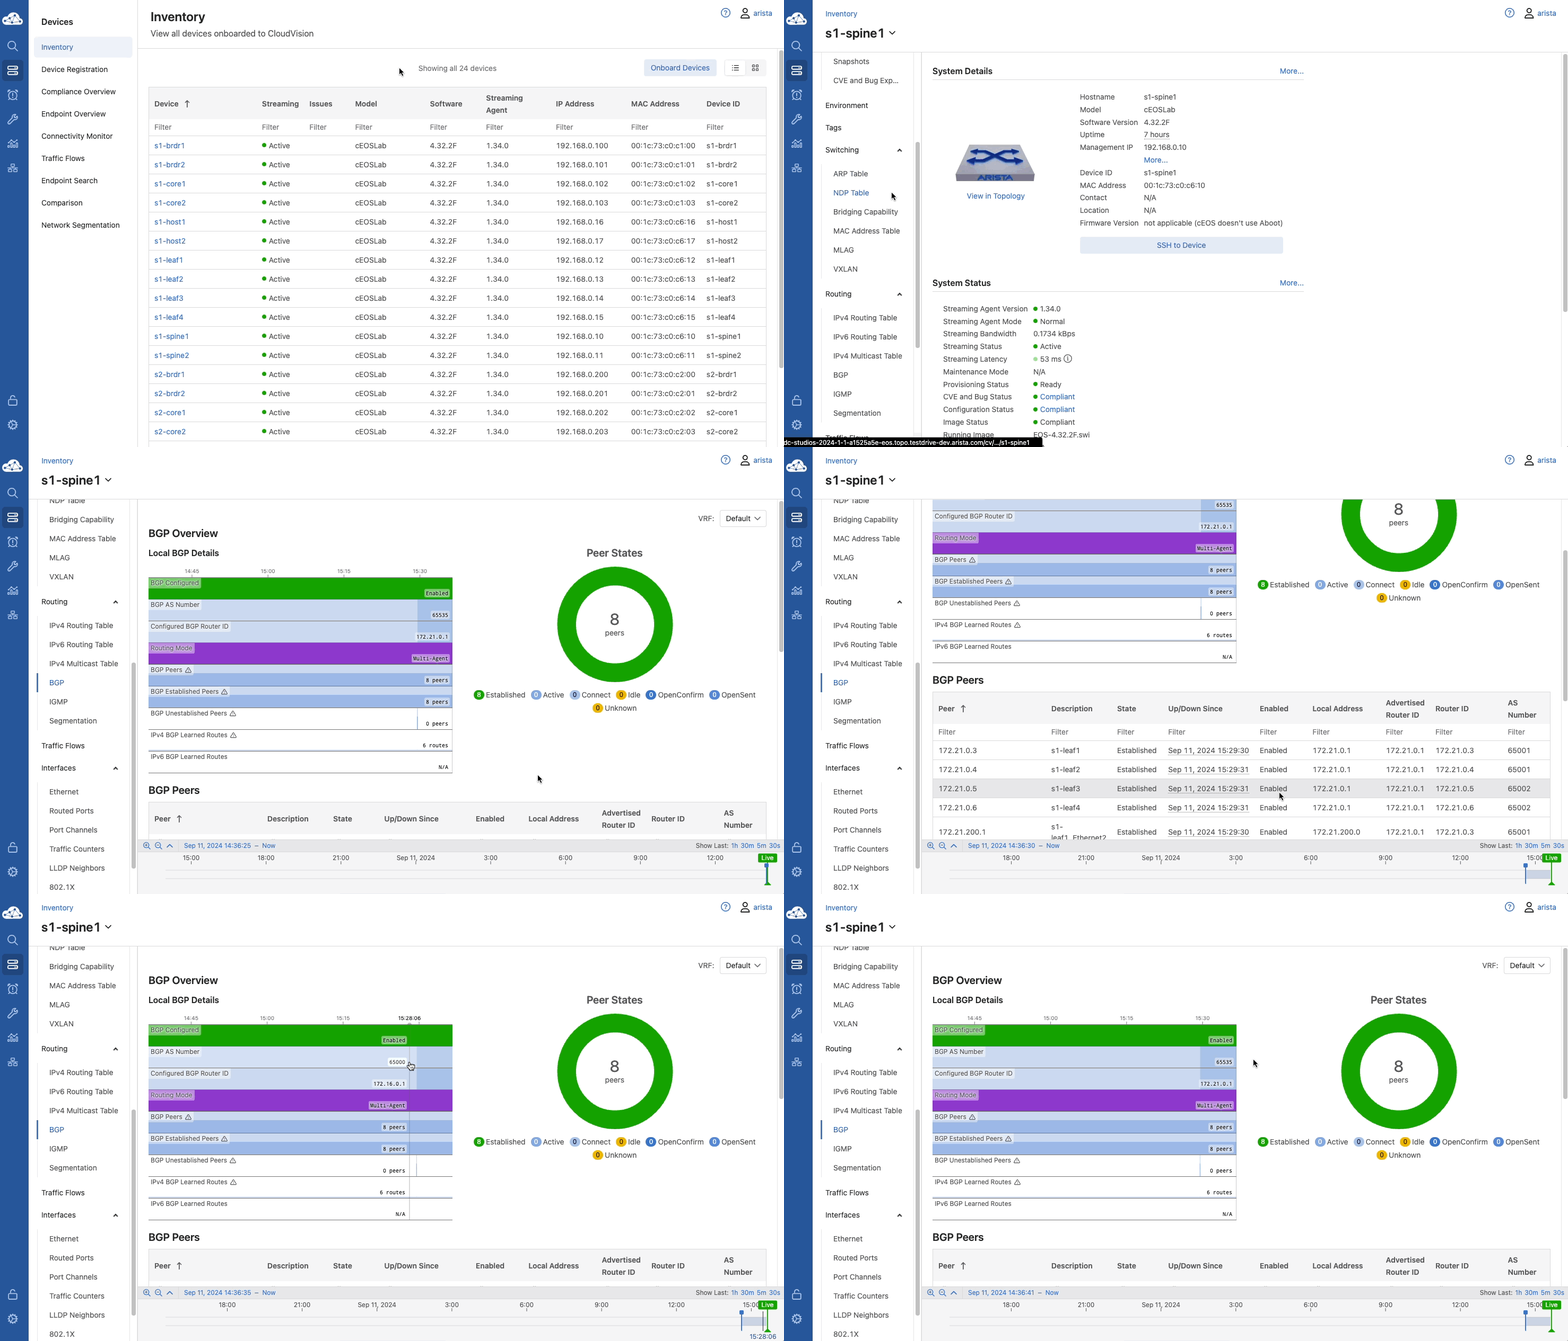
s1-spine1in the list of devices and click on it. Then in the left navigation bar, scroll down and select BGP. Here we can view the current BGP AS Number and Router ID from the graph display. You can also scroll down and view BGP Peer information. -
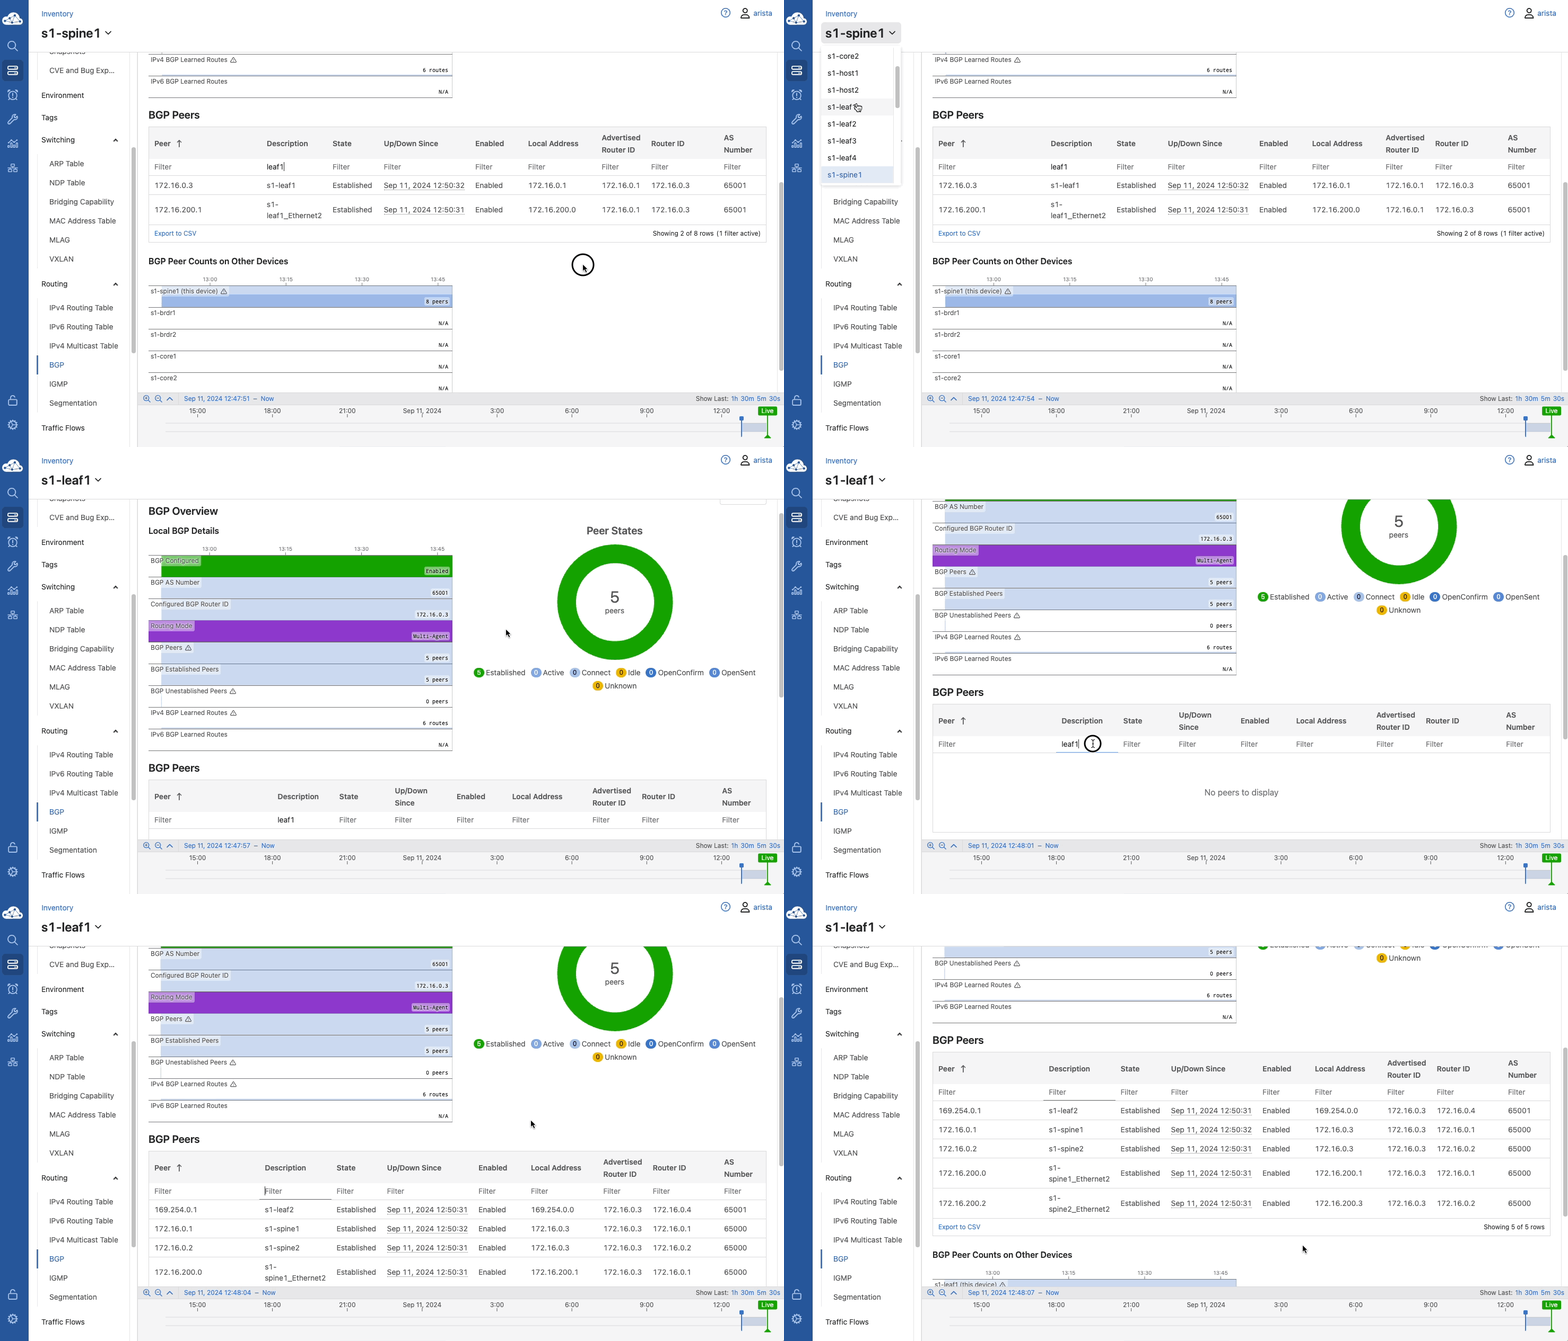
Use the device name pull-down menu and select s1-leaf1 to hop to the BGP details of that device. Repeat for other devices in the fabric as desired.
-
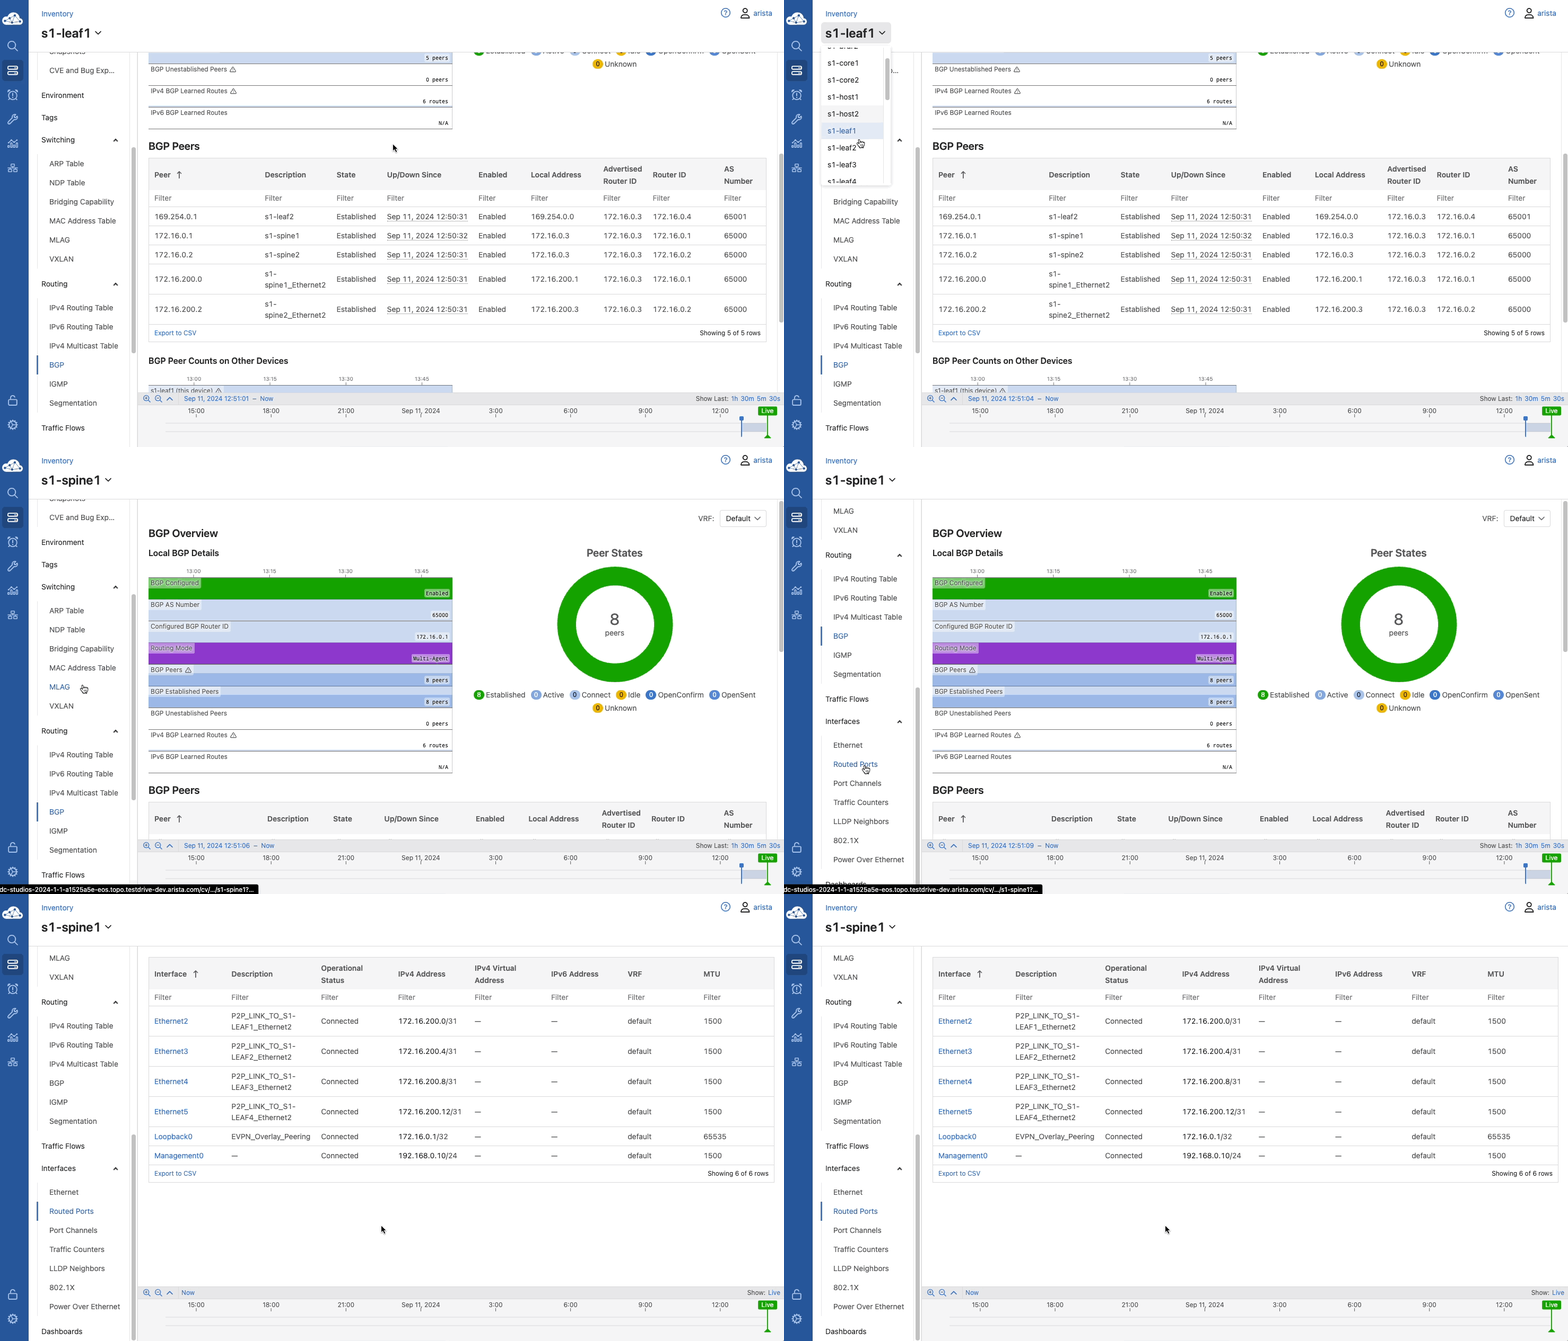
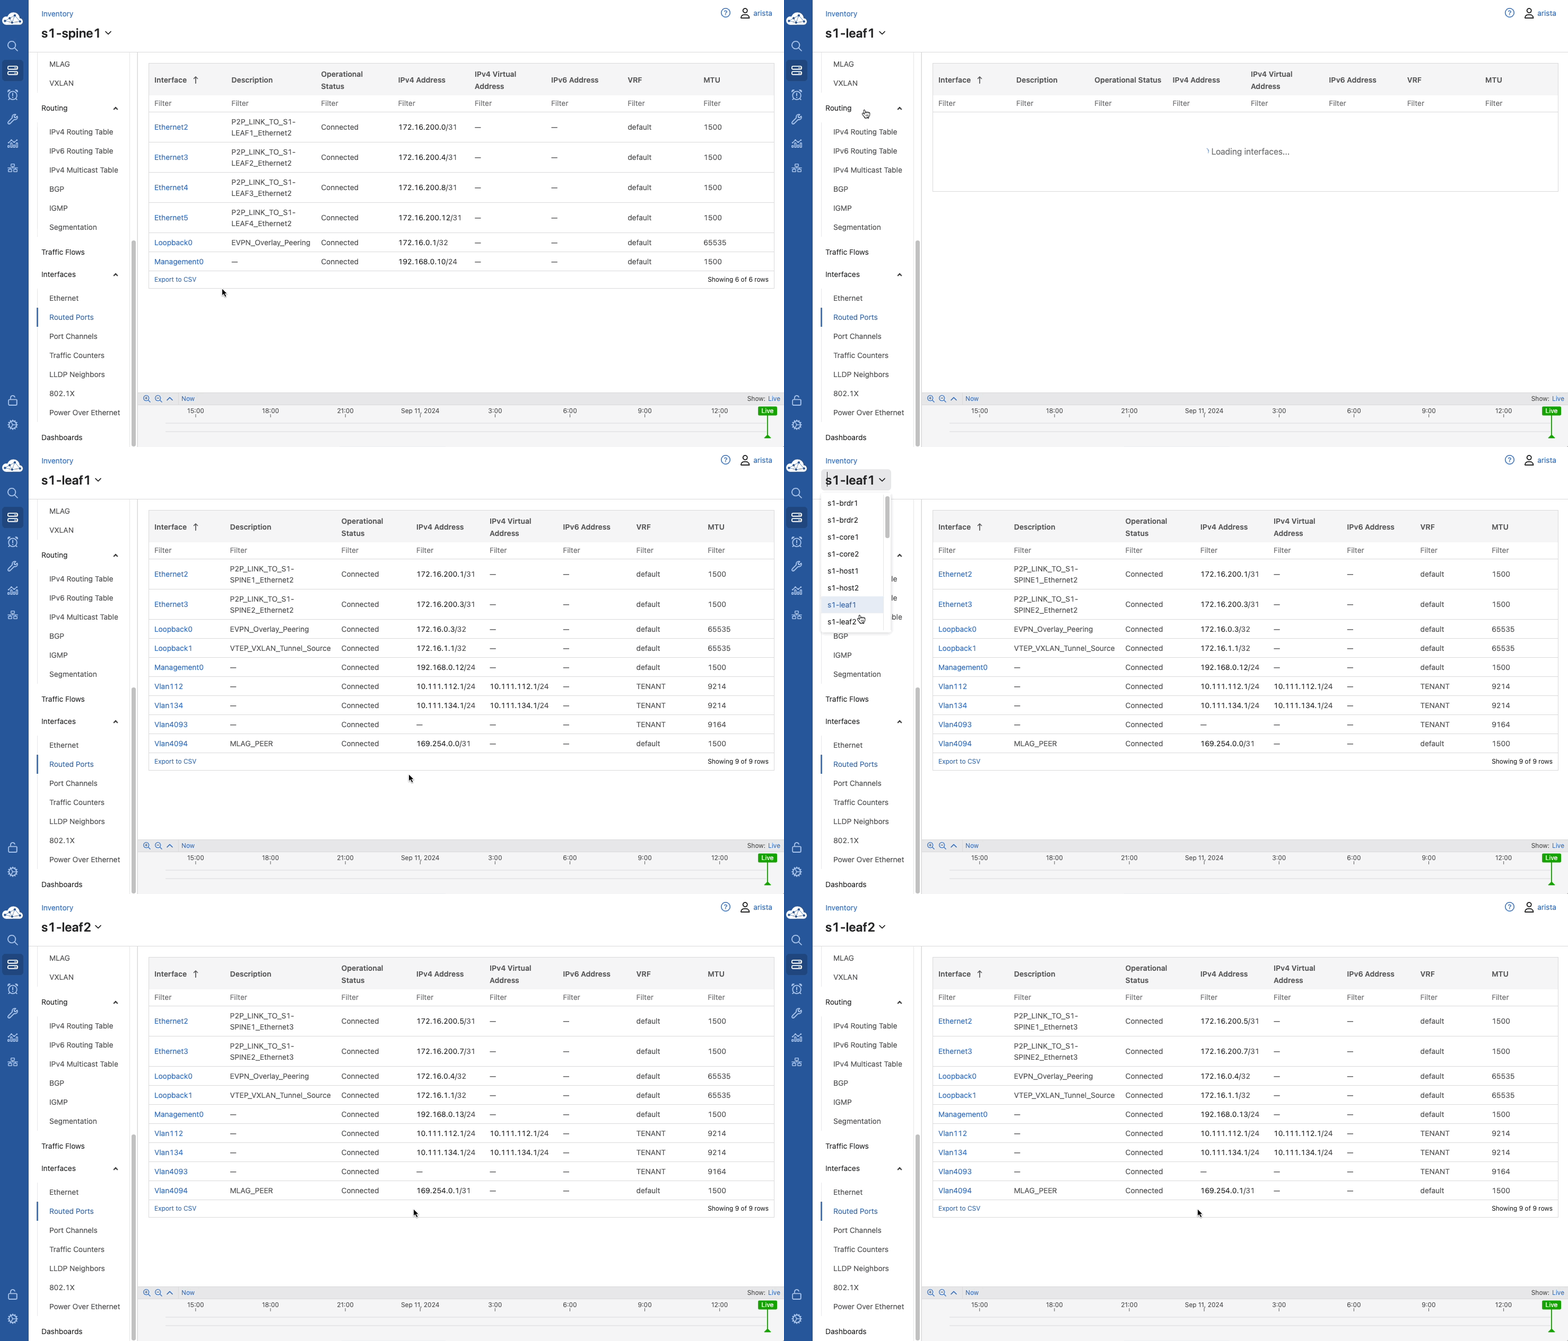
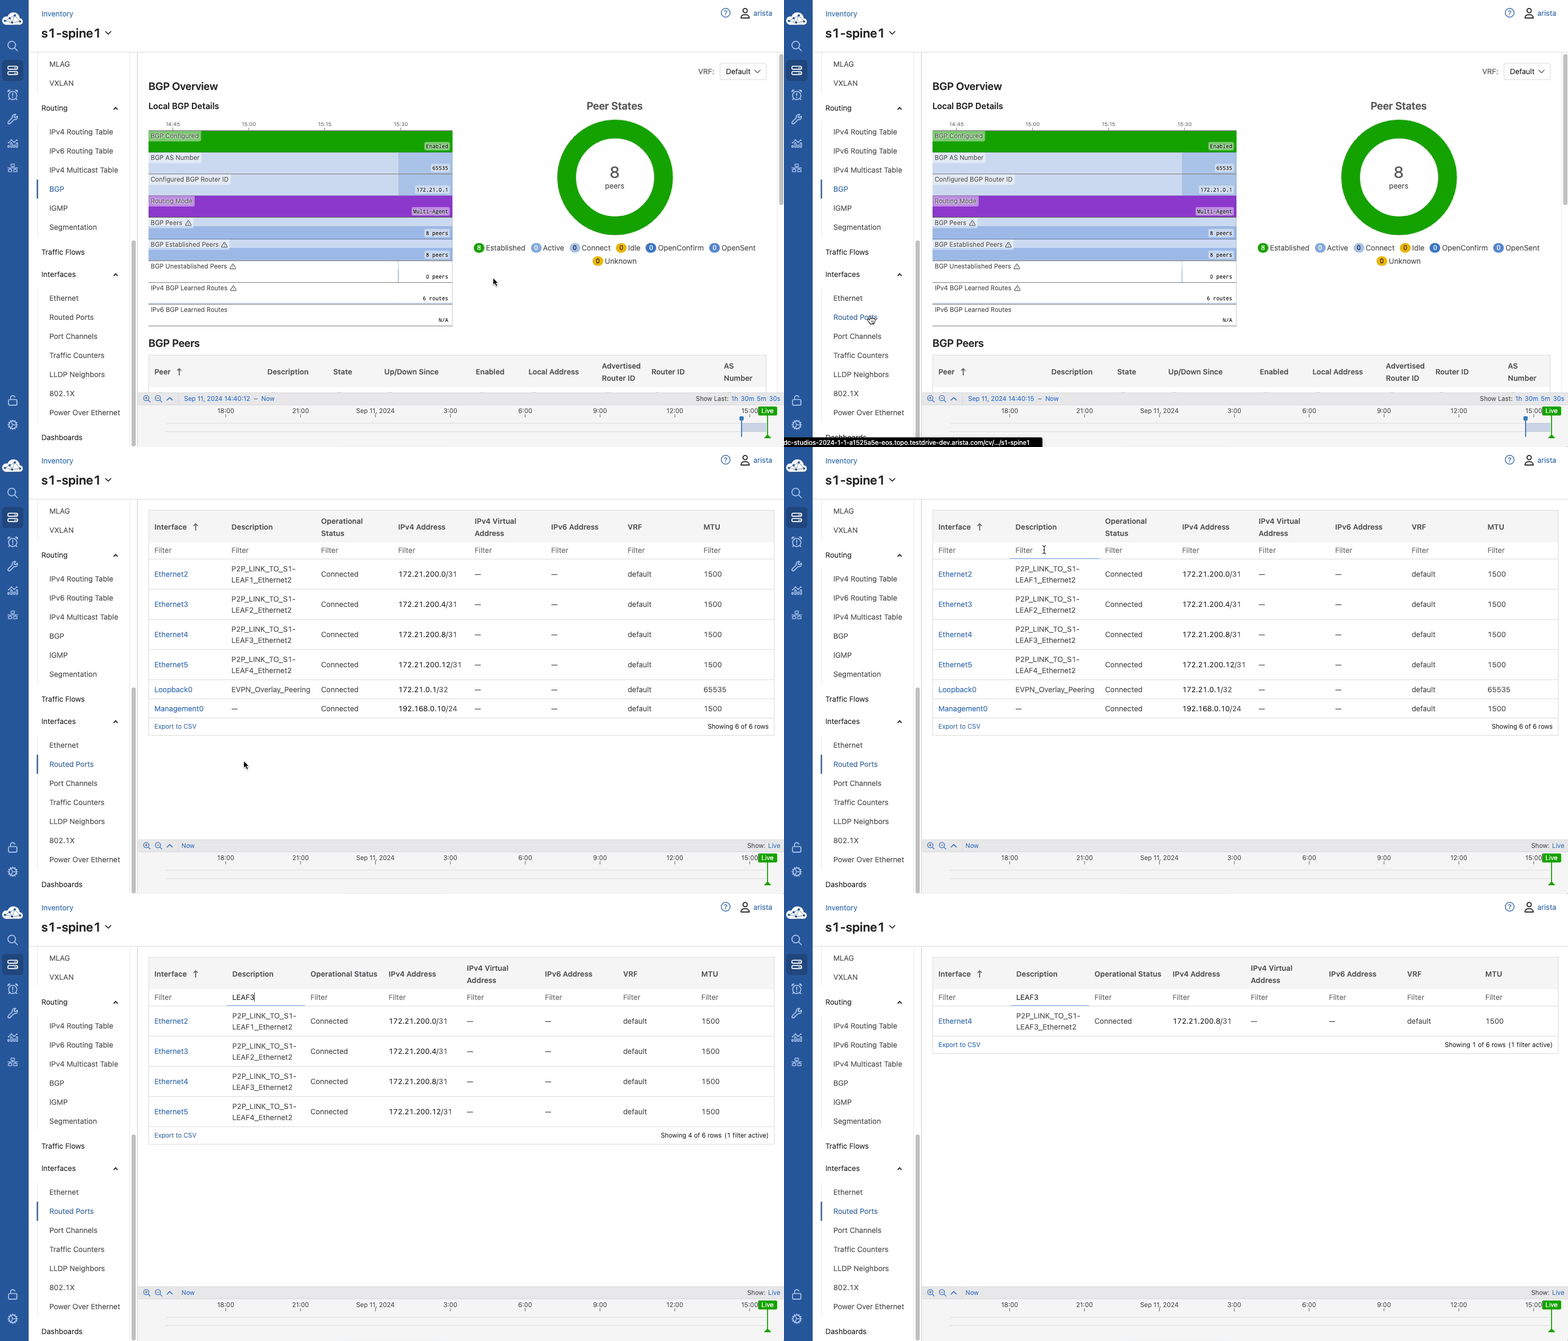
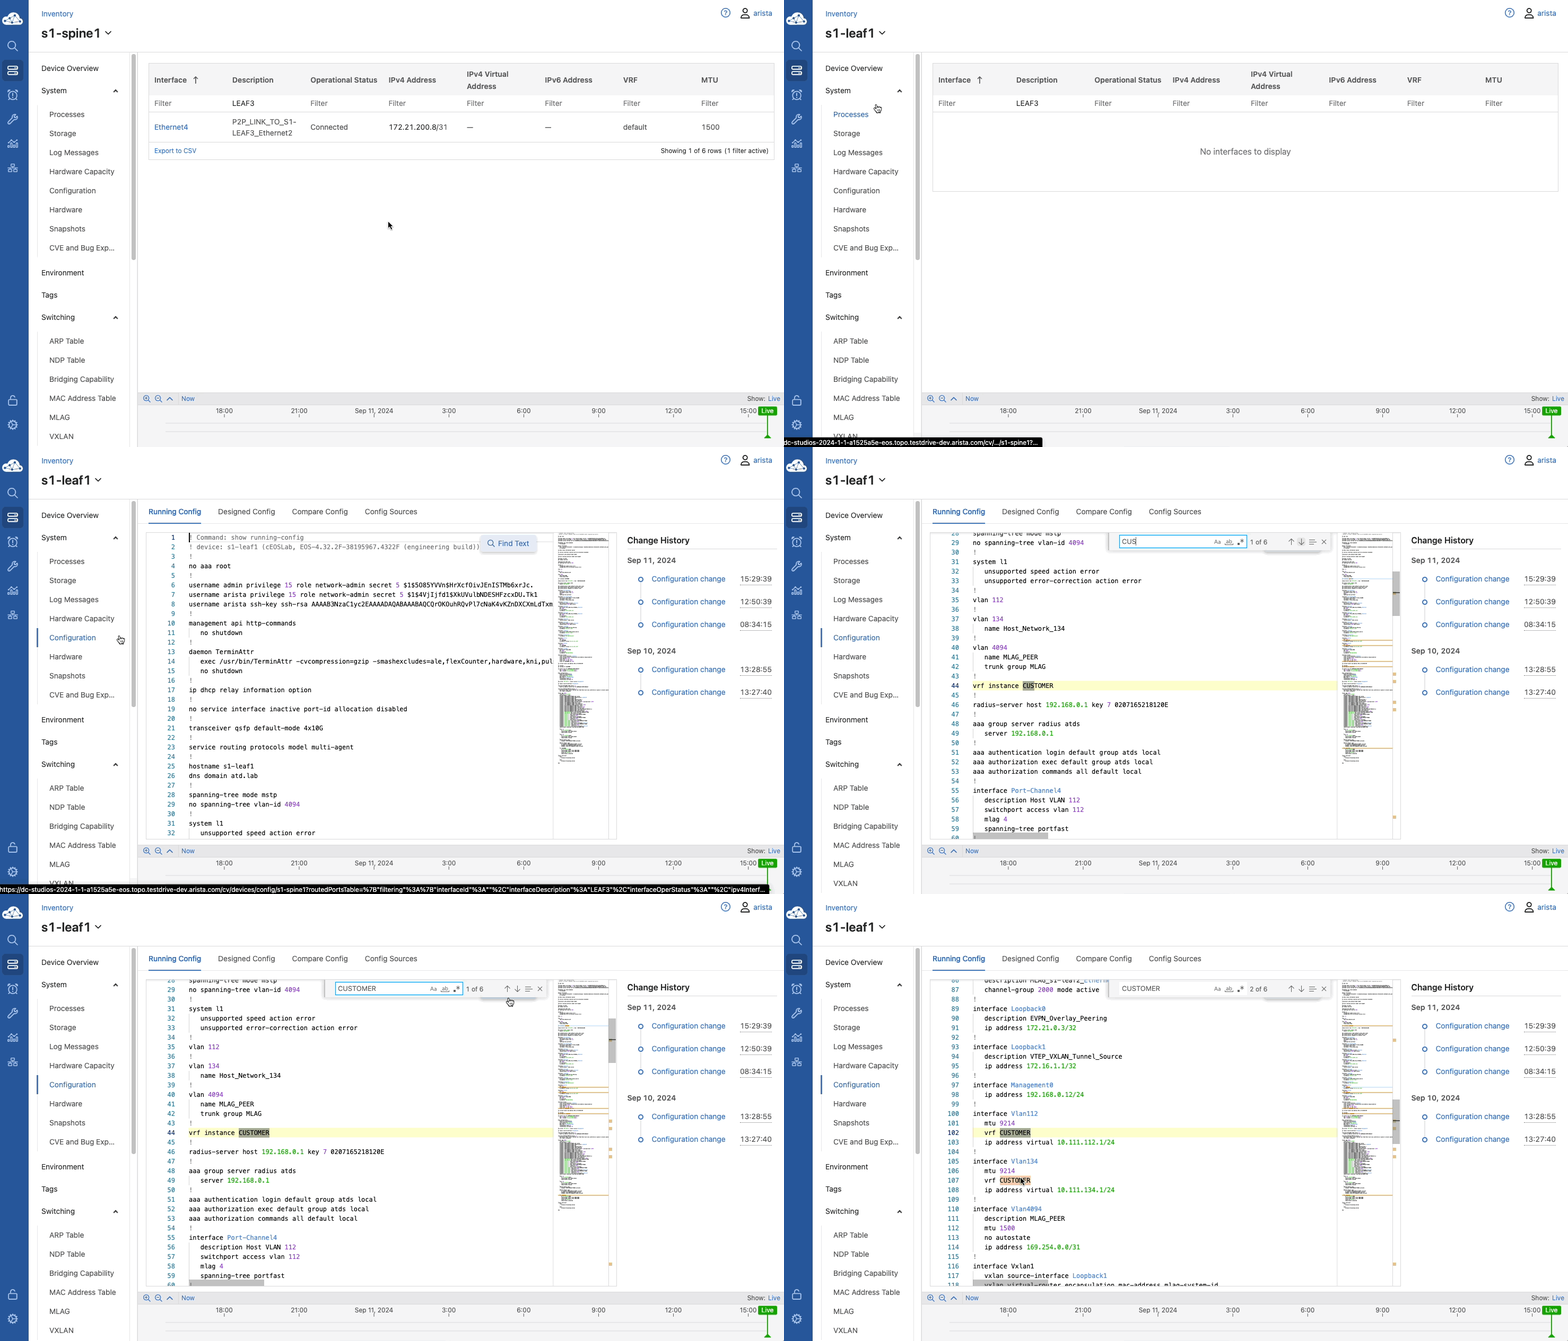
Use the device name pull-down menu to select s1-spine1 again, then click Routed Ports under Interfaces section in the left navigation bar to view the assigned interface IP addresses.
-
Use the device name pull-down menu and select s1-leaf1 to hop to the L3 Interface details of that device. Repeat for other devices in the fabric as desired.
-
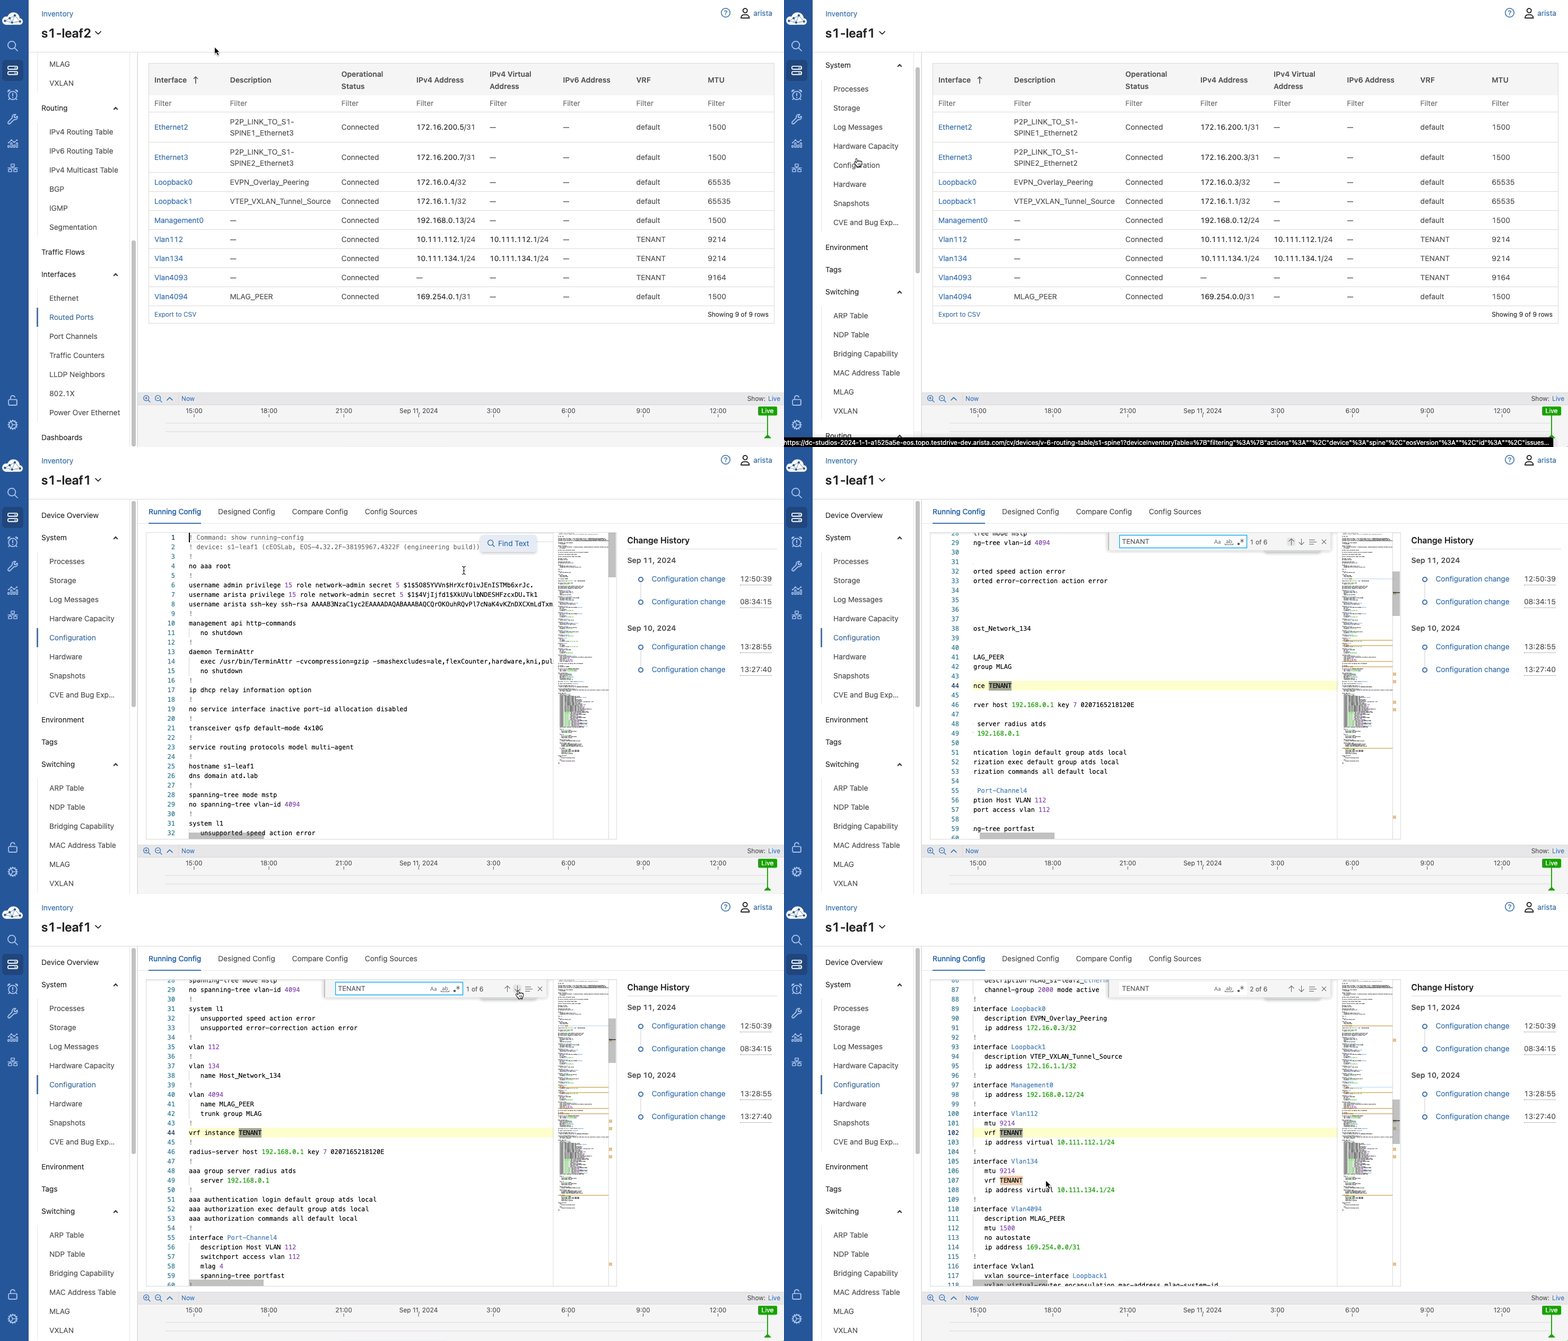
Select s1-leaf1 from the device name pull-down menu and then select Configuration in the left navigation bar. Confirm the existing VRF TENANT and that it is assigned to the two VLANs created previously, 112 and 134. You can scroll or use the Find Text option as well.
Network Fabric Changes with Studios
Let's assume that after the network configuration has been generated and deployed by Studios, we want to make a change to some of the settings we used. Because these configurations are generated by the data models inside of CloudVision, we'll see how simple it is to made fabric-wide changes with a few steps.
Update Fabric IP Addressing and ASNs
-
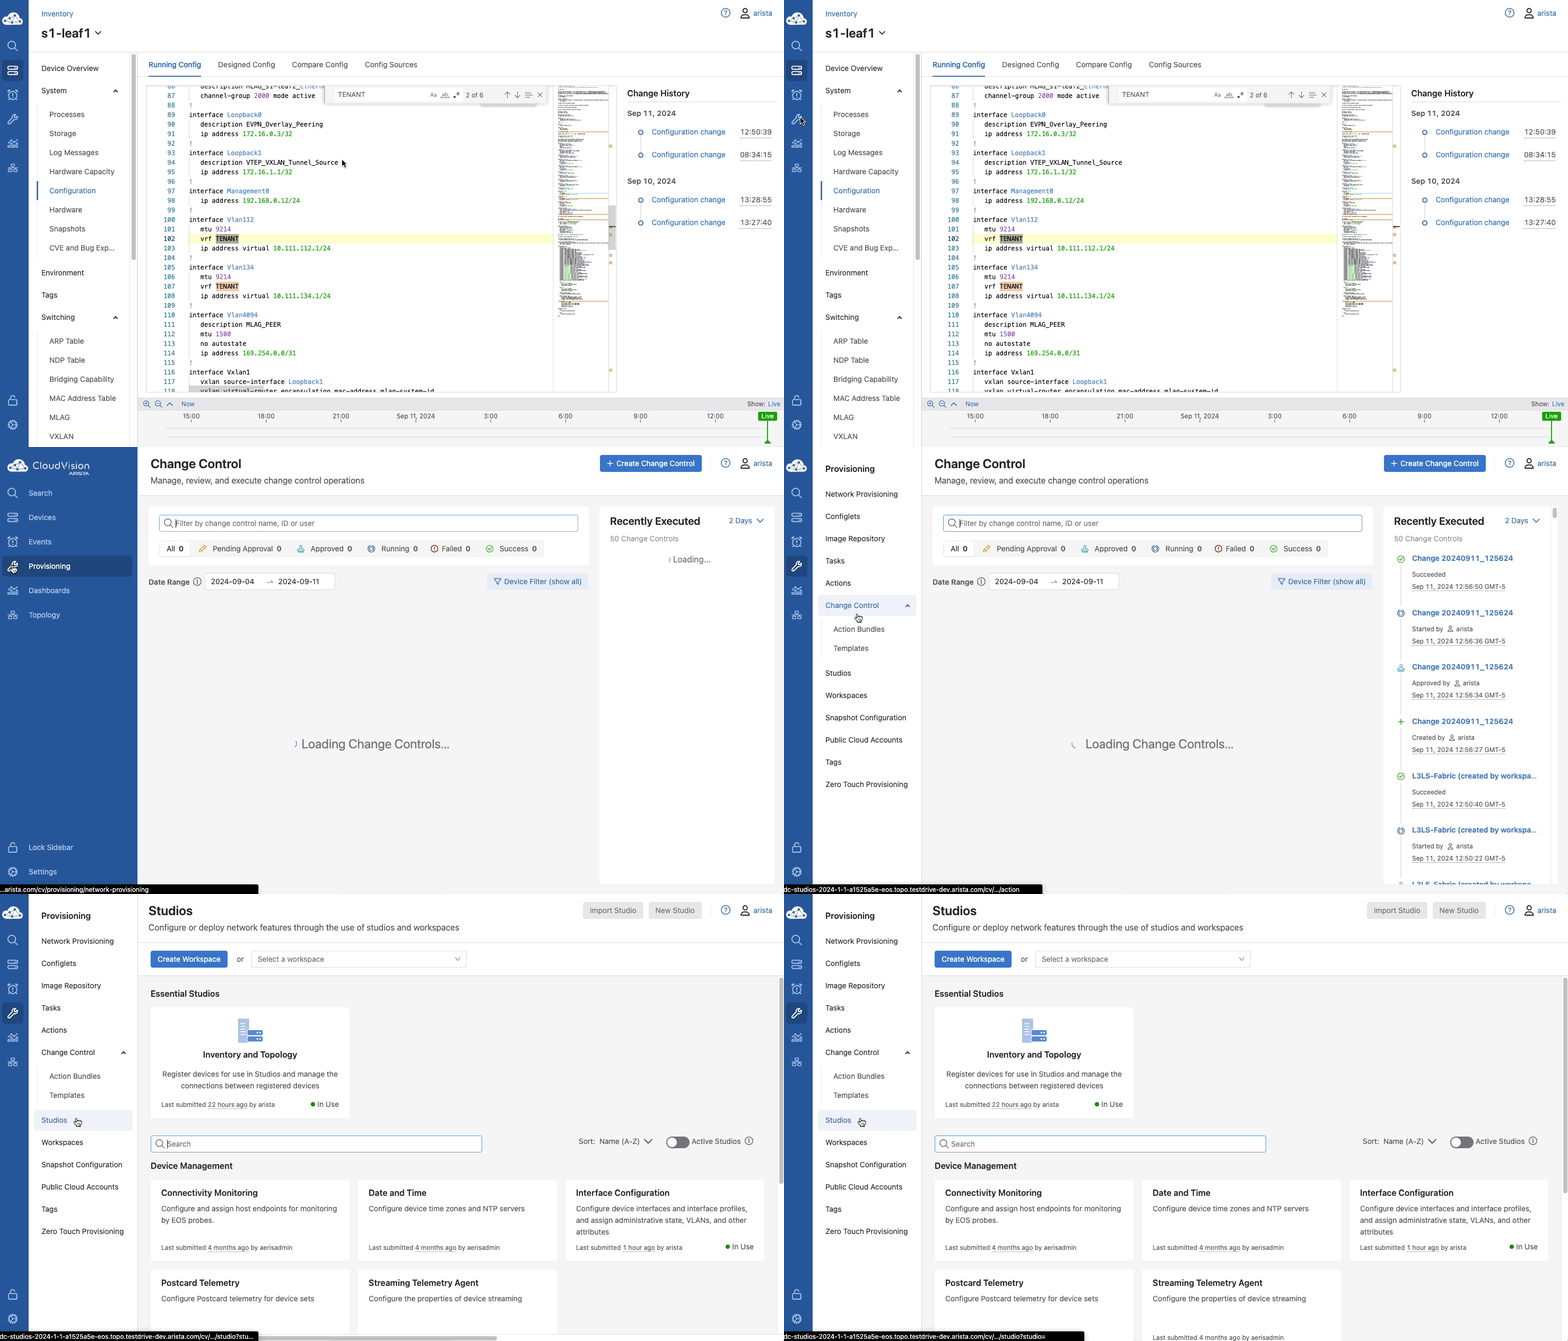
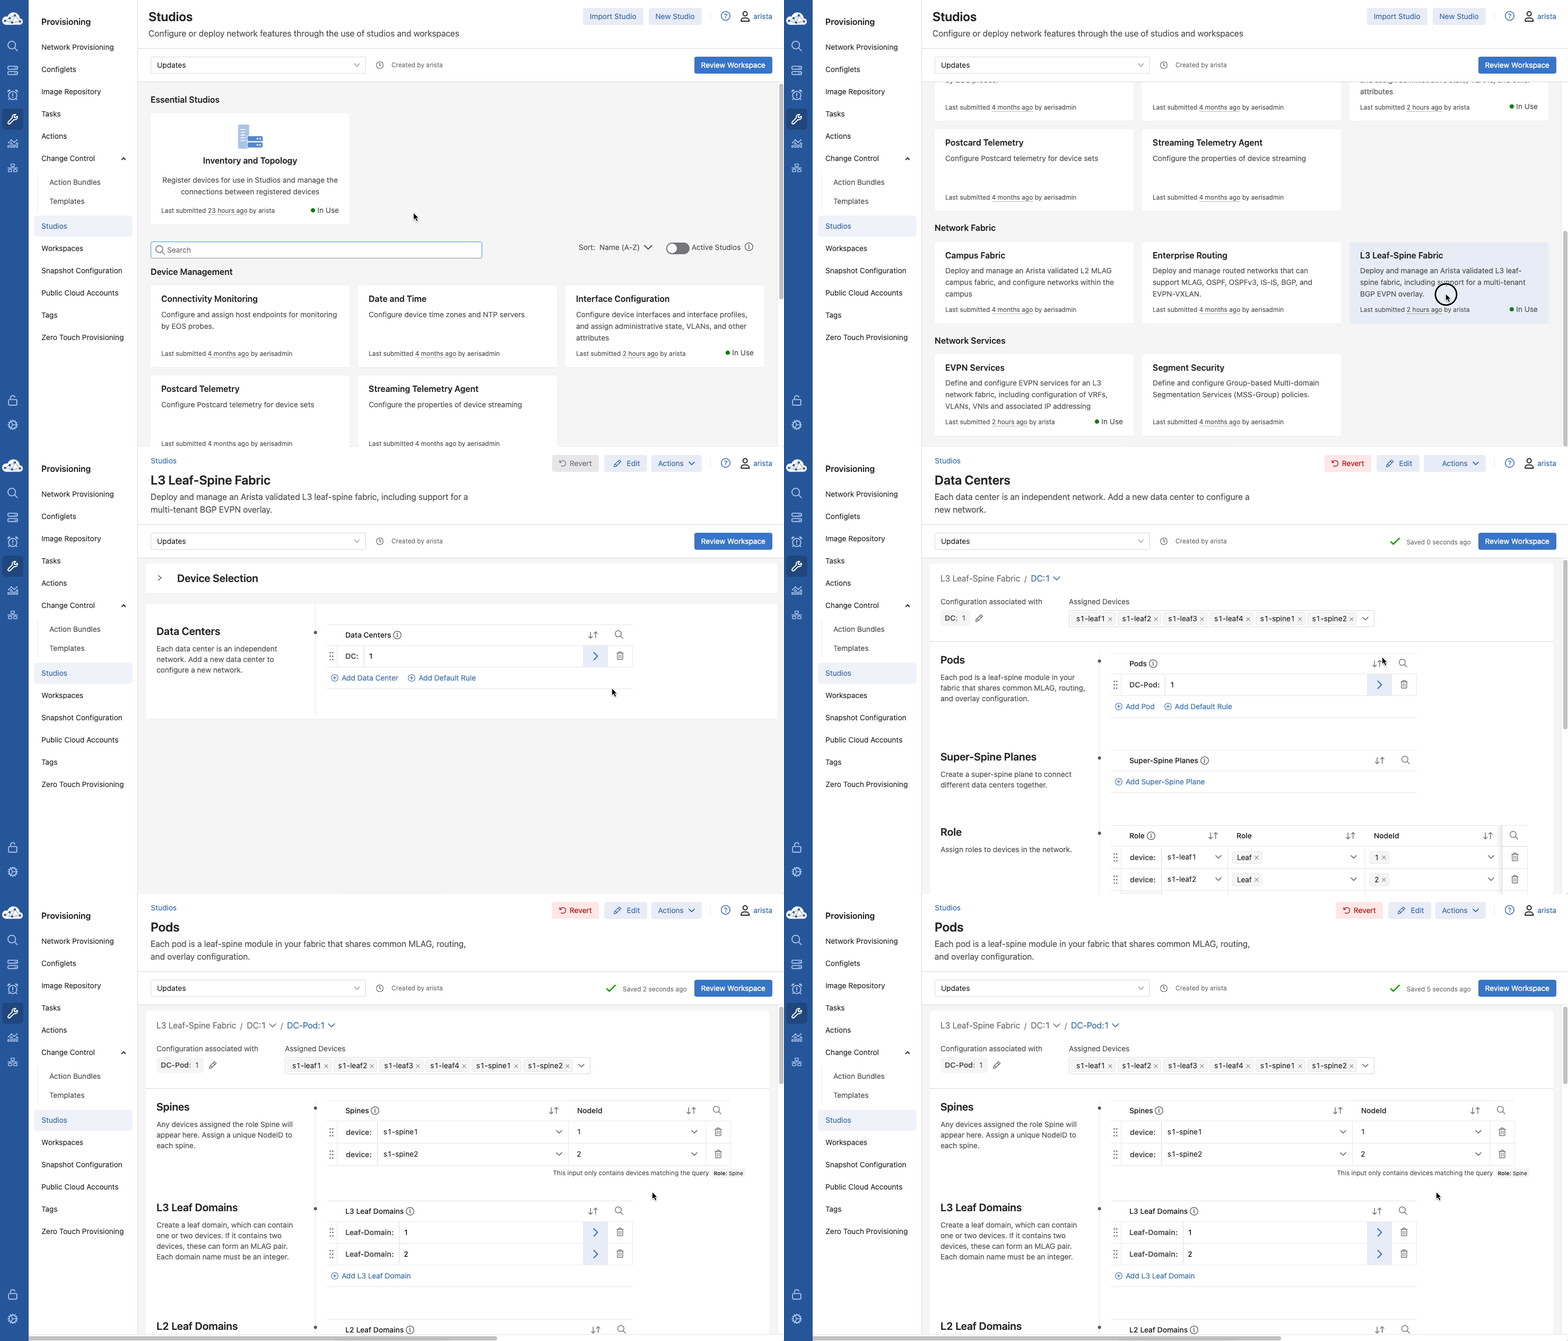
Click Provisioning on the left menu, then click Studios.
-
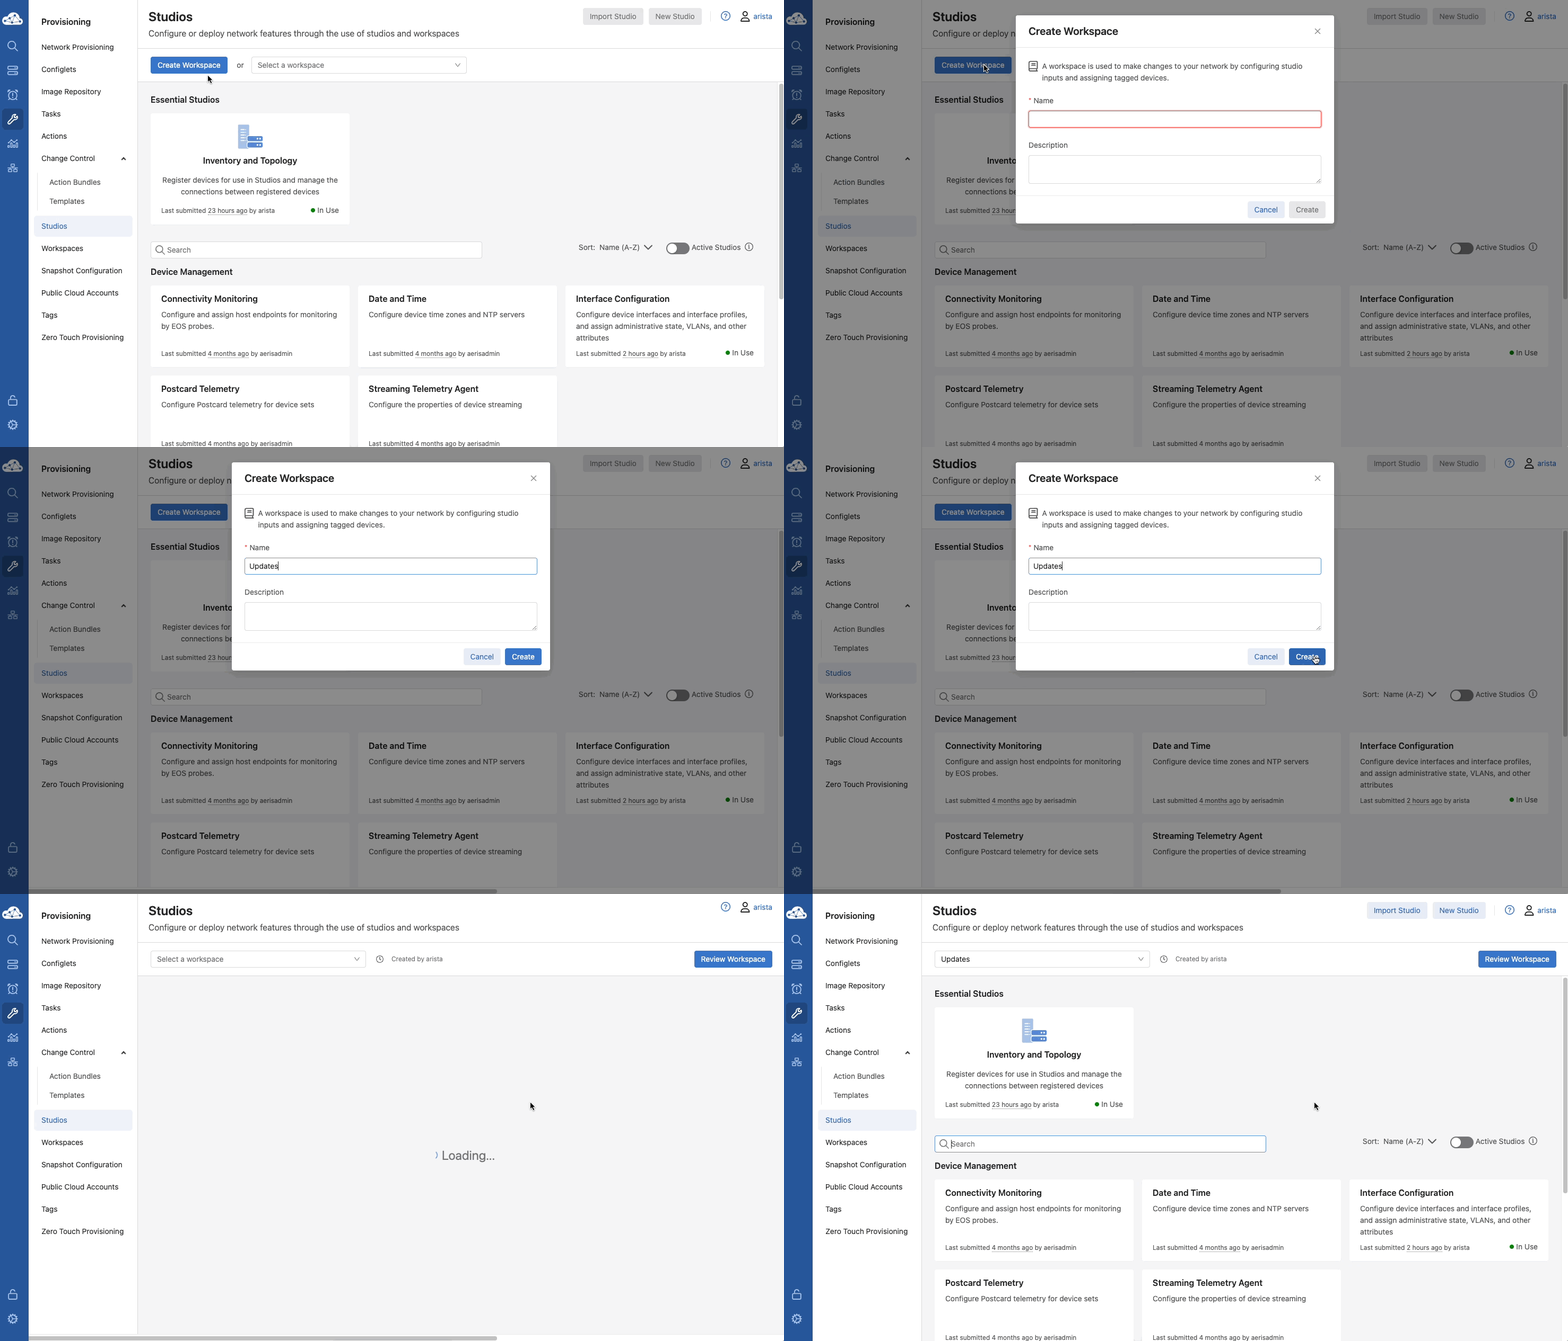
Click Create Workspace and name it
Updates. -
Find and click the L3 Leaf-Spine Fabric Studio by searching or scrolling down. Then, click the right arrow for
DC:1followed by the right arrow forDC-Pod:1to edit its settings. -
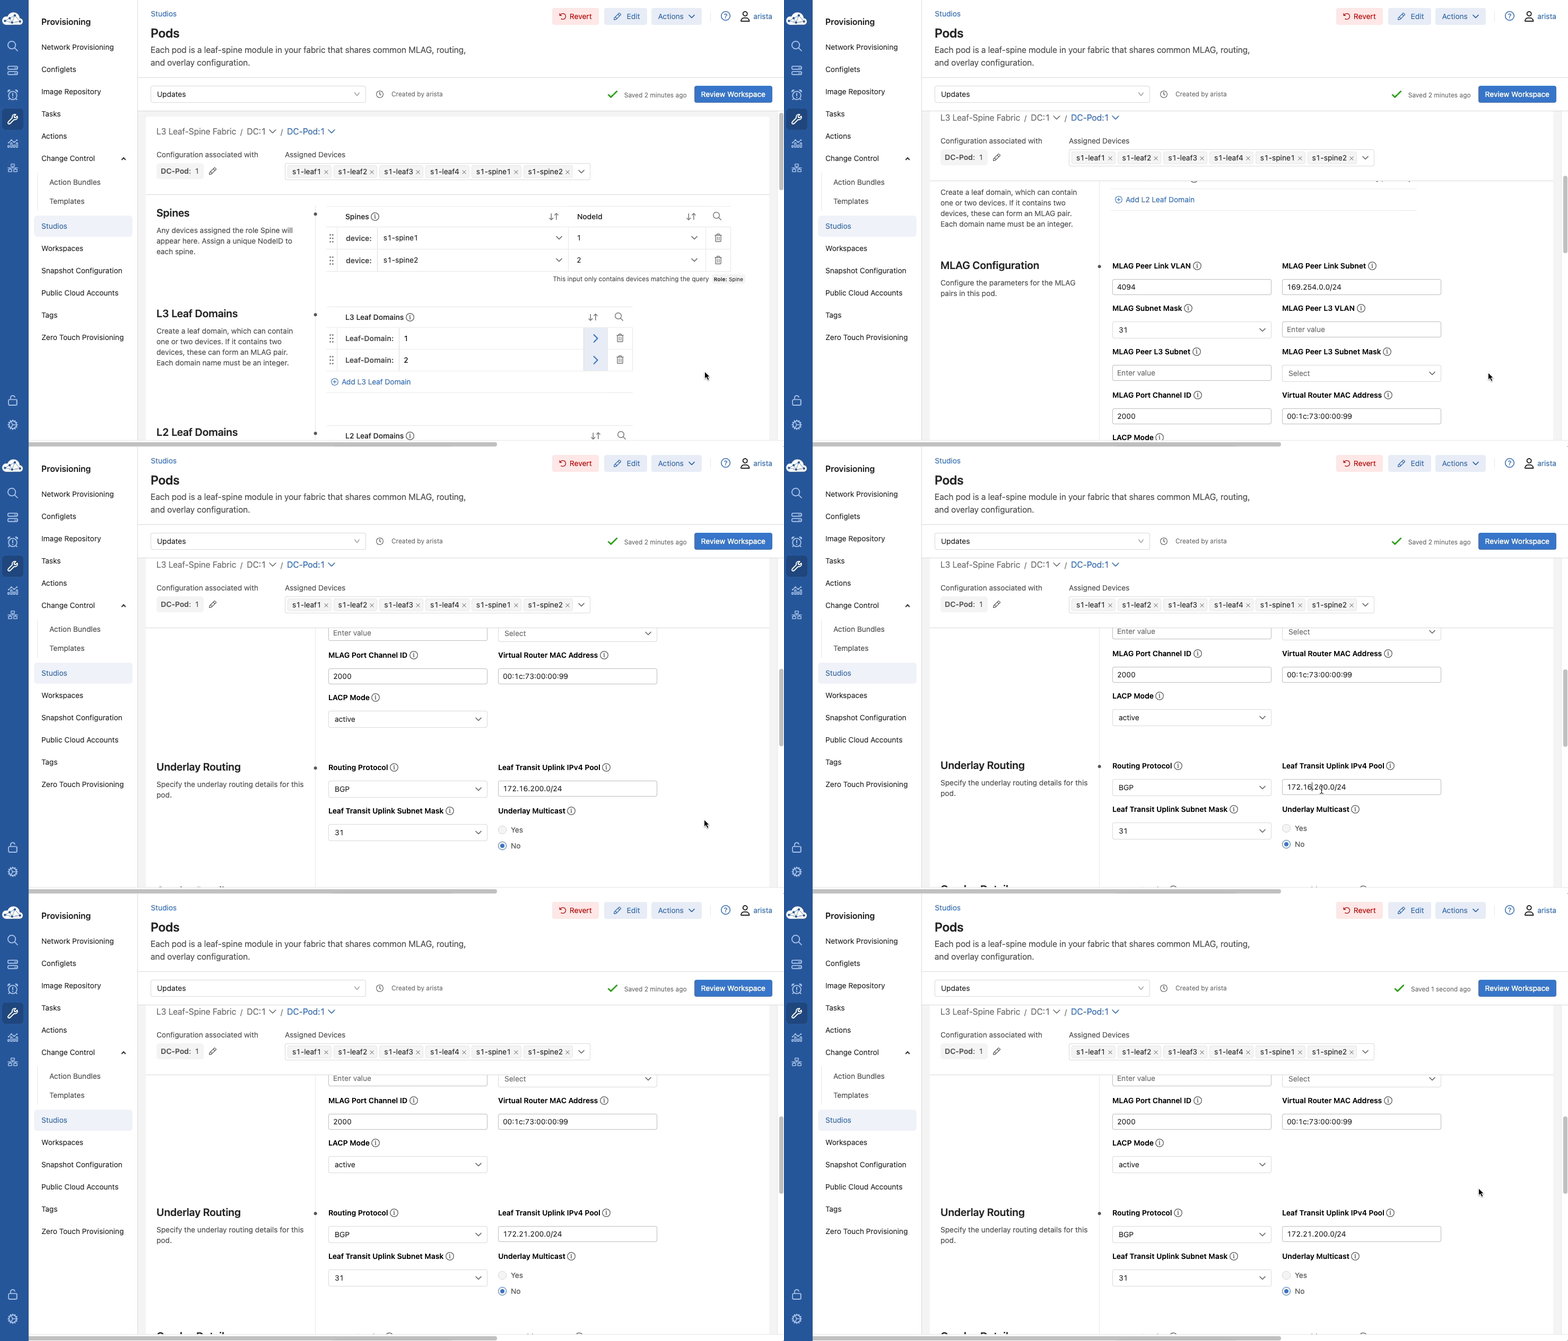
Scroll down to update the Underlay Routing section to update the Leaf Transit Uplink IPv4 Pool from subnet
172.16.200.0/24to172.21.200.0/24. -
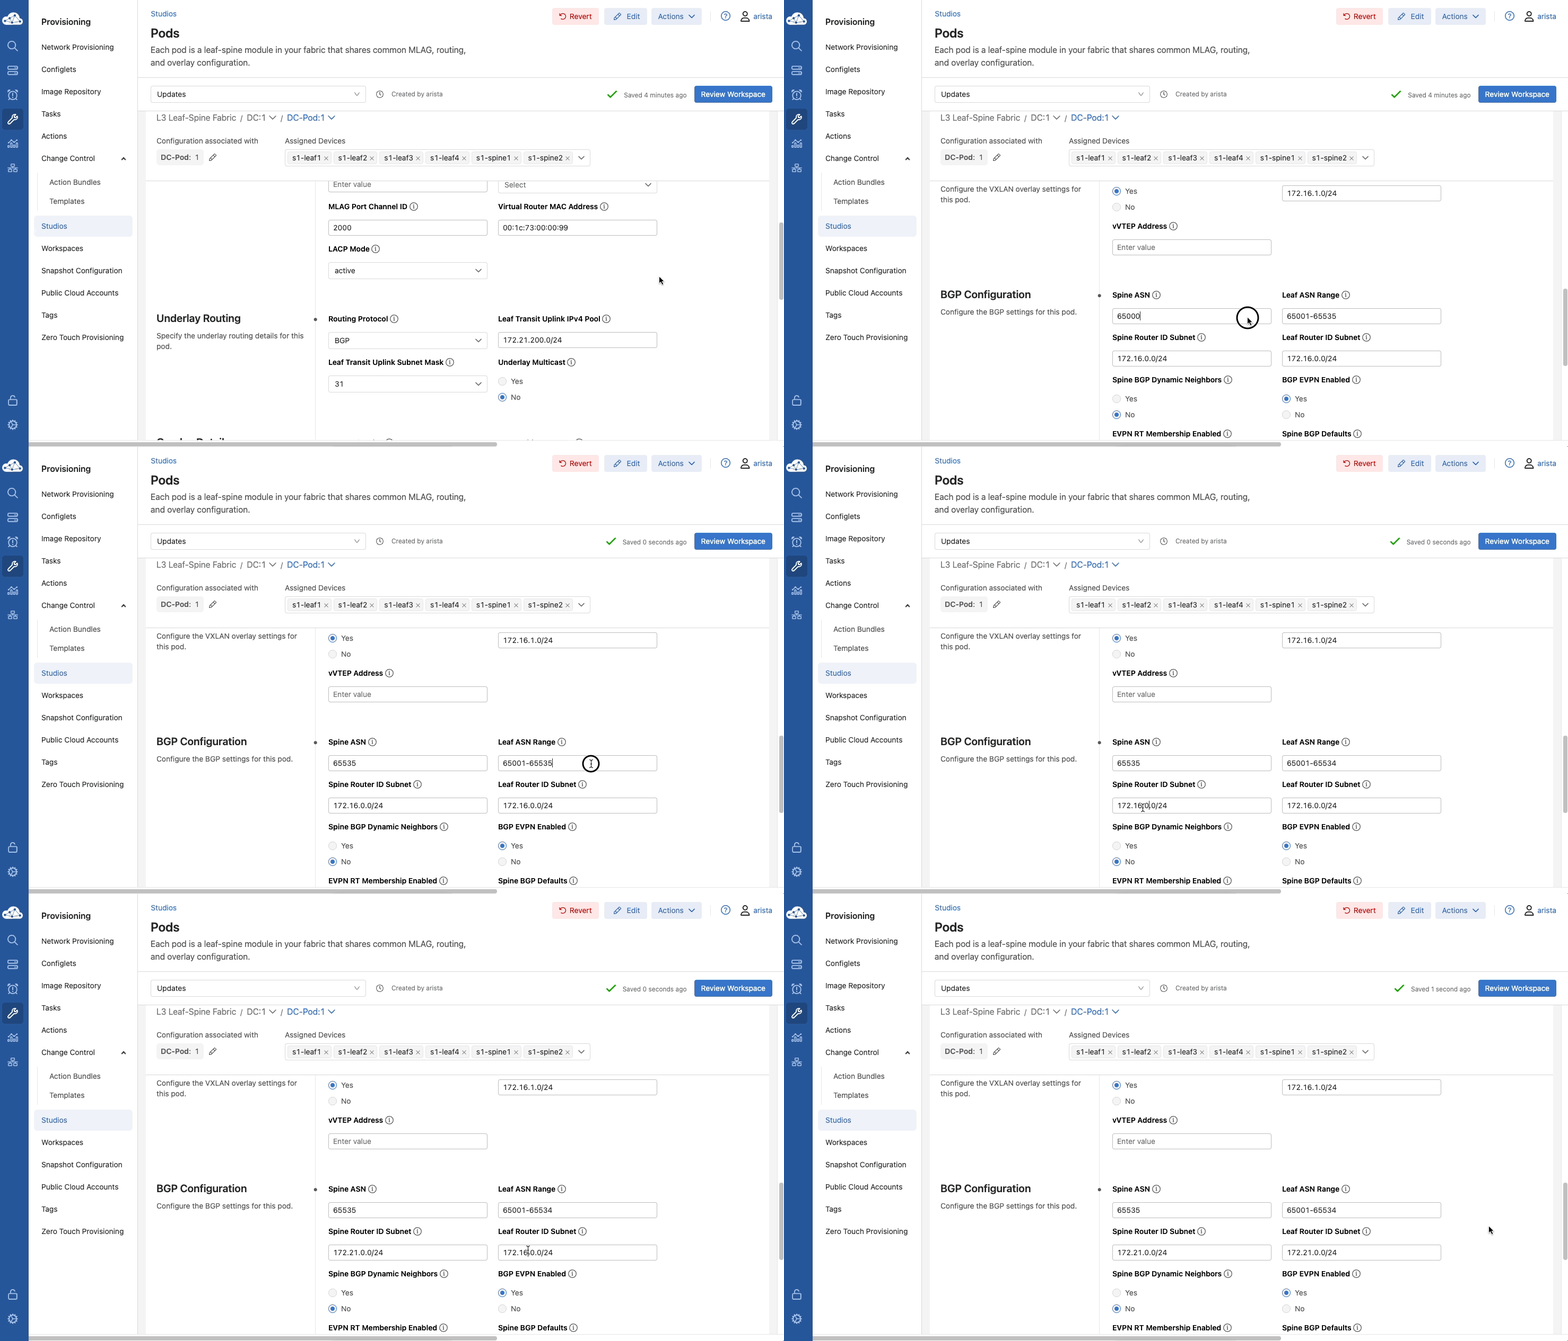
Continue scrolling to the BGP Configuration section. Change the Spine ASN from
65000to65535. You will also need to update the Leaf ASN Range to65001-65534. Additionally, update the Spine Router ID Subnet and Leaf Router ID Subnet from172.16.0.0/24to172.21.0.0/24.
Change Name of Existing VRF
-
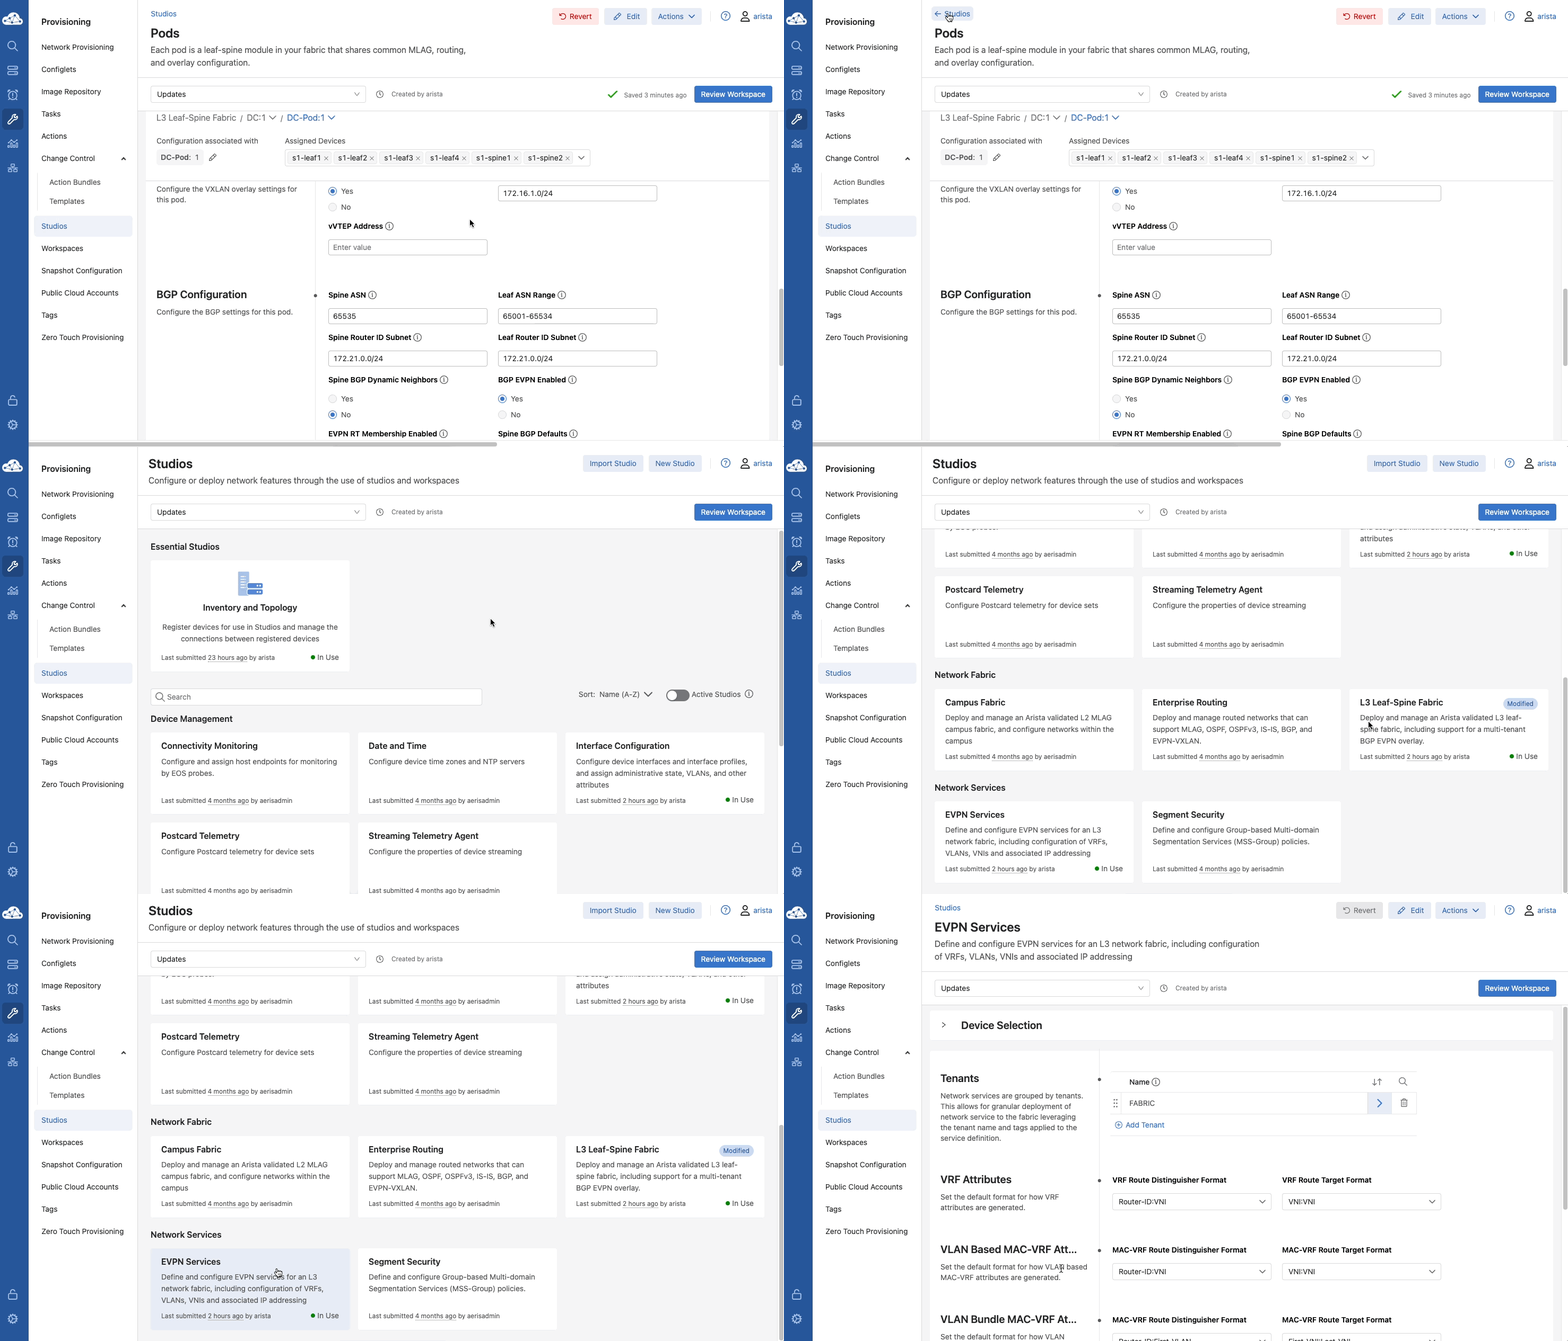
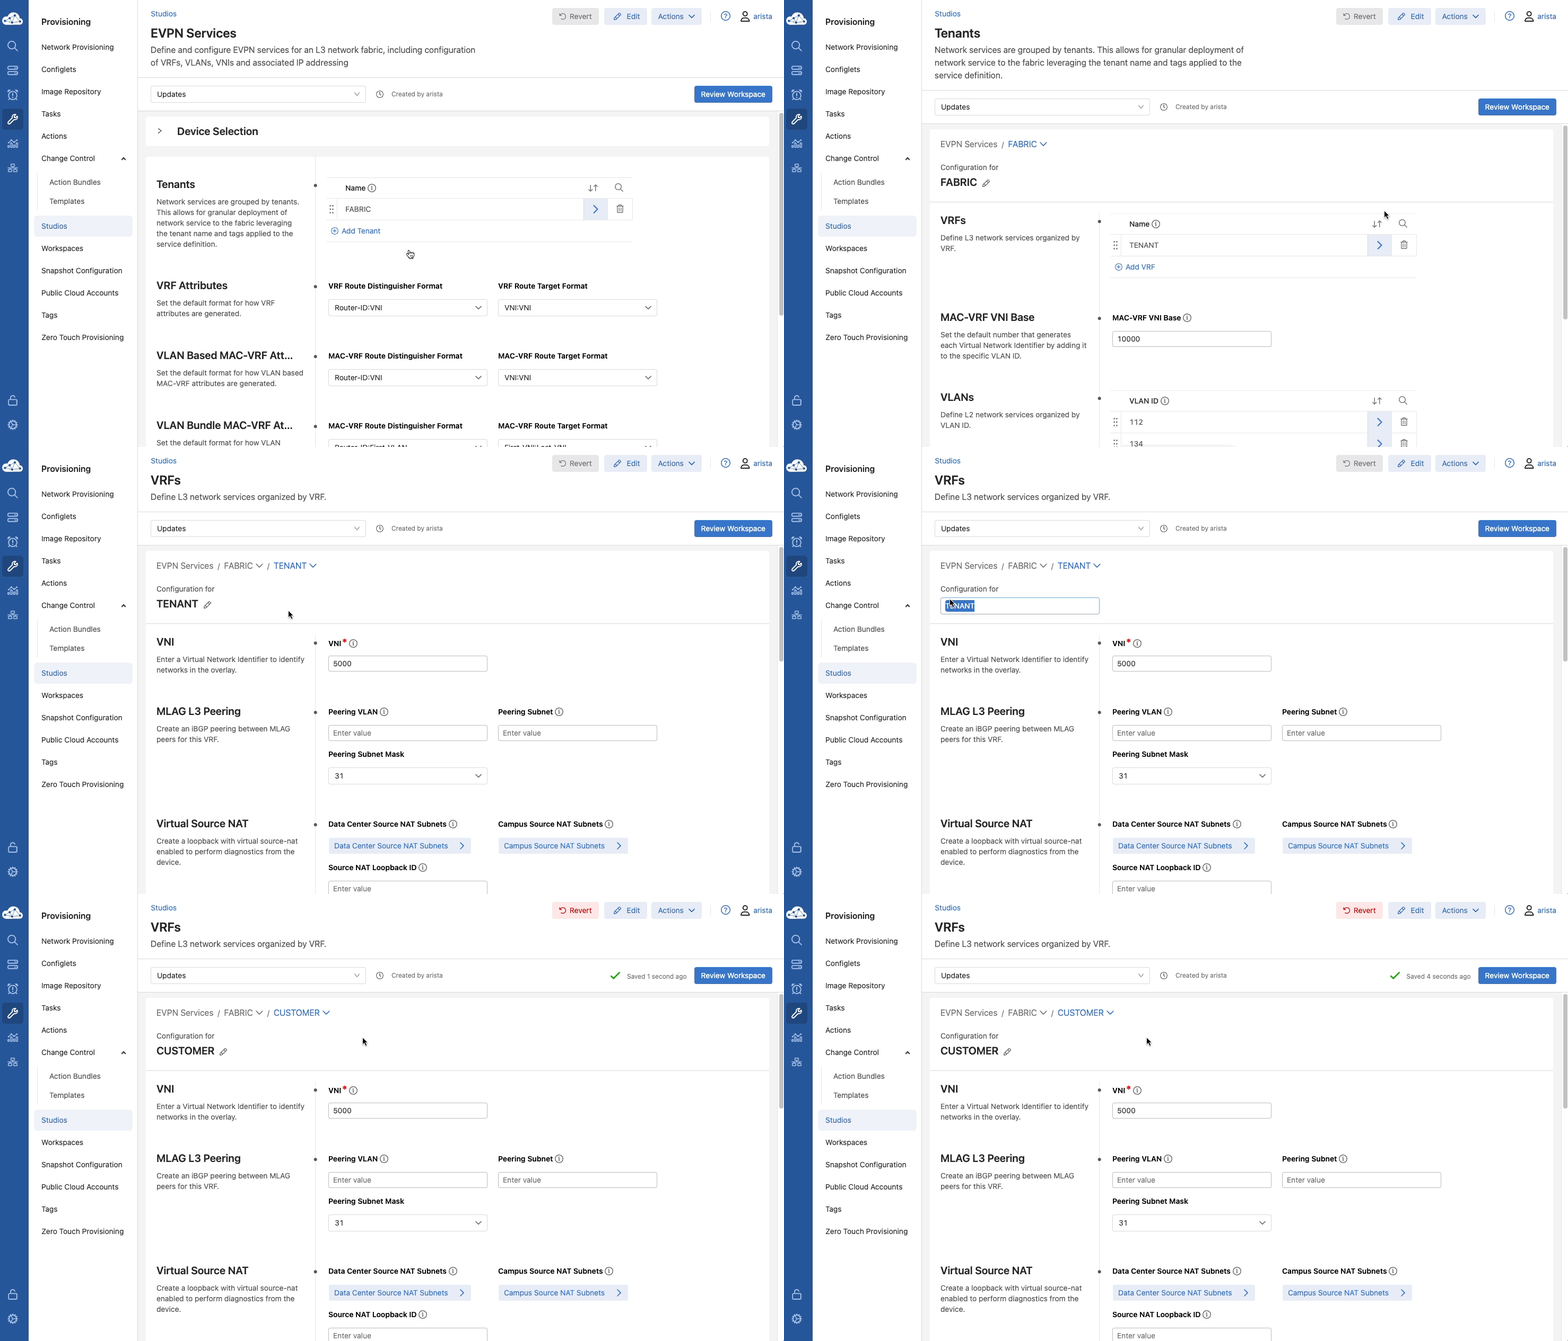
Navigate back to the main Studios page by clicking the blue Studios link near the top of the page. Then scroll down and select the EVPN Services Studio.
-
Click the right arrow to edit the Tenant named
FABRIC, then click the right arrow to edit the VRF namedTENANT. Finally, click the pencil to edit the VRF namedTENANT. Rename this toCUSTOMER.
Submit the Workspace and Deploy the Configuration
-
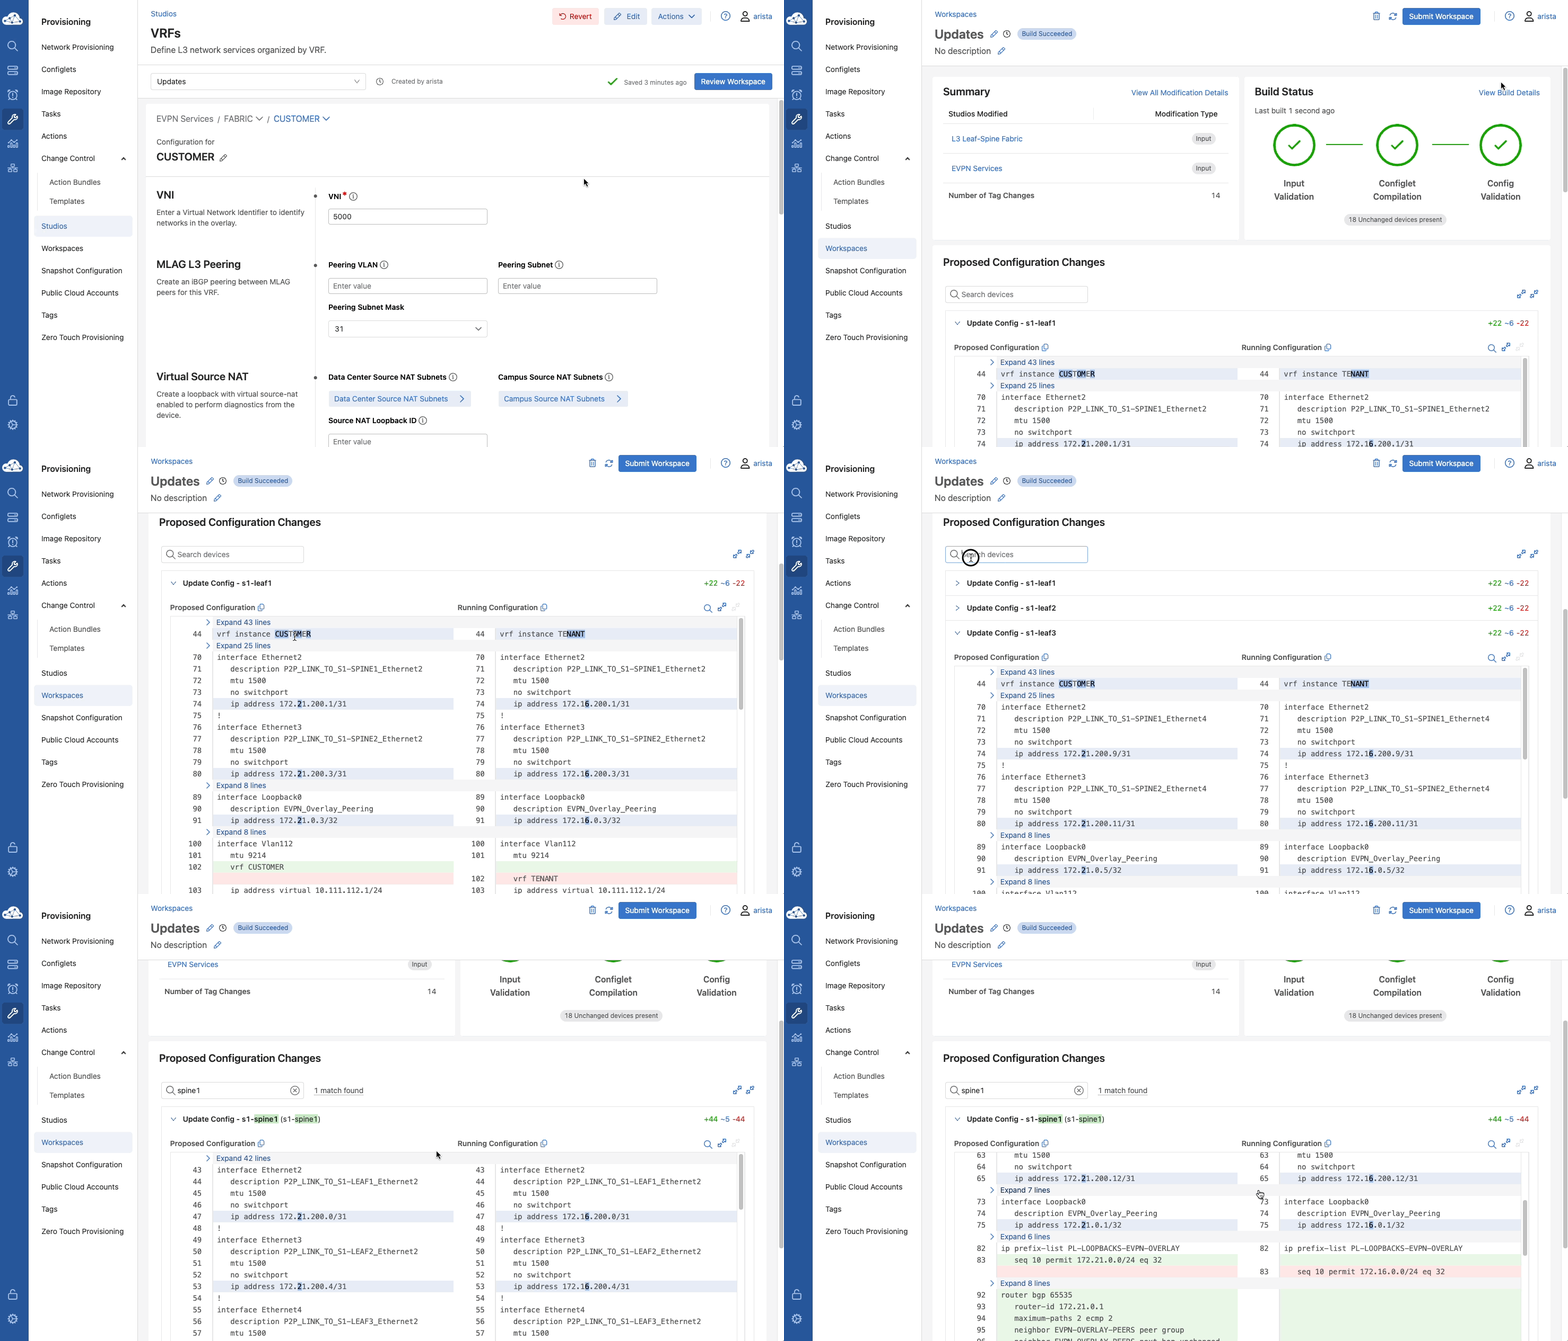
Click Review Workspace in the top right corner. Verify the Workspace builds and validates correctly. You may also review the Proposed Configuration Changes section to review the configuration updates that have been generated via the Studios workflow.
-
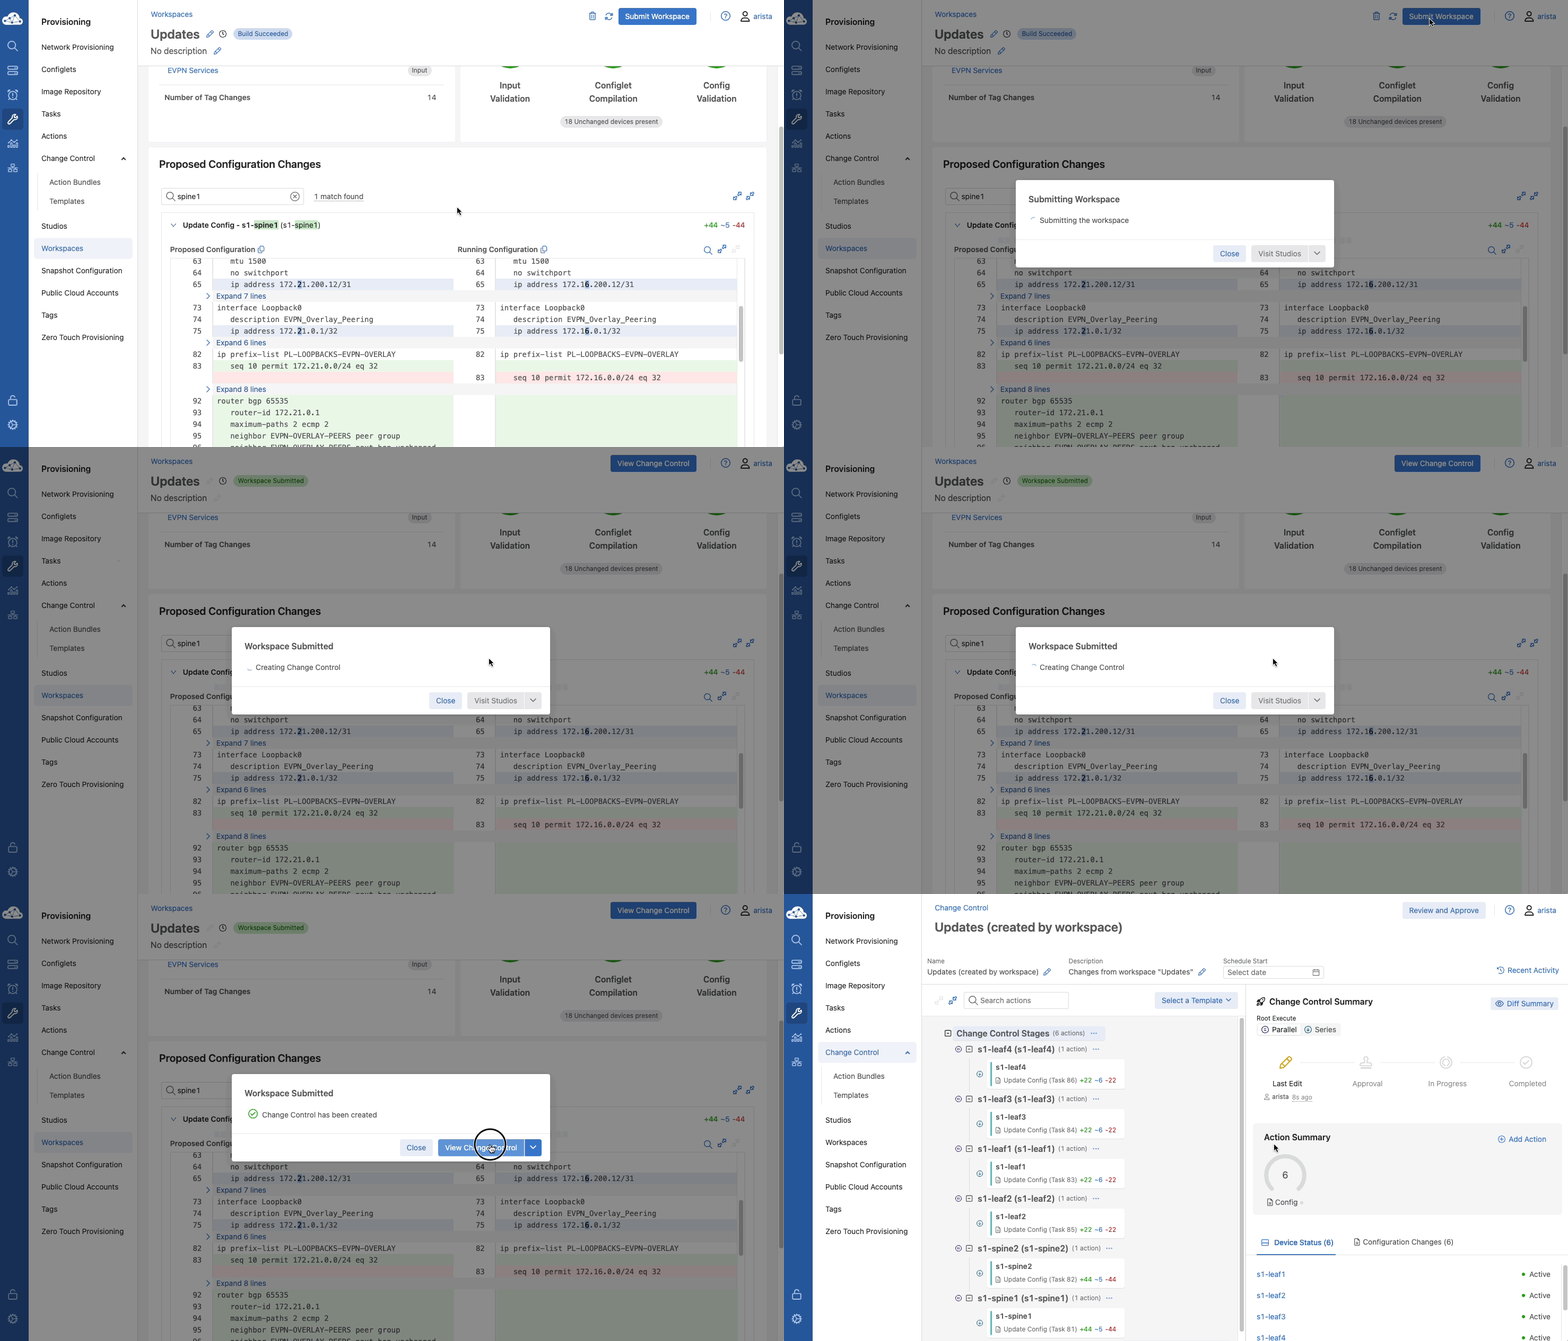
Click Submit Workspace, then View Change Control.
-
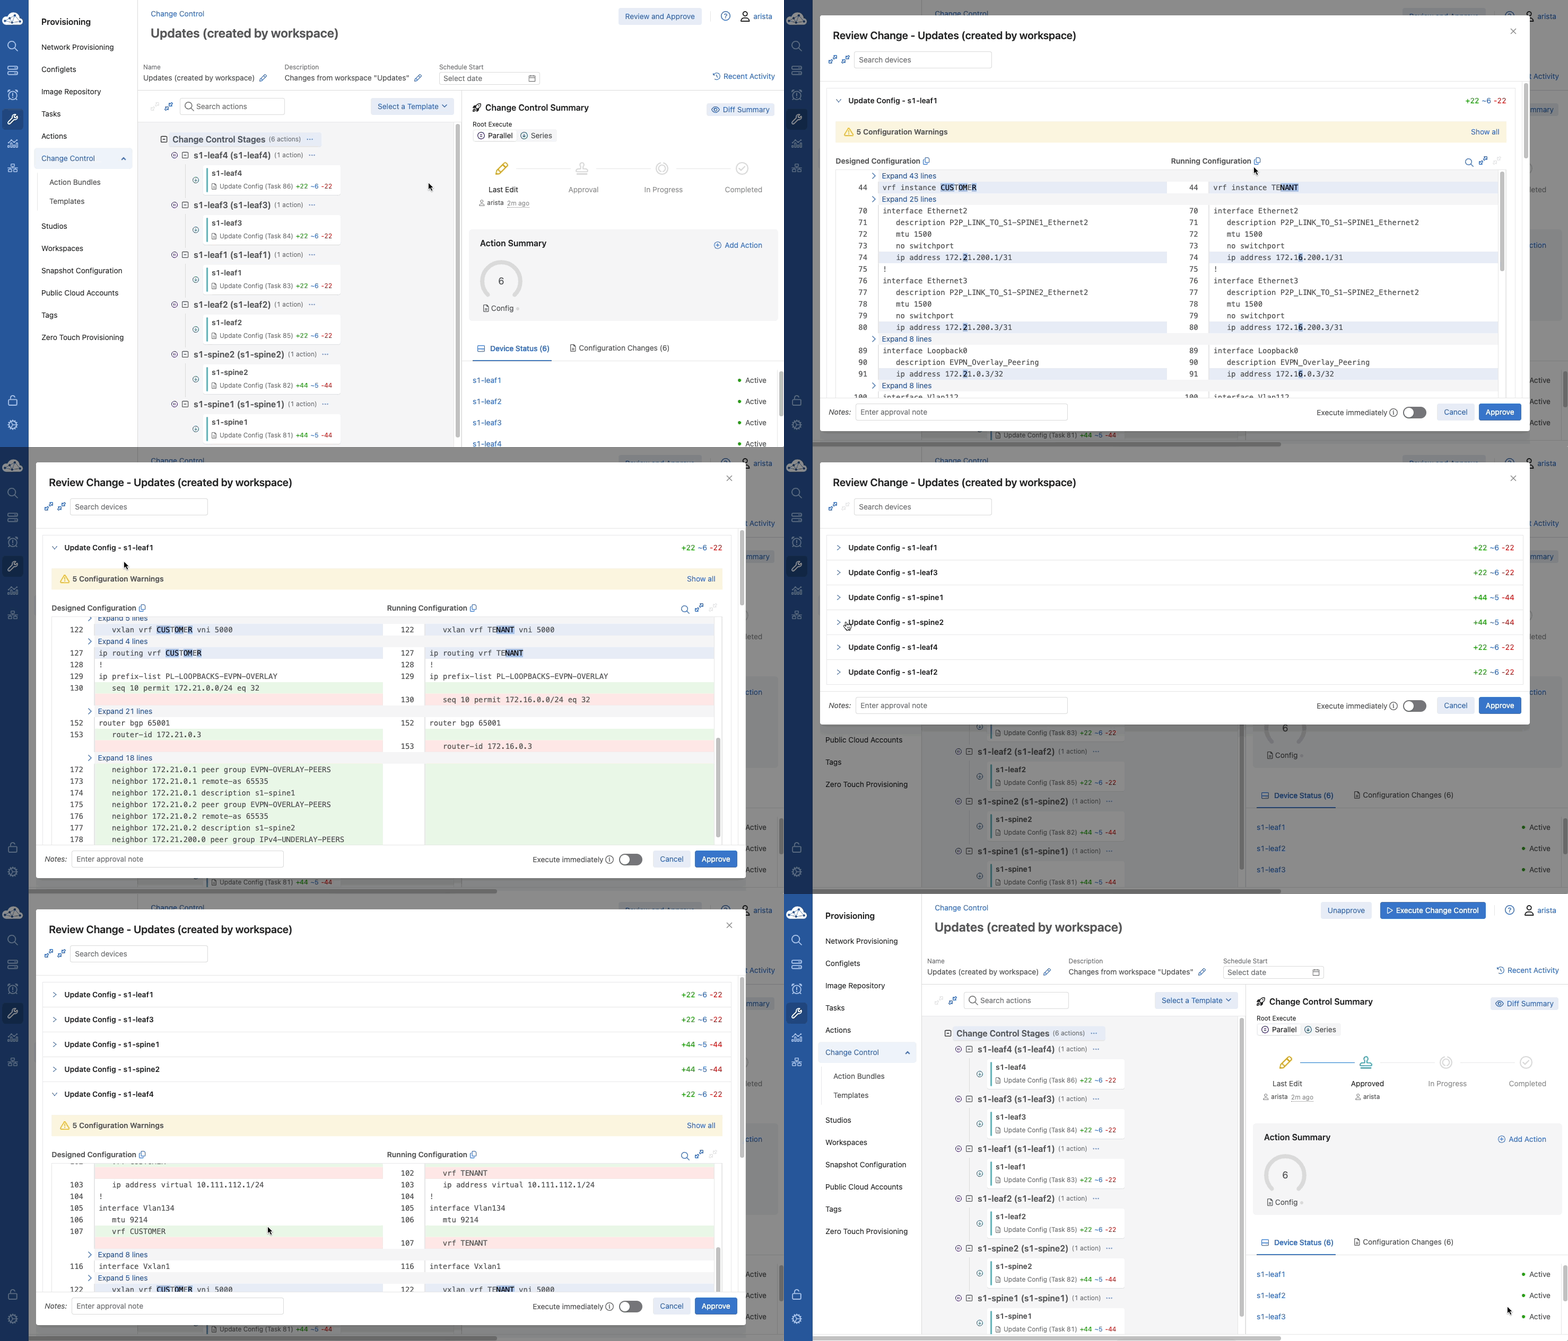
Click Review and Approve in the top right. Review the proposed changes in the Change Control, then click Approve.
-
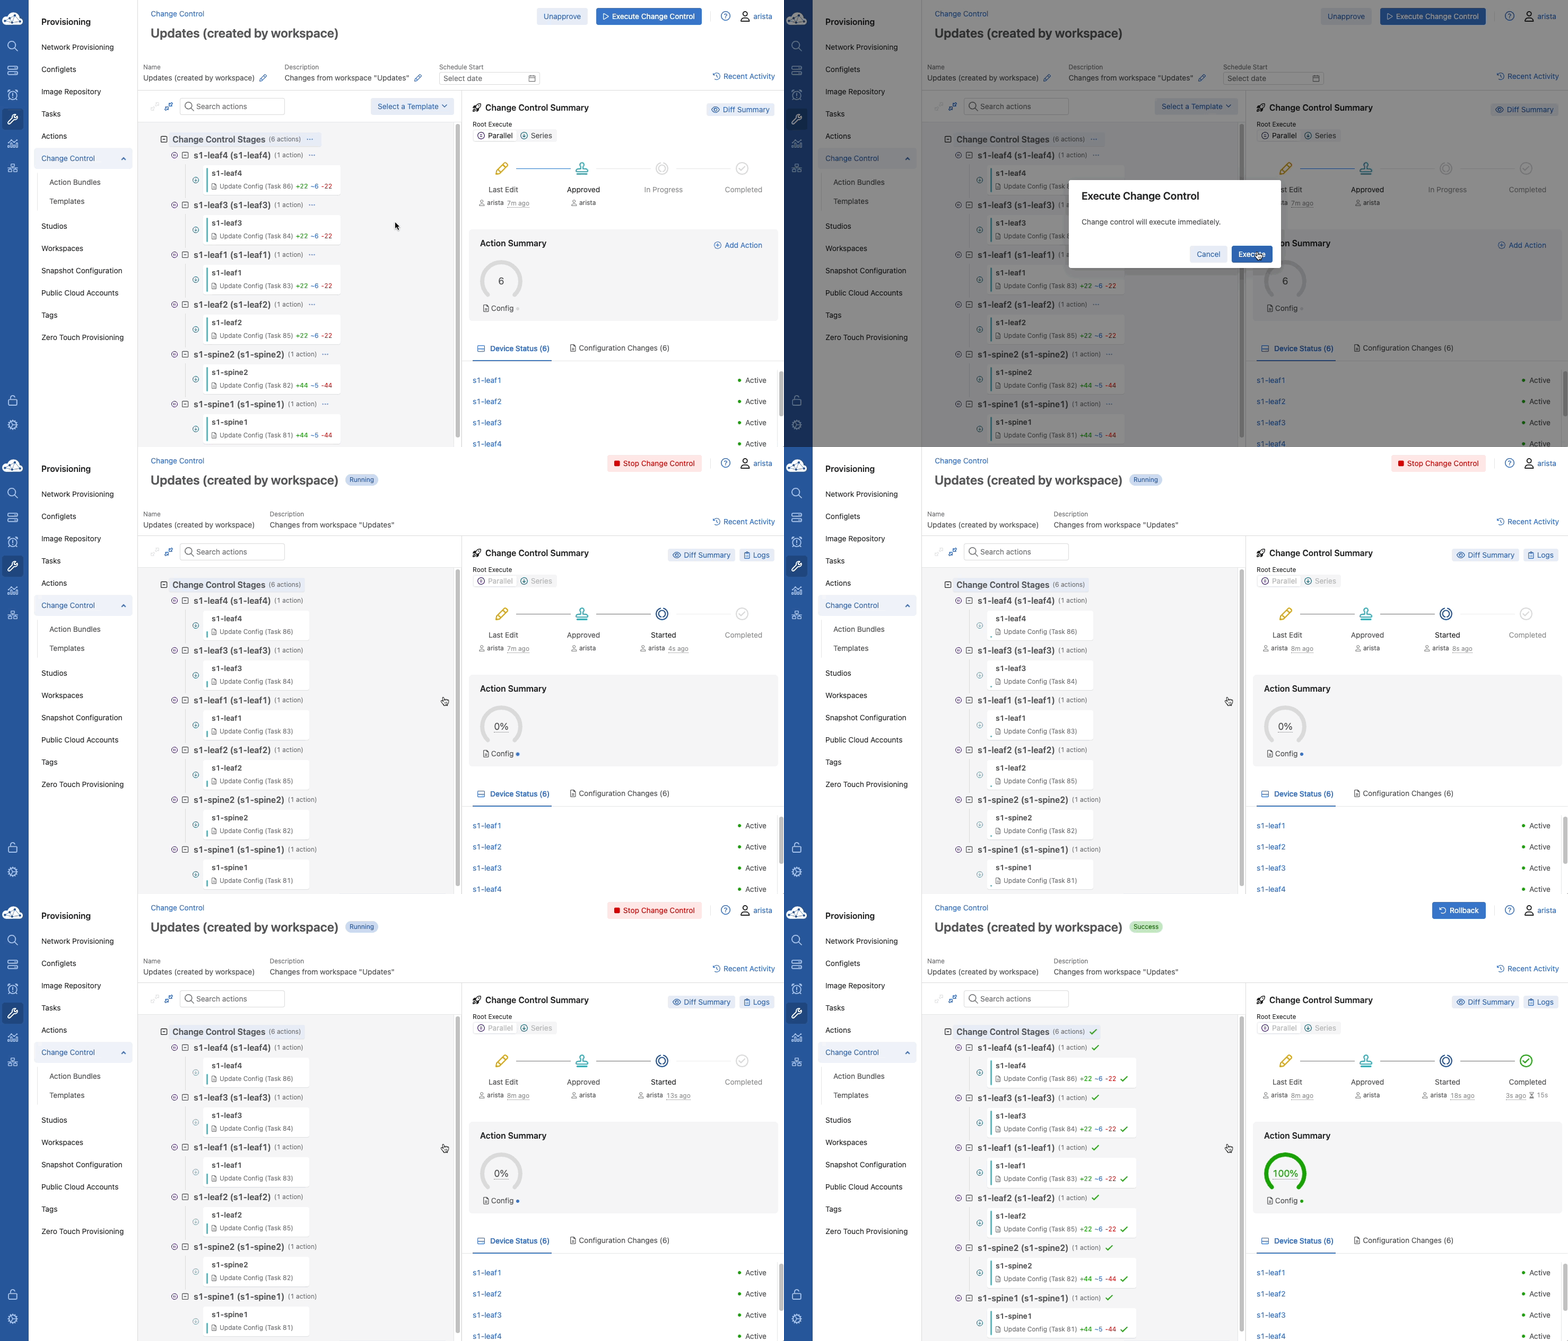
Click Execute Change Control, then click Execute on the pop-up window. Wait for the Change Control to complete.
Verification of Updated Network Settings
Now that we've made our configuration updates through Studios, let's review those changes through the telemetry data in CloudVision that we saw at the beginning of the lab.
-
Navigate back to Devices on the left menu, then Inventory in the navigation bar.
-
Find and click on s1-spine1, then select BGP on the left navigation bar. Here we can see the updated BGP ASN and Neighbor settings. We can also use the timeline view of BGP telemetry to see when the changes occurred.
-
Scroll down on the left navigation bar and select Routed Ports to review the L3 interface settings. Notice again the updated P2P and Loopback addresses.
-
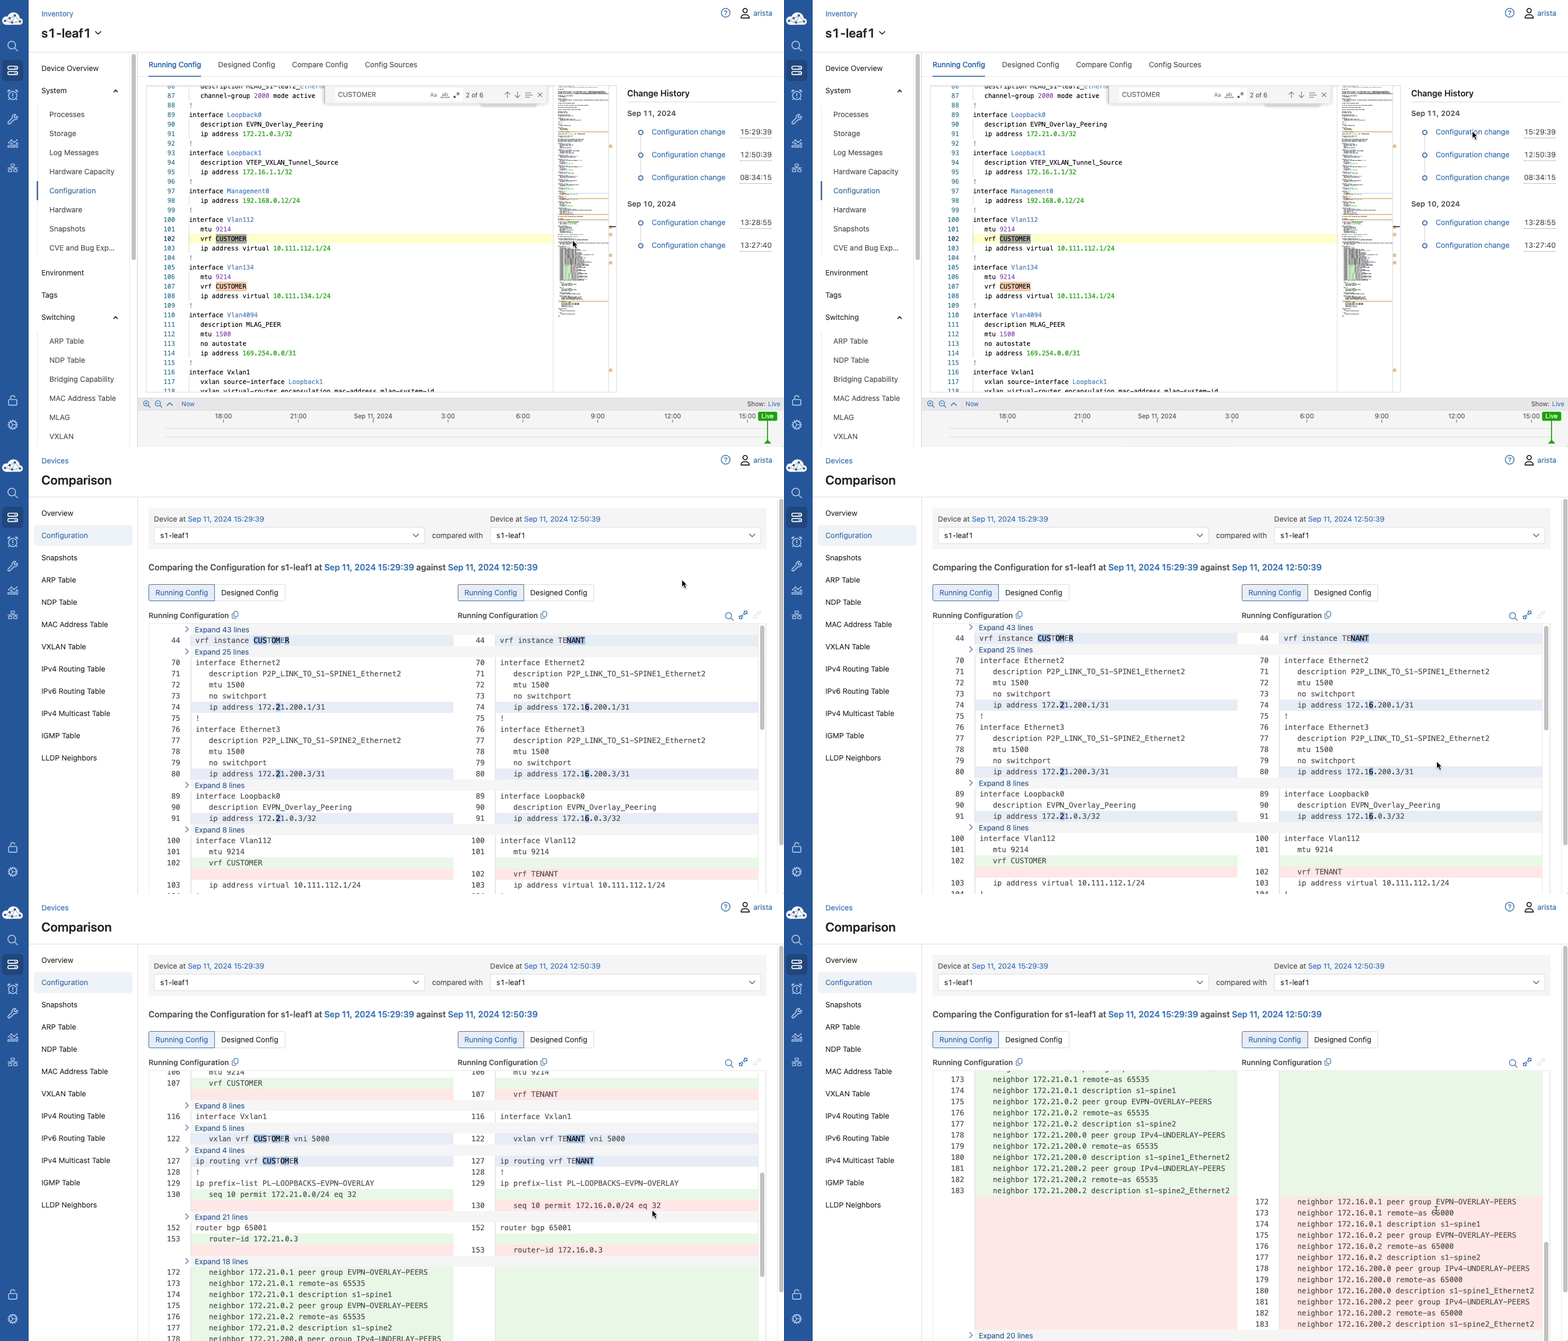
Use the device name pull-down menu to select s1-leaf1, and then click Configuration in the left navigation bar. Review the Running Configuration to confirm the VRF has been renamed to
CUSTOMERand that it is assigned to the two Vlans created previously. -
Notice that CloudVision registers and tracks all configuration changes on the device. You can select the latest change to see the configuration changes pushed via our Studios update.
-
Repeat steps 2-5 for other devices in the fabric as desired.
Success
Lab Complete! You have modified multiple settings inside your L3LS network without requiring intimate knowledge of the command sets needed to make those updates.
