Topology Hierarchy Manager
Within CloudVision, topology hierarchies are a way to customize the topology layout of your environment and devices that are reporting into CloudVision. This deviates from the standard CloudVision topology layout and allows you to more closely align the topology hierarchy, with how the environment really looks. This lab will walk you through the steps to create a custom topology hierarchy to match the dual Data Center ATD environment.
Preparing the Lab
This lab utilizes the Dual DC ATD and doesn't need anything special configuration wise. We are going to use the base ATD environment as it comes, and just modify the topology hierarchy in CloudVision. Click the CVP link on your main ATD screen to access CloudVision.
We can verify the default topology layout as follows:
-
In CloudVision, on the left hand side menu, click
Topology. -
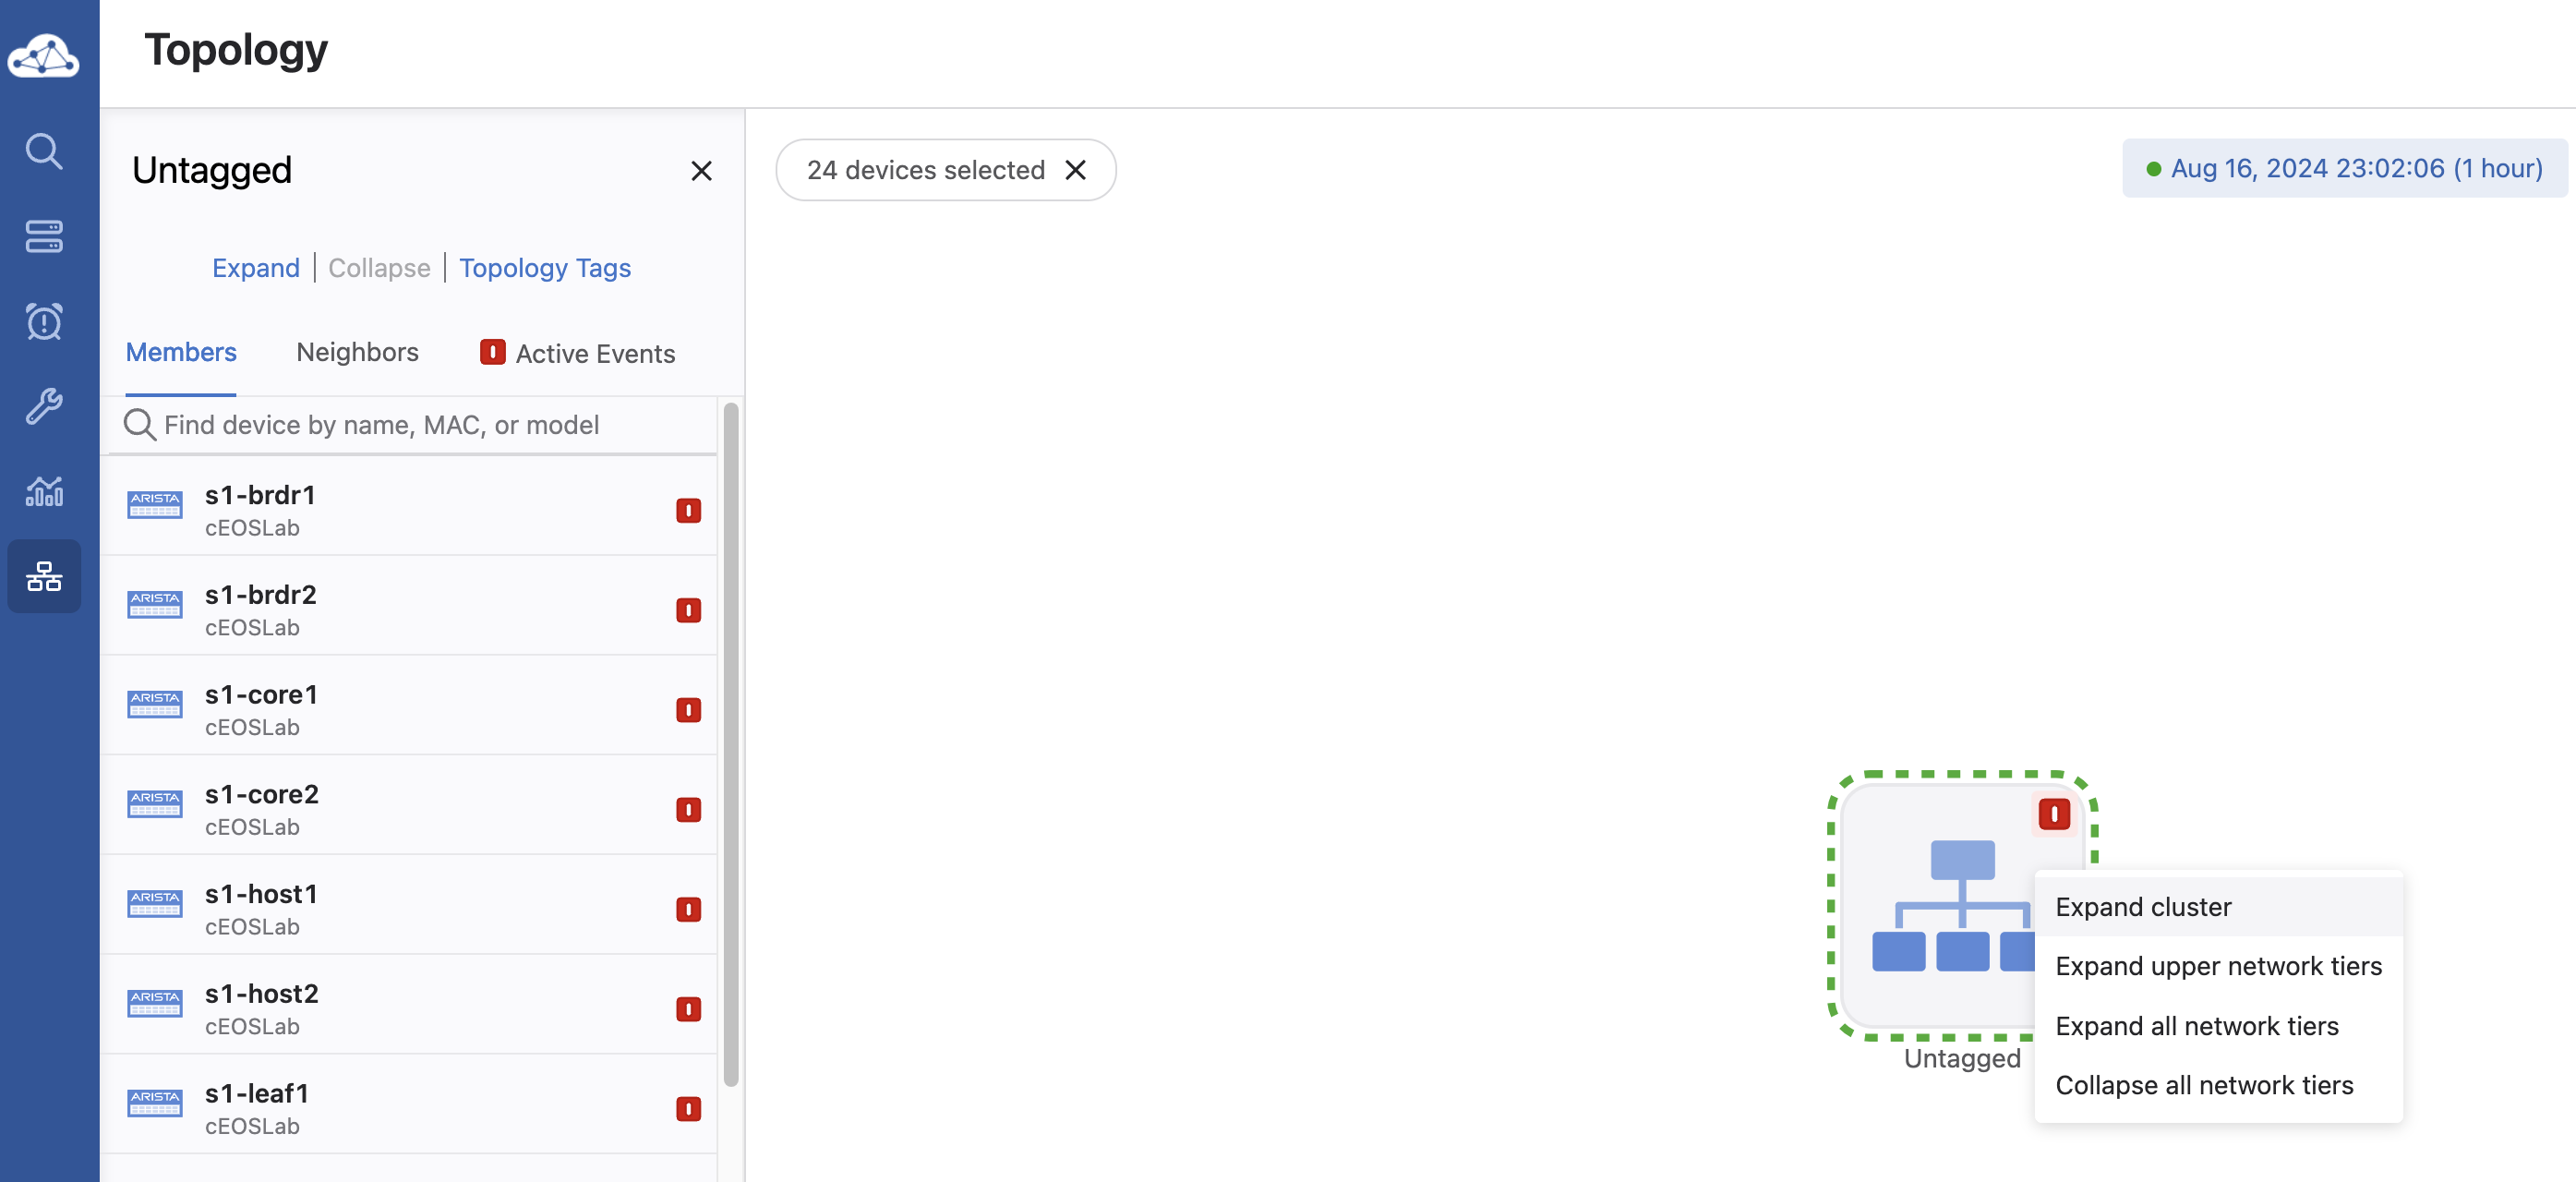
From the Topology page, right click the icon that says untagged in the center, and click
Expand Cluster. -
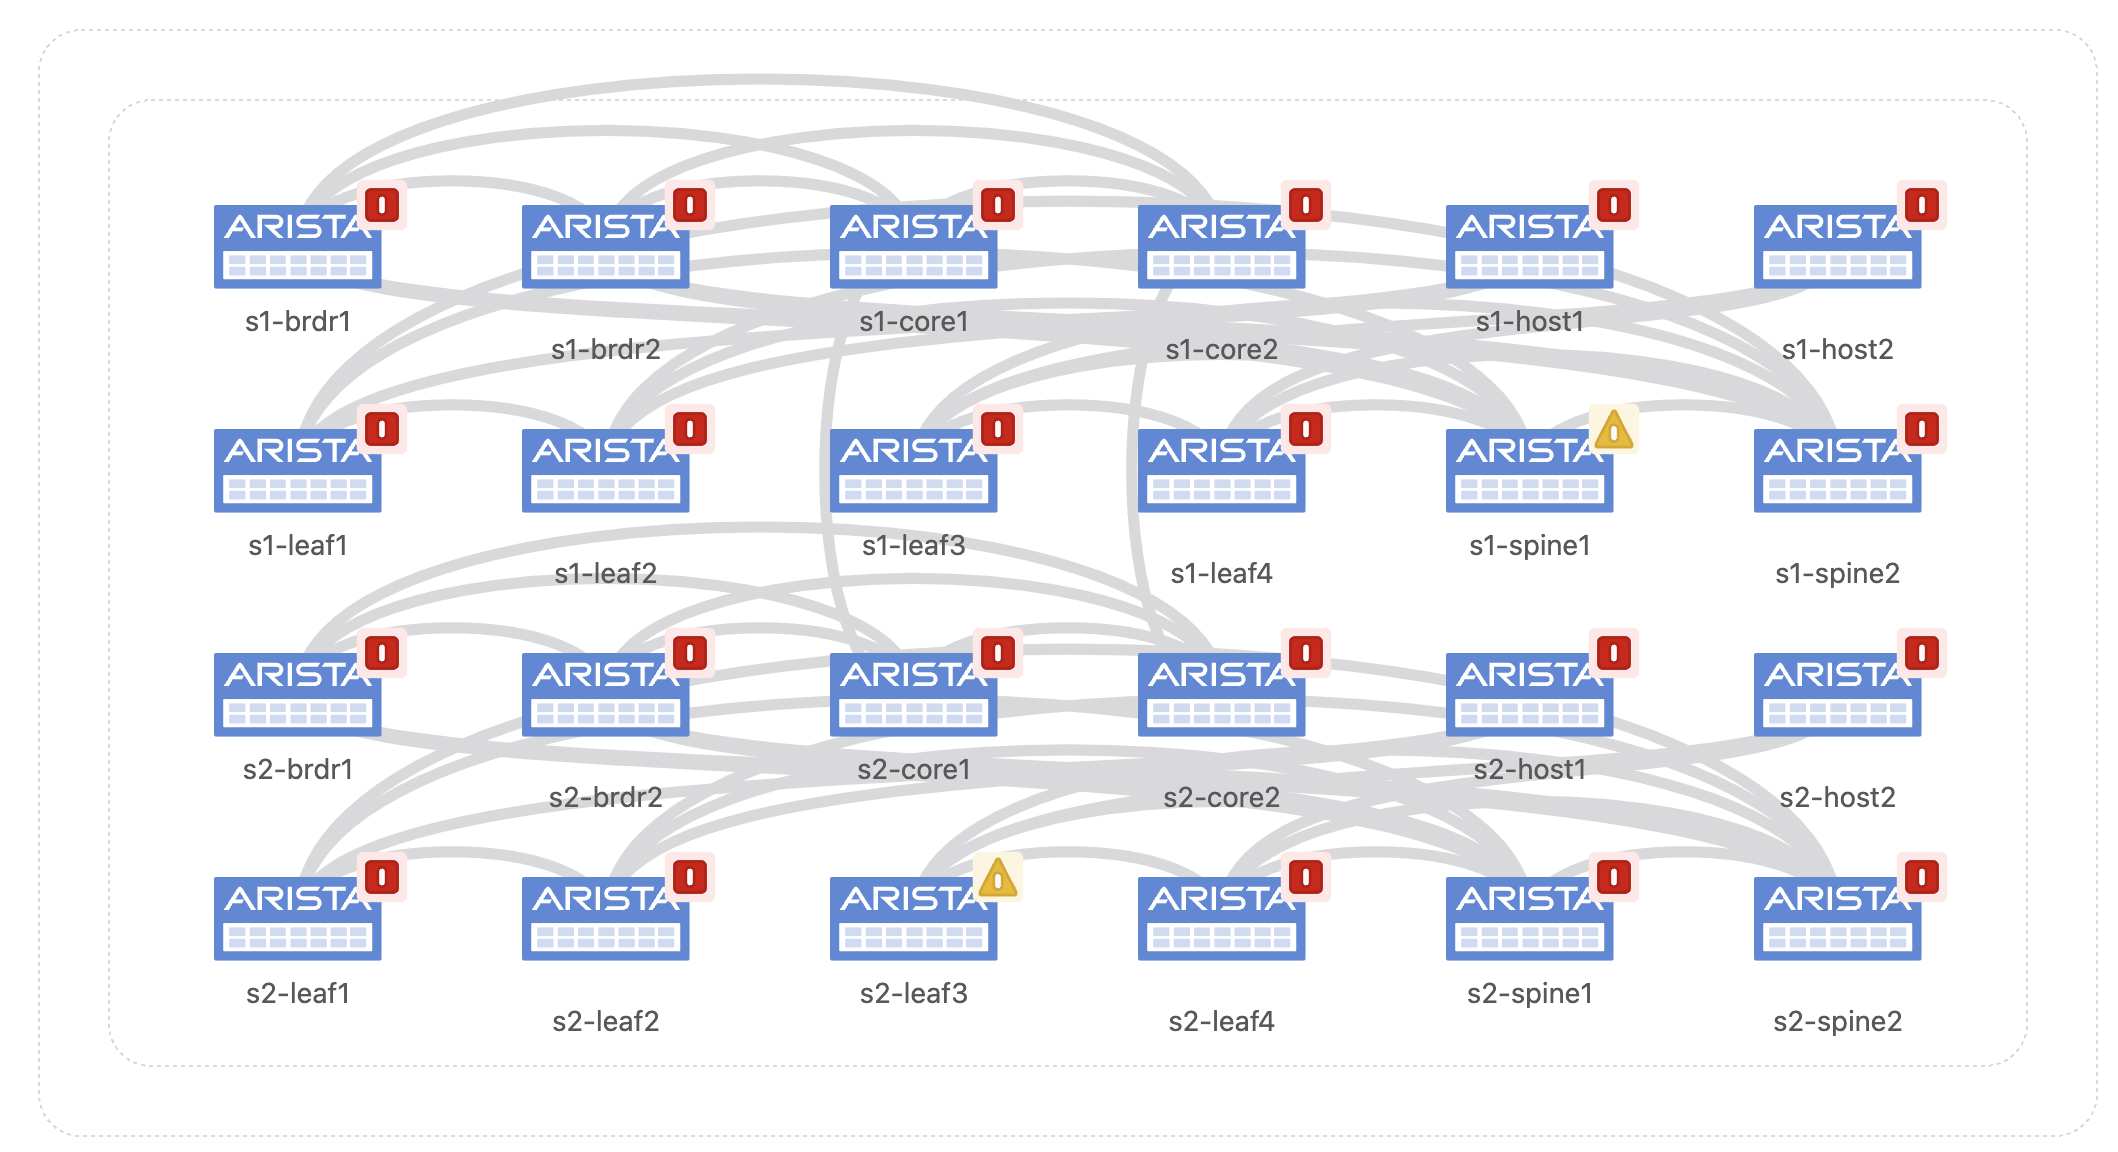
Now we can see the default, unorganized topology view.
Lab Tasks
Now lets create a custom topology hierarchy that more accurately reflects the network layout for this ATD environment.
-
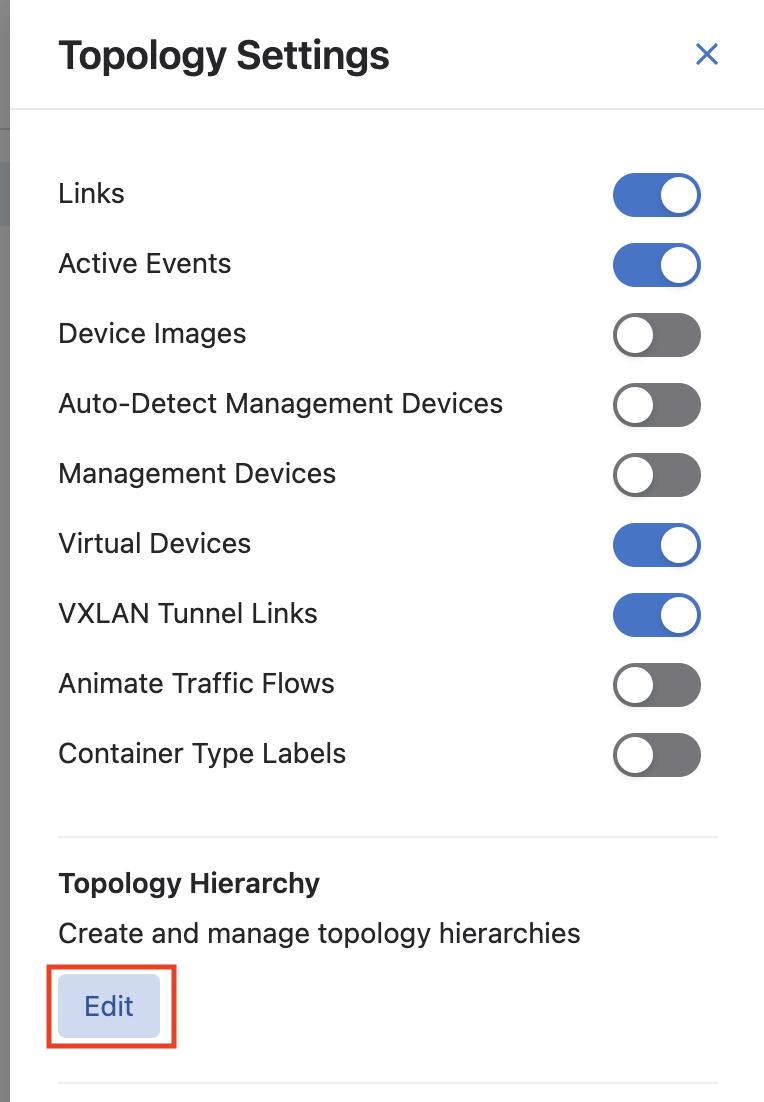
From the Topology screen, click the
 to open Topology Settings, and click
 Editunder the Topology Hierarchy section. -
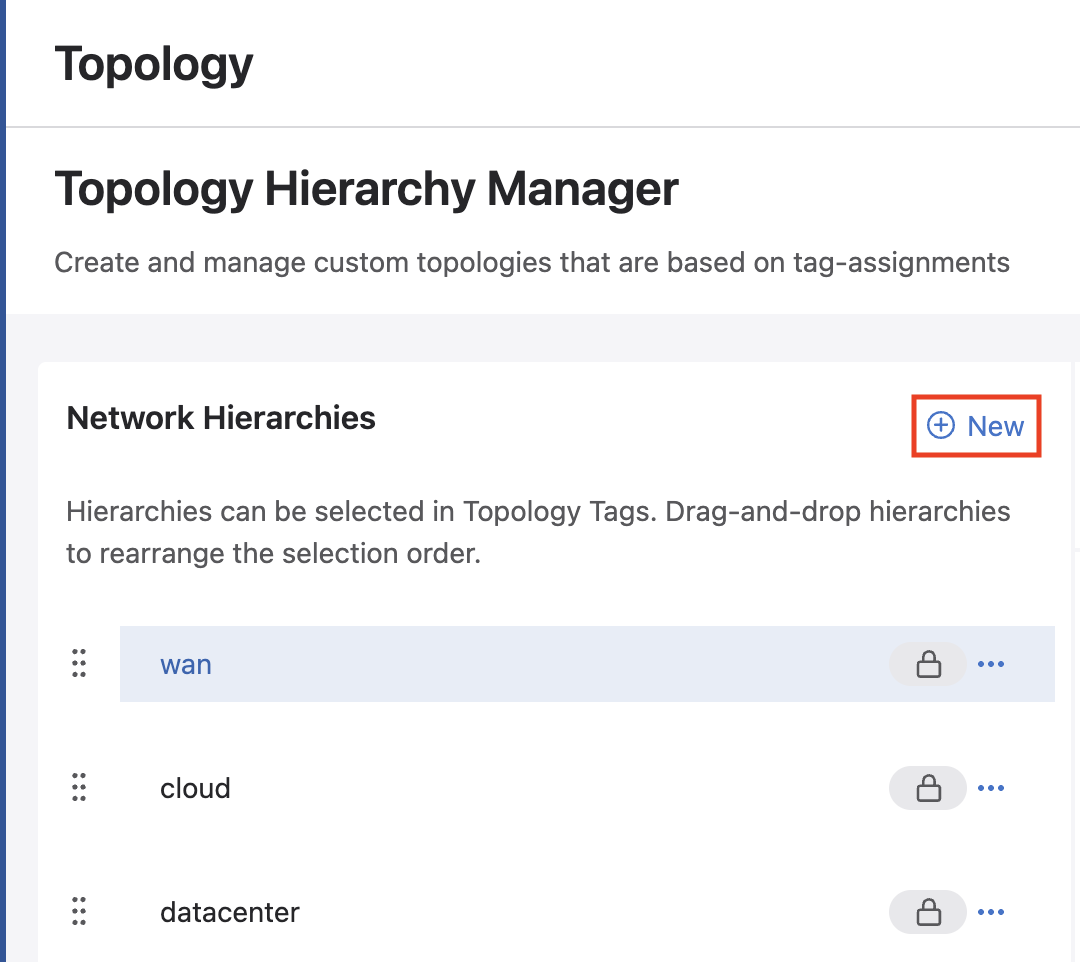
In the Topology Hierarchy Manager screen that opens, we can see some existing network hierarchies, however, we are going to create a custom one, so click
New. -
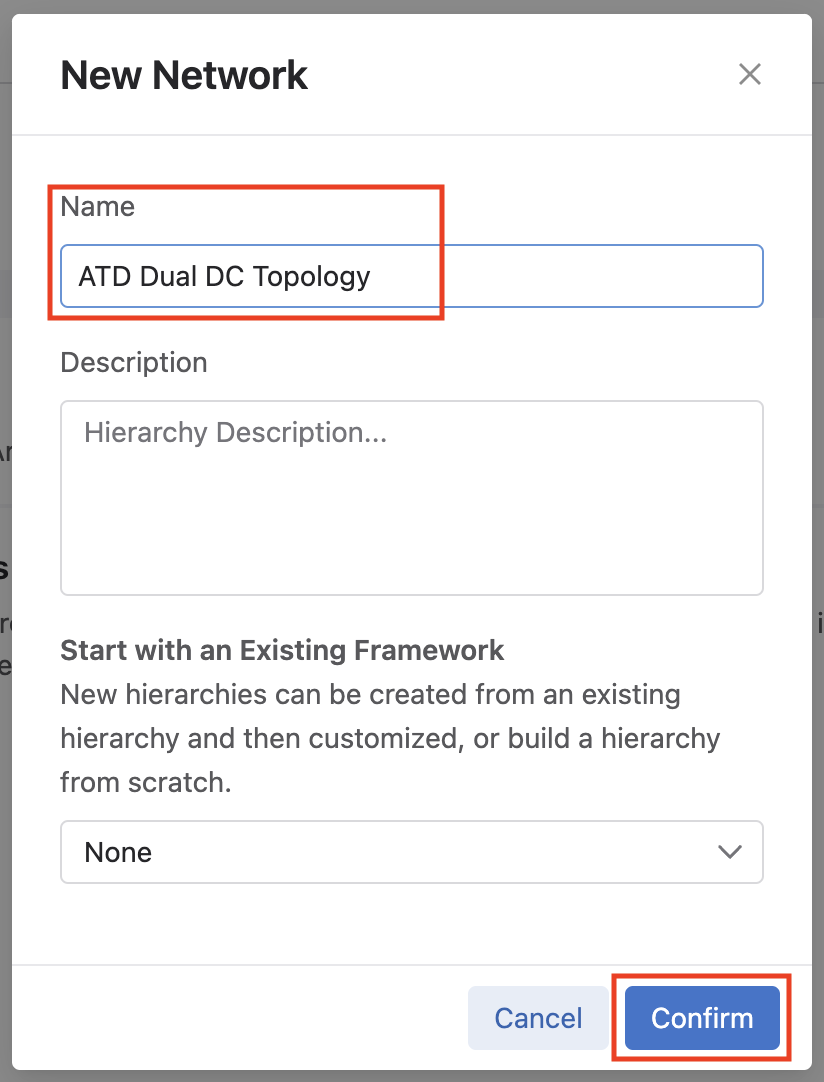
In the New Network window, give your hierarchy a name and click
Confirm. -
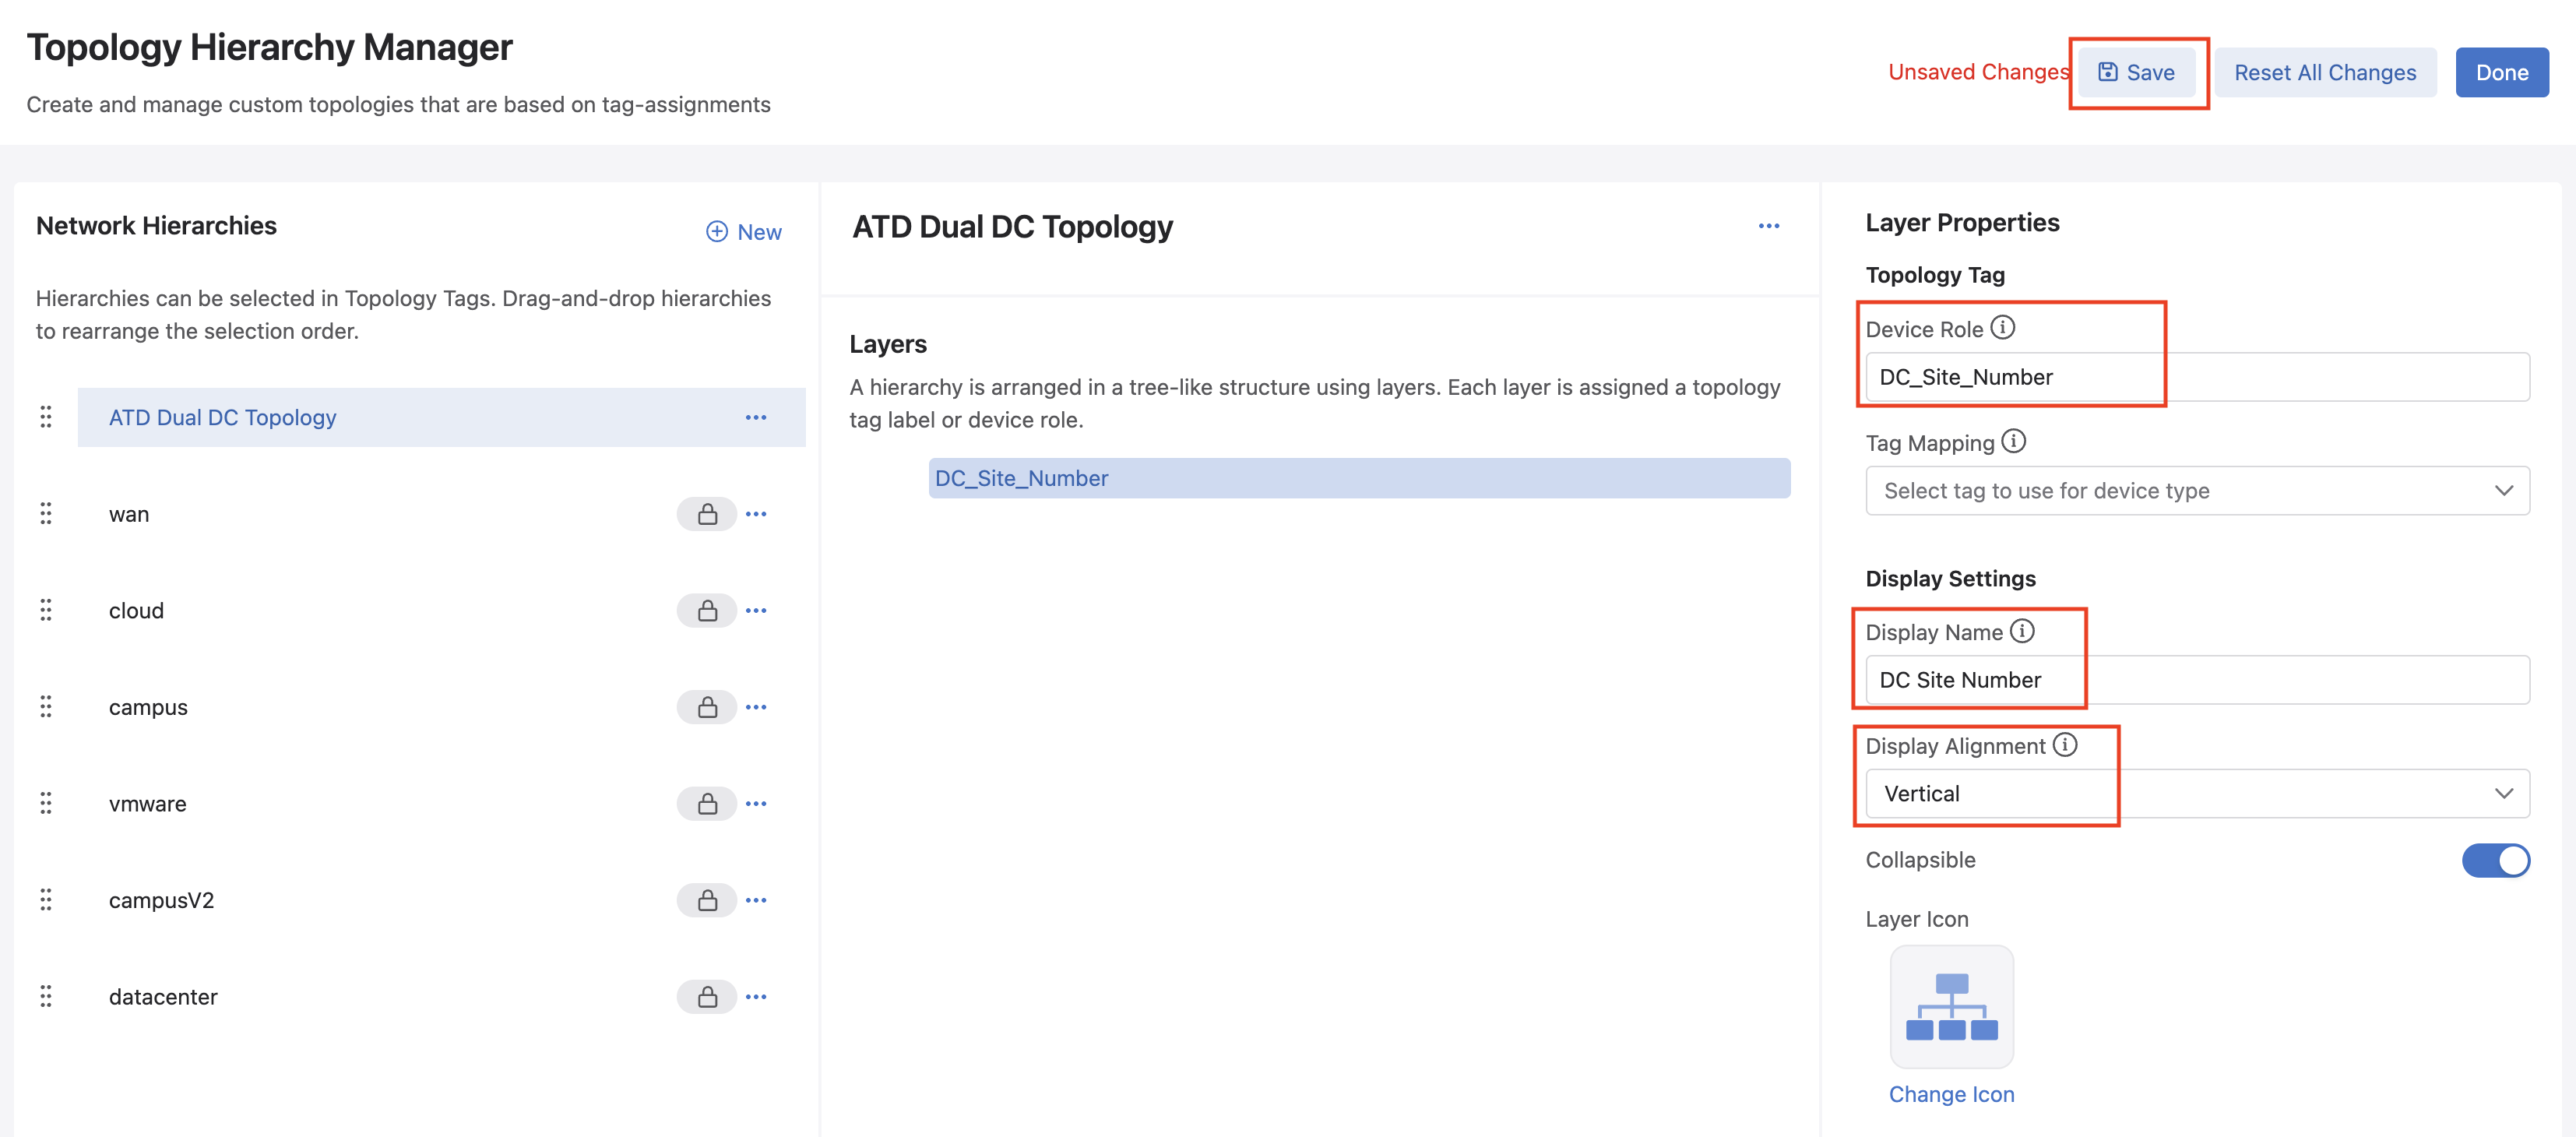
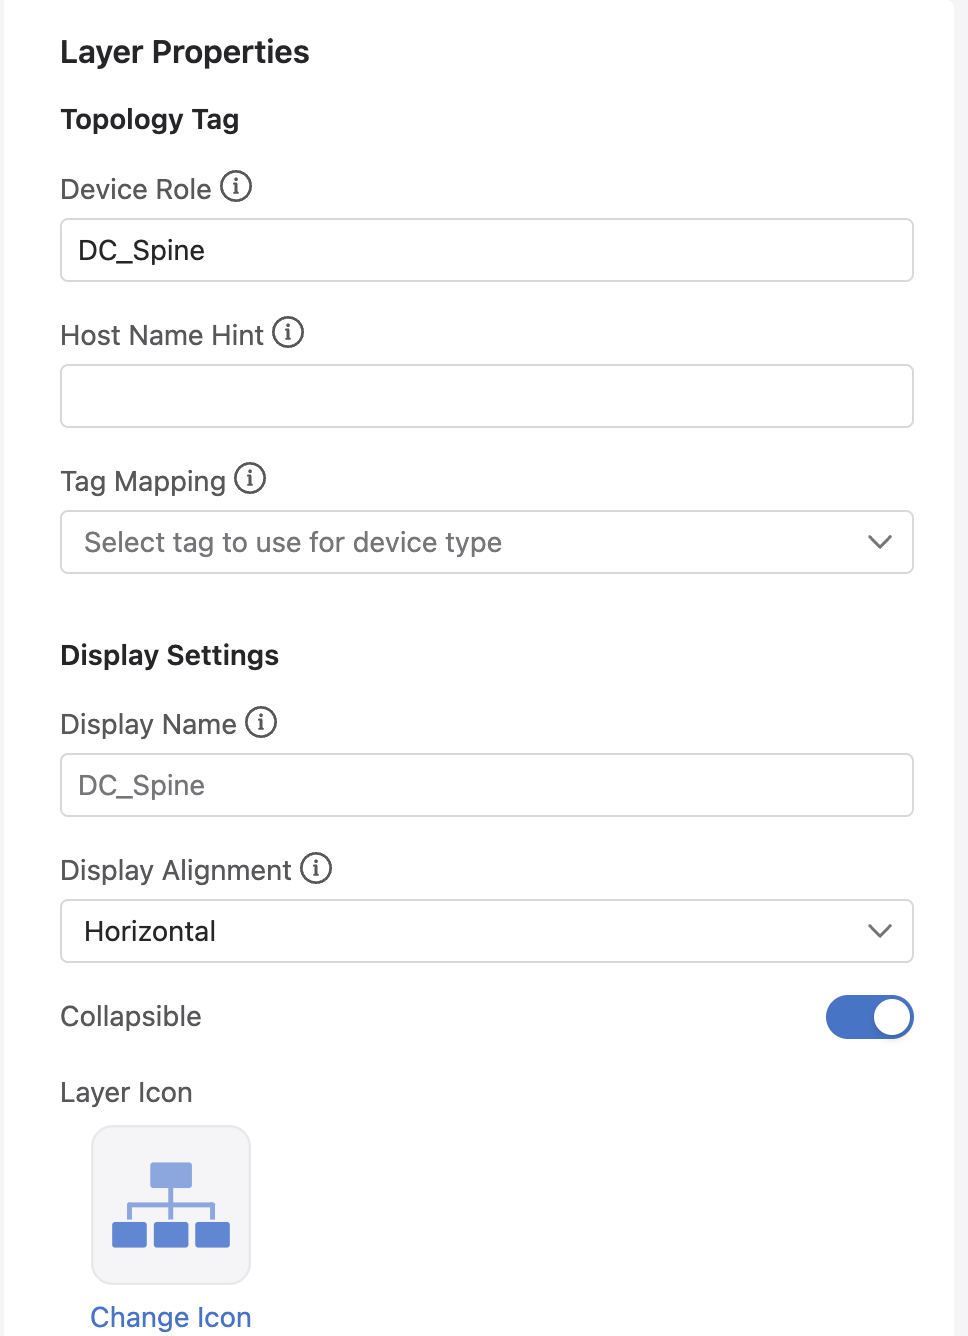
Click the top layer in your new hierarchy, which should say Custom. On the Layer Properties menu on the far right, we will change the following settings.
-
Device Role:DC_Site_Number -
Display Name:DC Site NumberSyntax
Mind the spaces. While the
Device Rolefield CAN NOT have any spaces, theDisplay Namefield can. -
Display Alignment:Vertical
Once you have changed these settings, click
Saveto save your changes. -
-
At this point we will create the
layersandsublayersthat creates the menu system that appears on the Topology page. Thelayersandsublayerswe create will be left with horizontal alignment. Create them as specified below.-
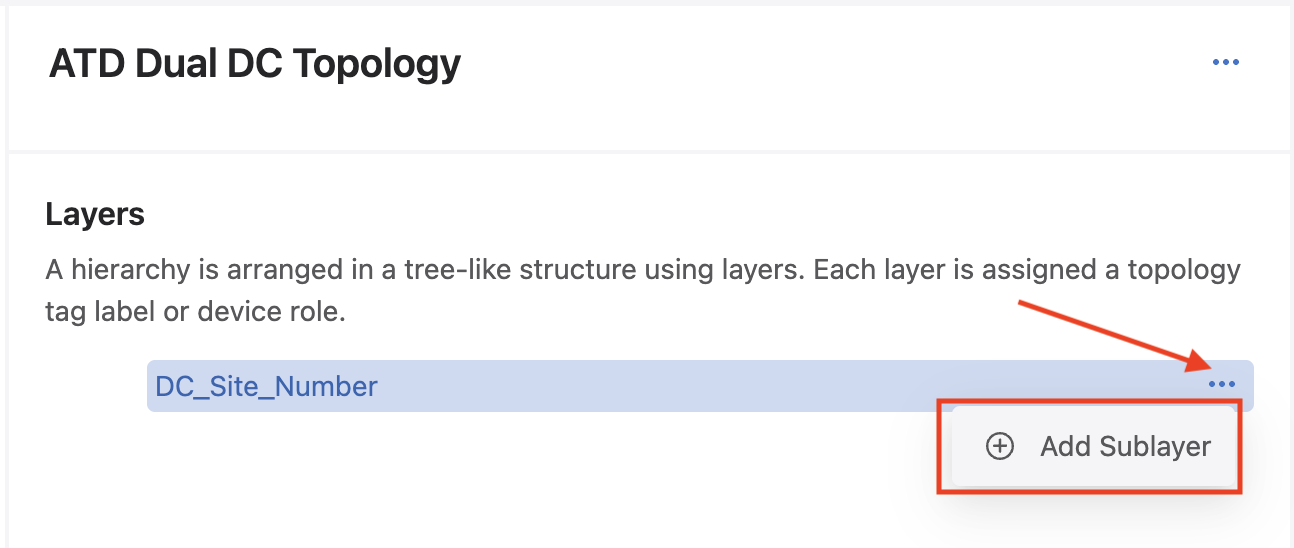
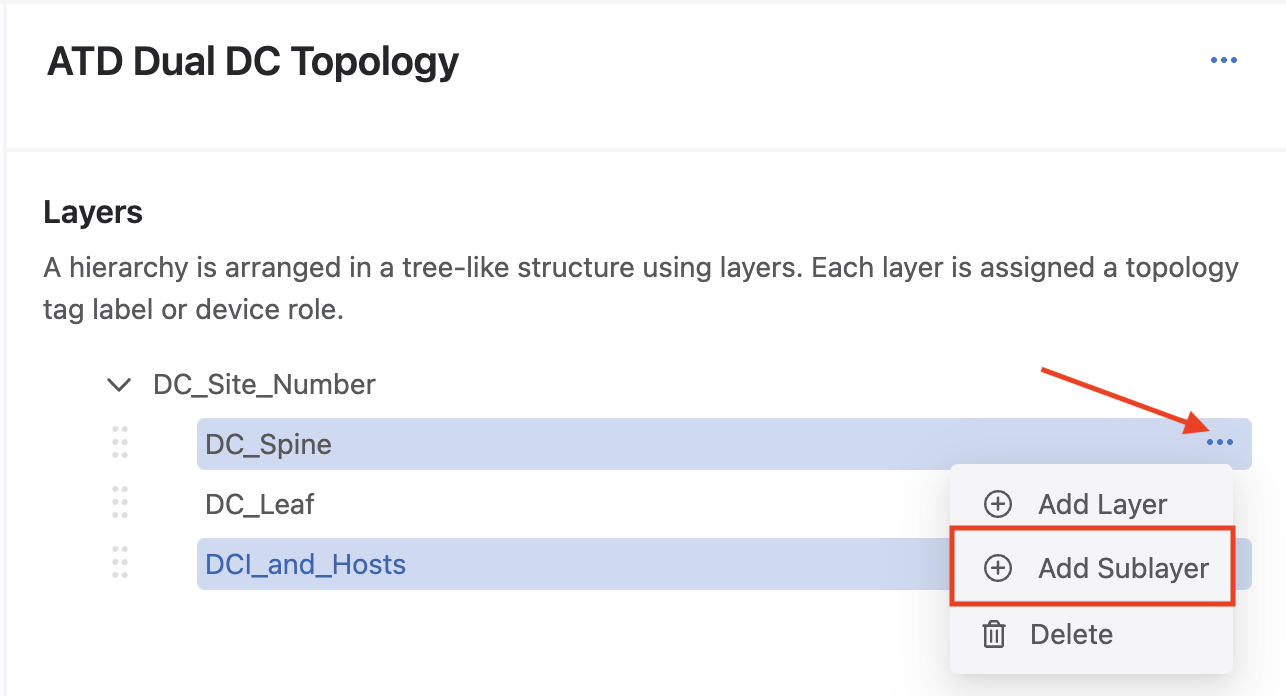
Create the following
layersby clicking the 3 ellipses next to DC_Site_Number, and clicking Add Sublayer.Device Role:DC_SpineDevice Role:DC_LeafDevice Role:DCI_and_Hosts
Auto Populate
When you type in the
Device Role, theDisplay Namefield will auto-populate with the same content. You can just type over it to change the name to something else. -
Create the following
sublayersby clicking the 3 ellipses next to eachlayeryou just created, and clicking Add Sublayer.- Under layer DC_Spine:
Device Role:spine
- Under layer DC_Leaf:
Device Role:leaf
- Under layer DCI_and_Hosts:
Device Role:leafDevice Role:endpoint
- Under layer DC_Spine:
-
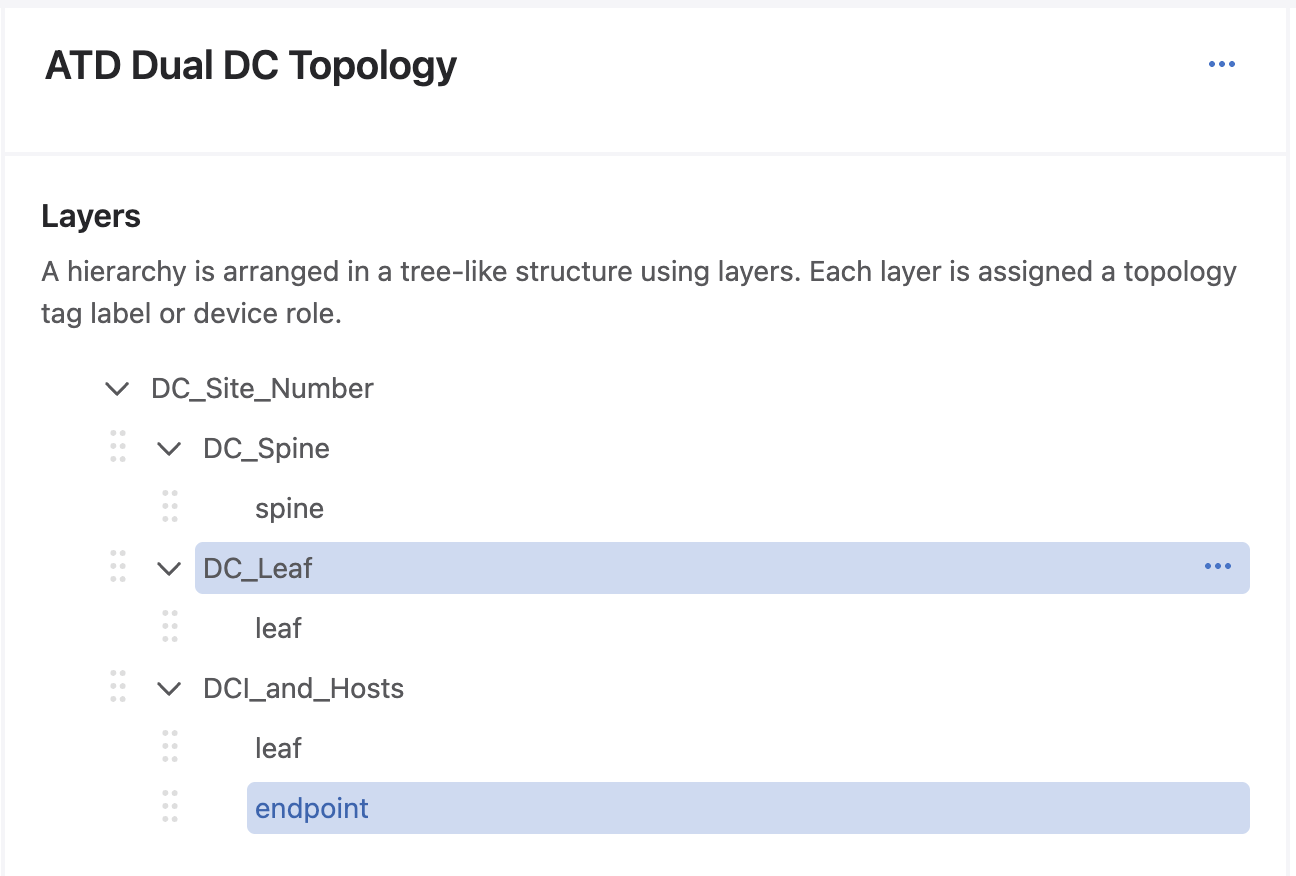
When complete, your
layersshould look like below. ClickSaveto save your changes and thenDoneto exit back to the Topology Overview.
-
-
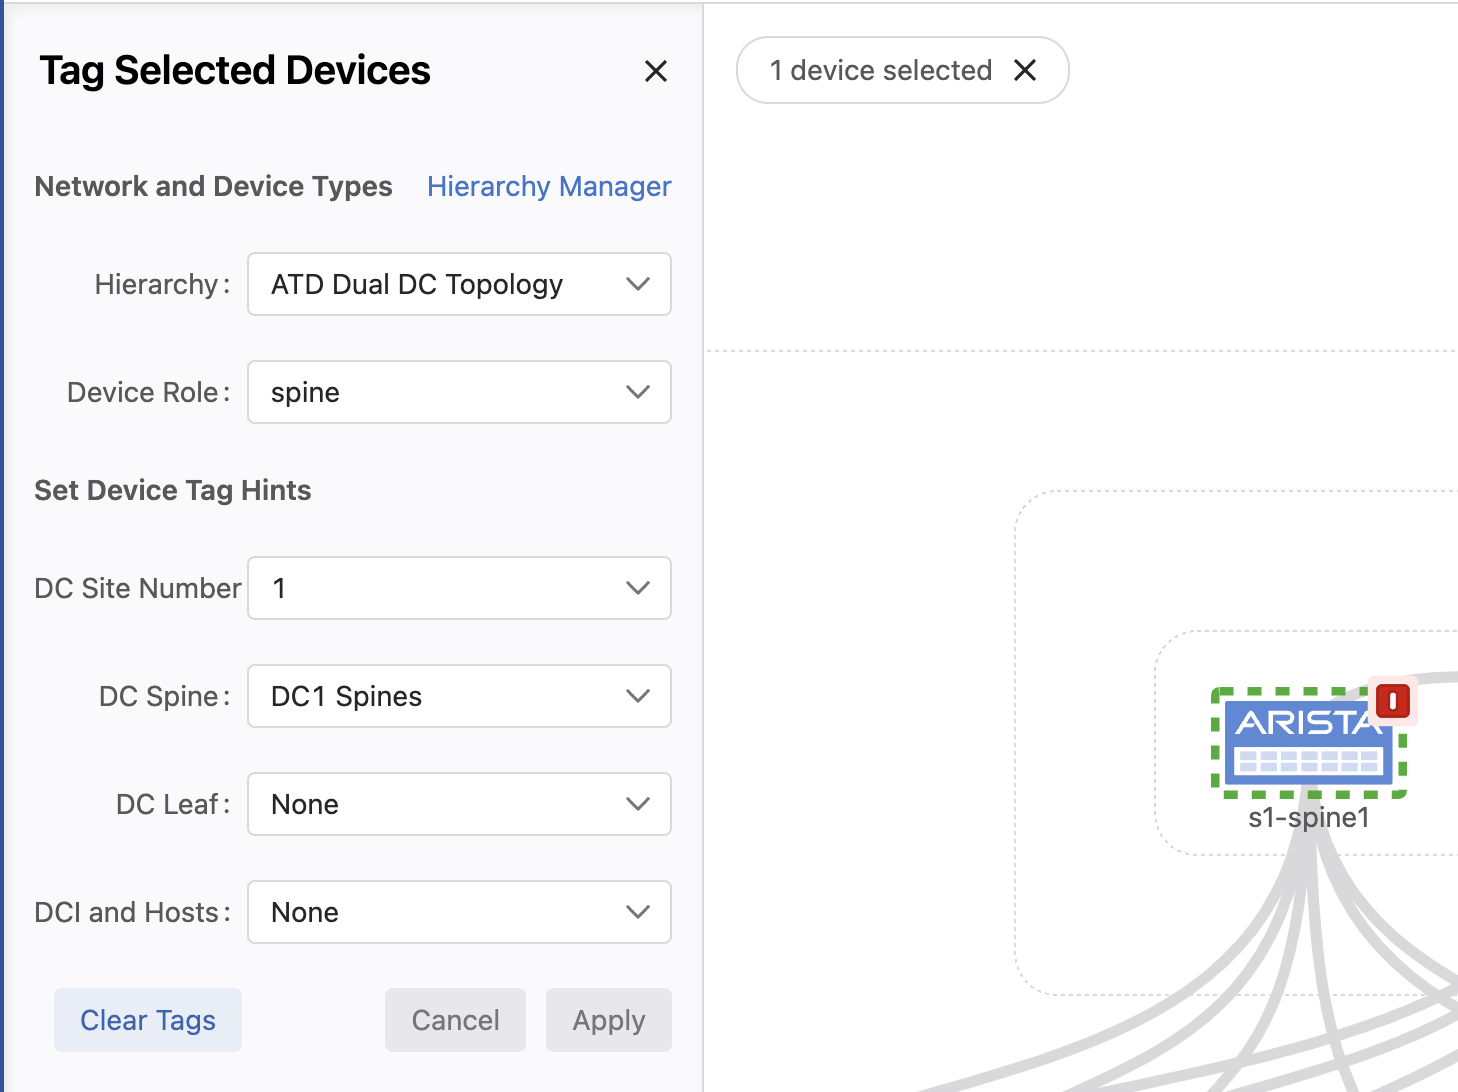
At this point we are ready to tag our devices to create the topology view. This is done by clicking the device, then clicking
Tags, then assigning the tags. At this moment, the tags do not exist yet so we will create them the first time, and then the tags will show in the dropdown menu for subsequent devices. The tags will be assigned as follows:Container Arrangement
Containers are arranged alphabetically, left to right. To get the DCI leafs and Border leafs close to each other, create the container names with that in mind
- All Devices
Hierarchy:ATD Dual DC Topology (Or whatever you named yours if something different)
- s1-spine1, s1-spine2
Device Role:spineDC Site Number:1DC Spine:DC1 Spines
- s1-leaf1, s1-leaf2, s1-leaf3, s1-leaf4
Device Role:leafDC Site Number:1DC Leaf:DC1 C1 Leafs
- s1-brdr1, s1-brdr2
Device Role:leafDC Site Number:1DC Leaf:DC1 C2 Border Leafs
- s1-host1, s1-host2
Device Role:endpointDC Site Number:1DCI and Hosts:DC1 C1 Hosts
- s1-core1, s1-core2
Device Role:leafDC Site Number:1DCI and Hosts:DC1 C2 DCI Leafs
- s2-spine1, s2-spine2
Device Role:spineDC Site Number:2DC Spine:DC2 Spines
- s2-leaf1, s2-leaf2, s2-leaf3, s2-leaf4
Device Role:leafDC Site Number:2DC Leaf:DC2 C2 Leafs
- s2-brdr1, s2-brdr2
Device Role:leafDC Site Number:2DC Leaf:DC2 C1 Border Leafs
- s2-host1, s2-host2
Device Role:endpointDC Site Number:1DCI and Hosts:DC2 C2 Hosts
- s2-core1, s2-core2
Device Role:leafDC Site Number:1DCI and Hosts:DC2 C1 DCI Leafs
- All Devices
Test
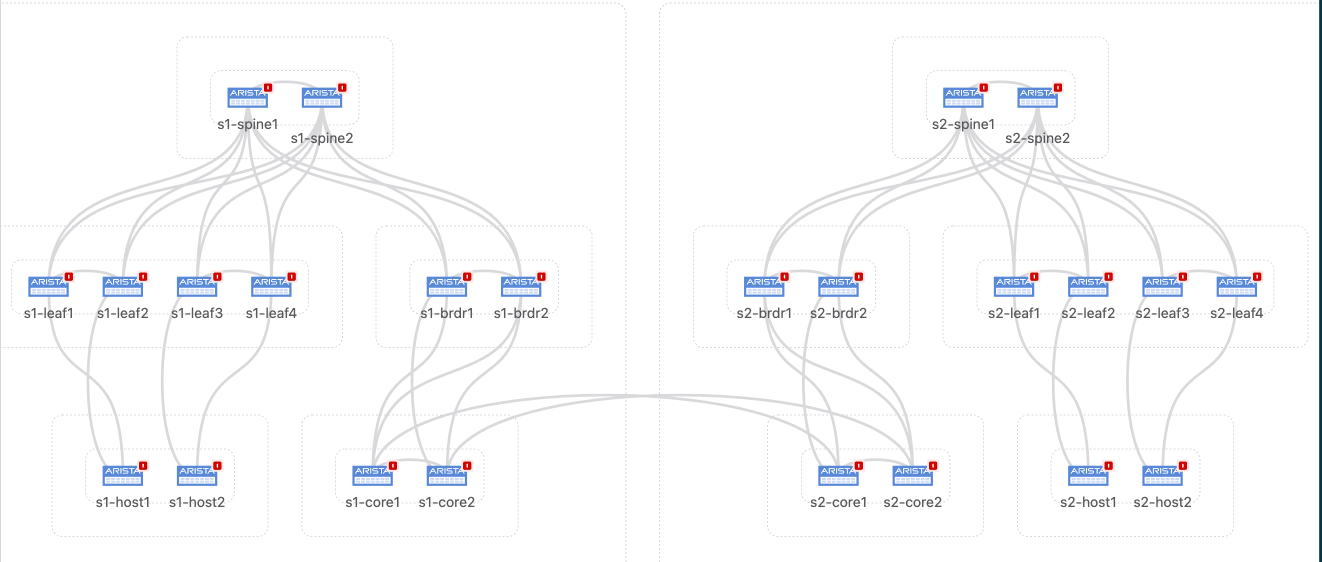
Once you have assigned the correct tags for every device and you zoom out, your topology should look like below, which looks just like the ATD Dual DC network diagram.
Success
Lab Complete!
