CVP Configlet, Change Control, and Rollback
Let's create a new CloudVision configlet. CloudVision configlets are snippets of configuration that are used to create a switch configuration.
All of the switches have a base Configlet. Additional Configlets have been defined for AAA and VLANs.
Getting Started
-
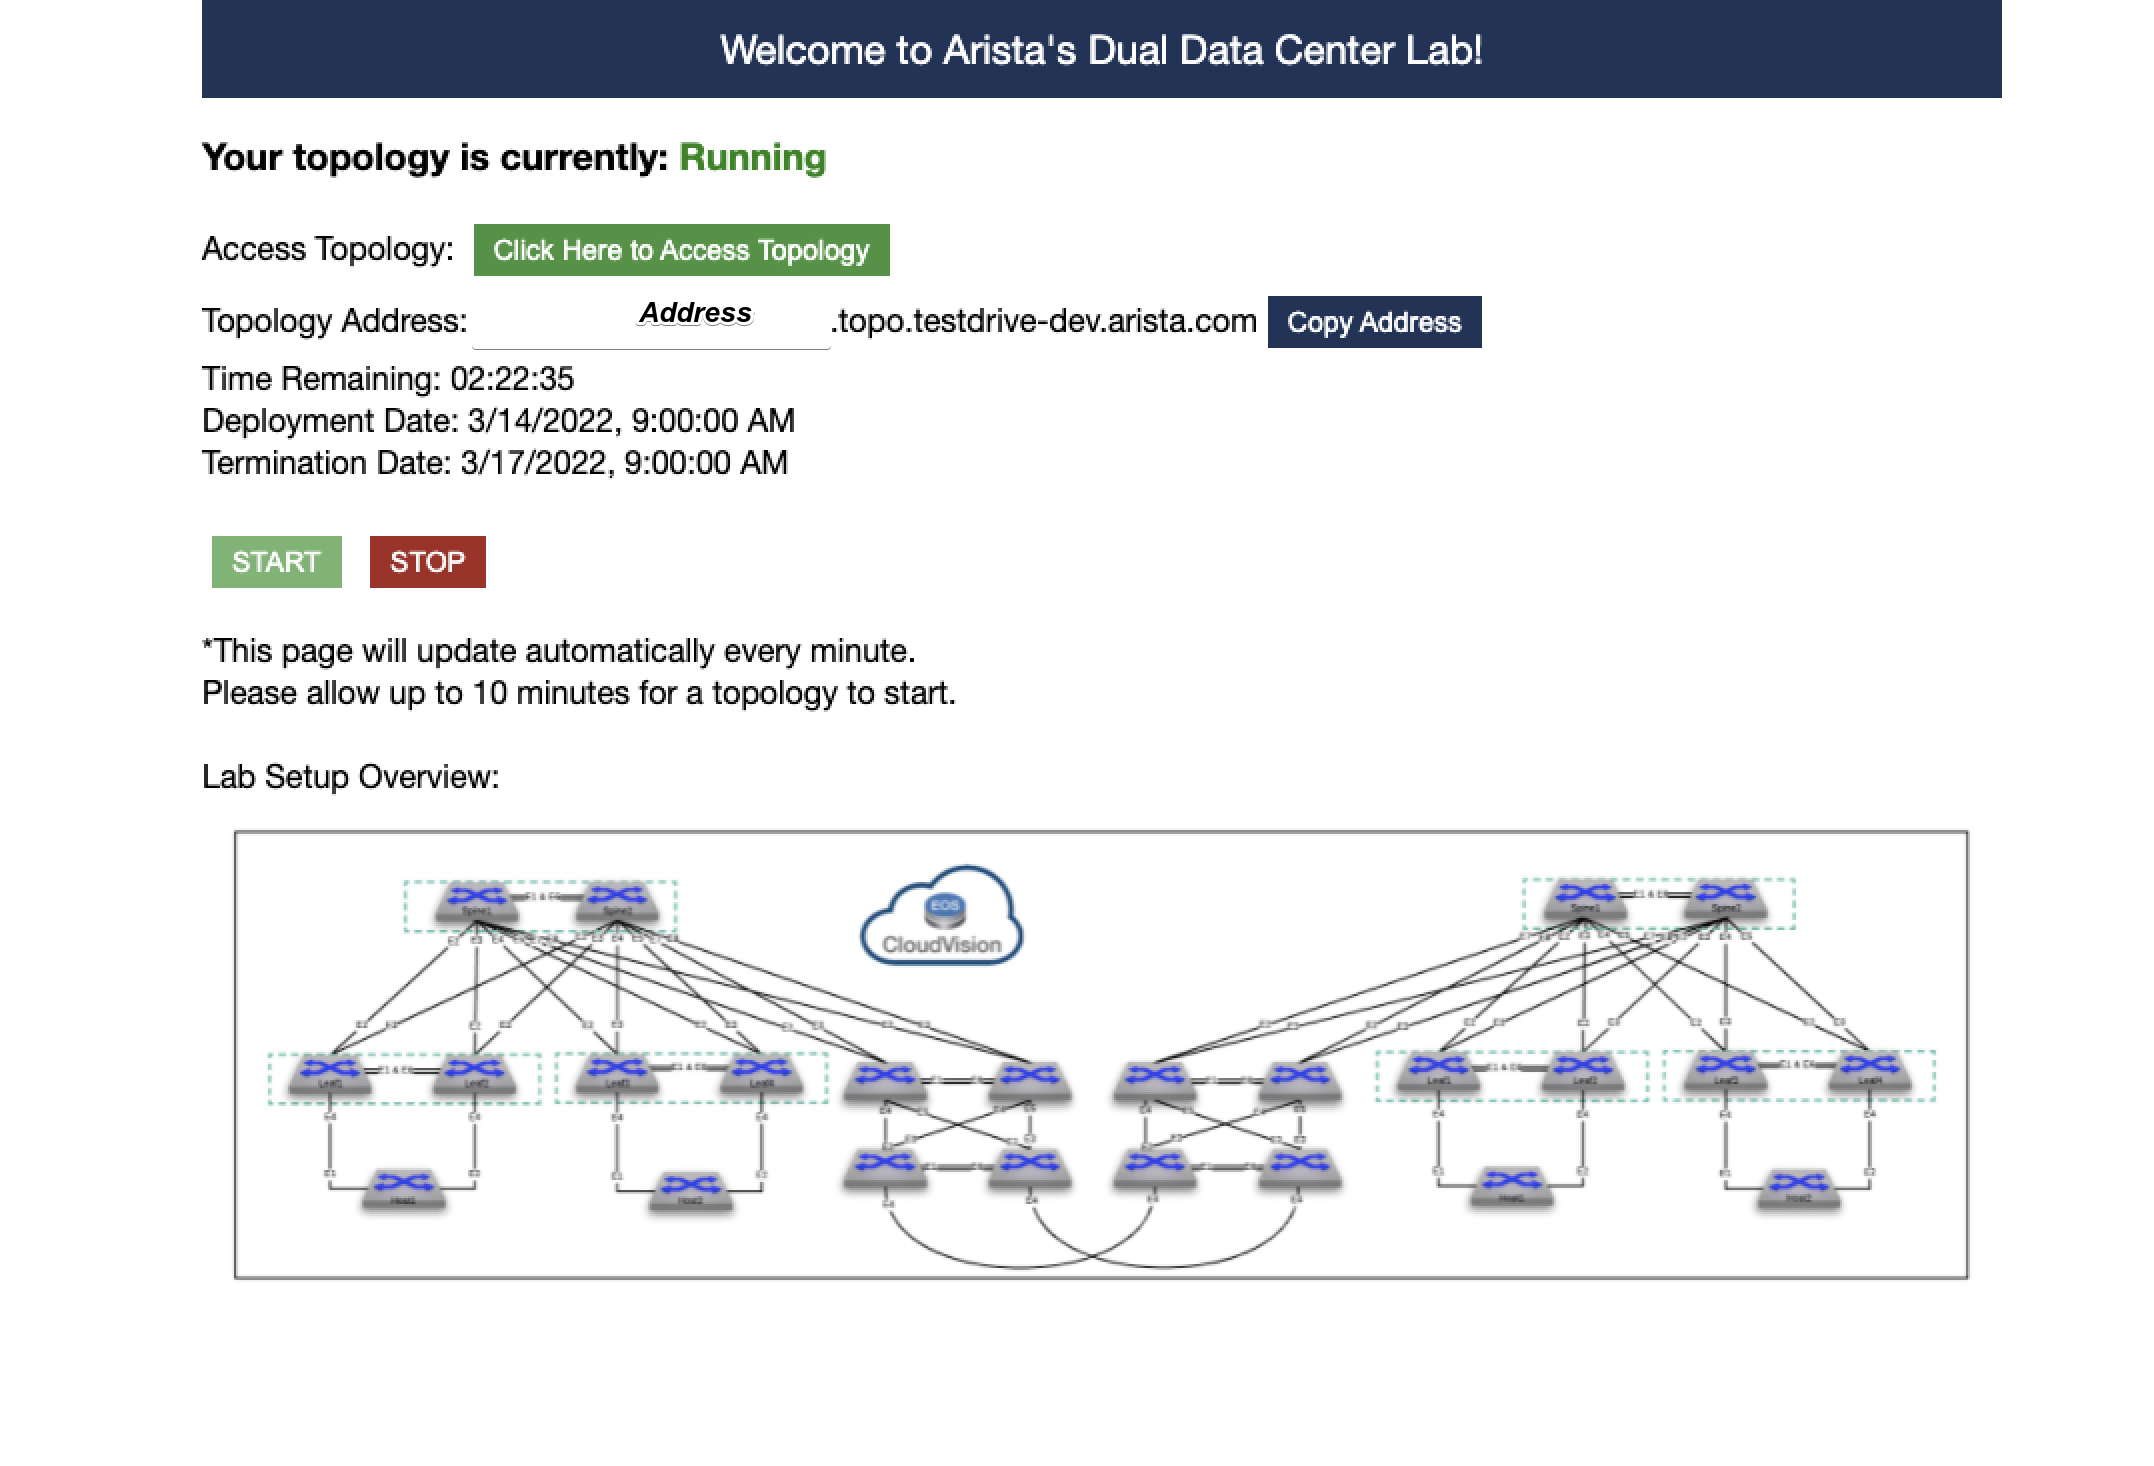
Log into the Arista Test Drive portal with your assigned URL. If you don't have one, please see your ATD staff.
-
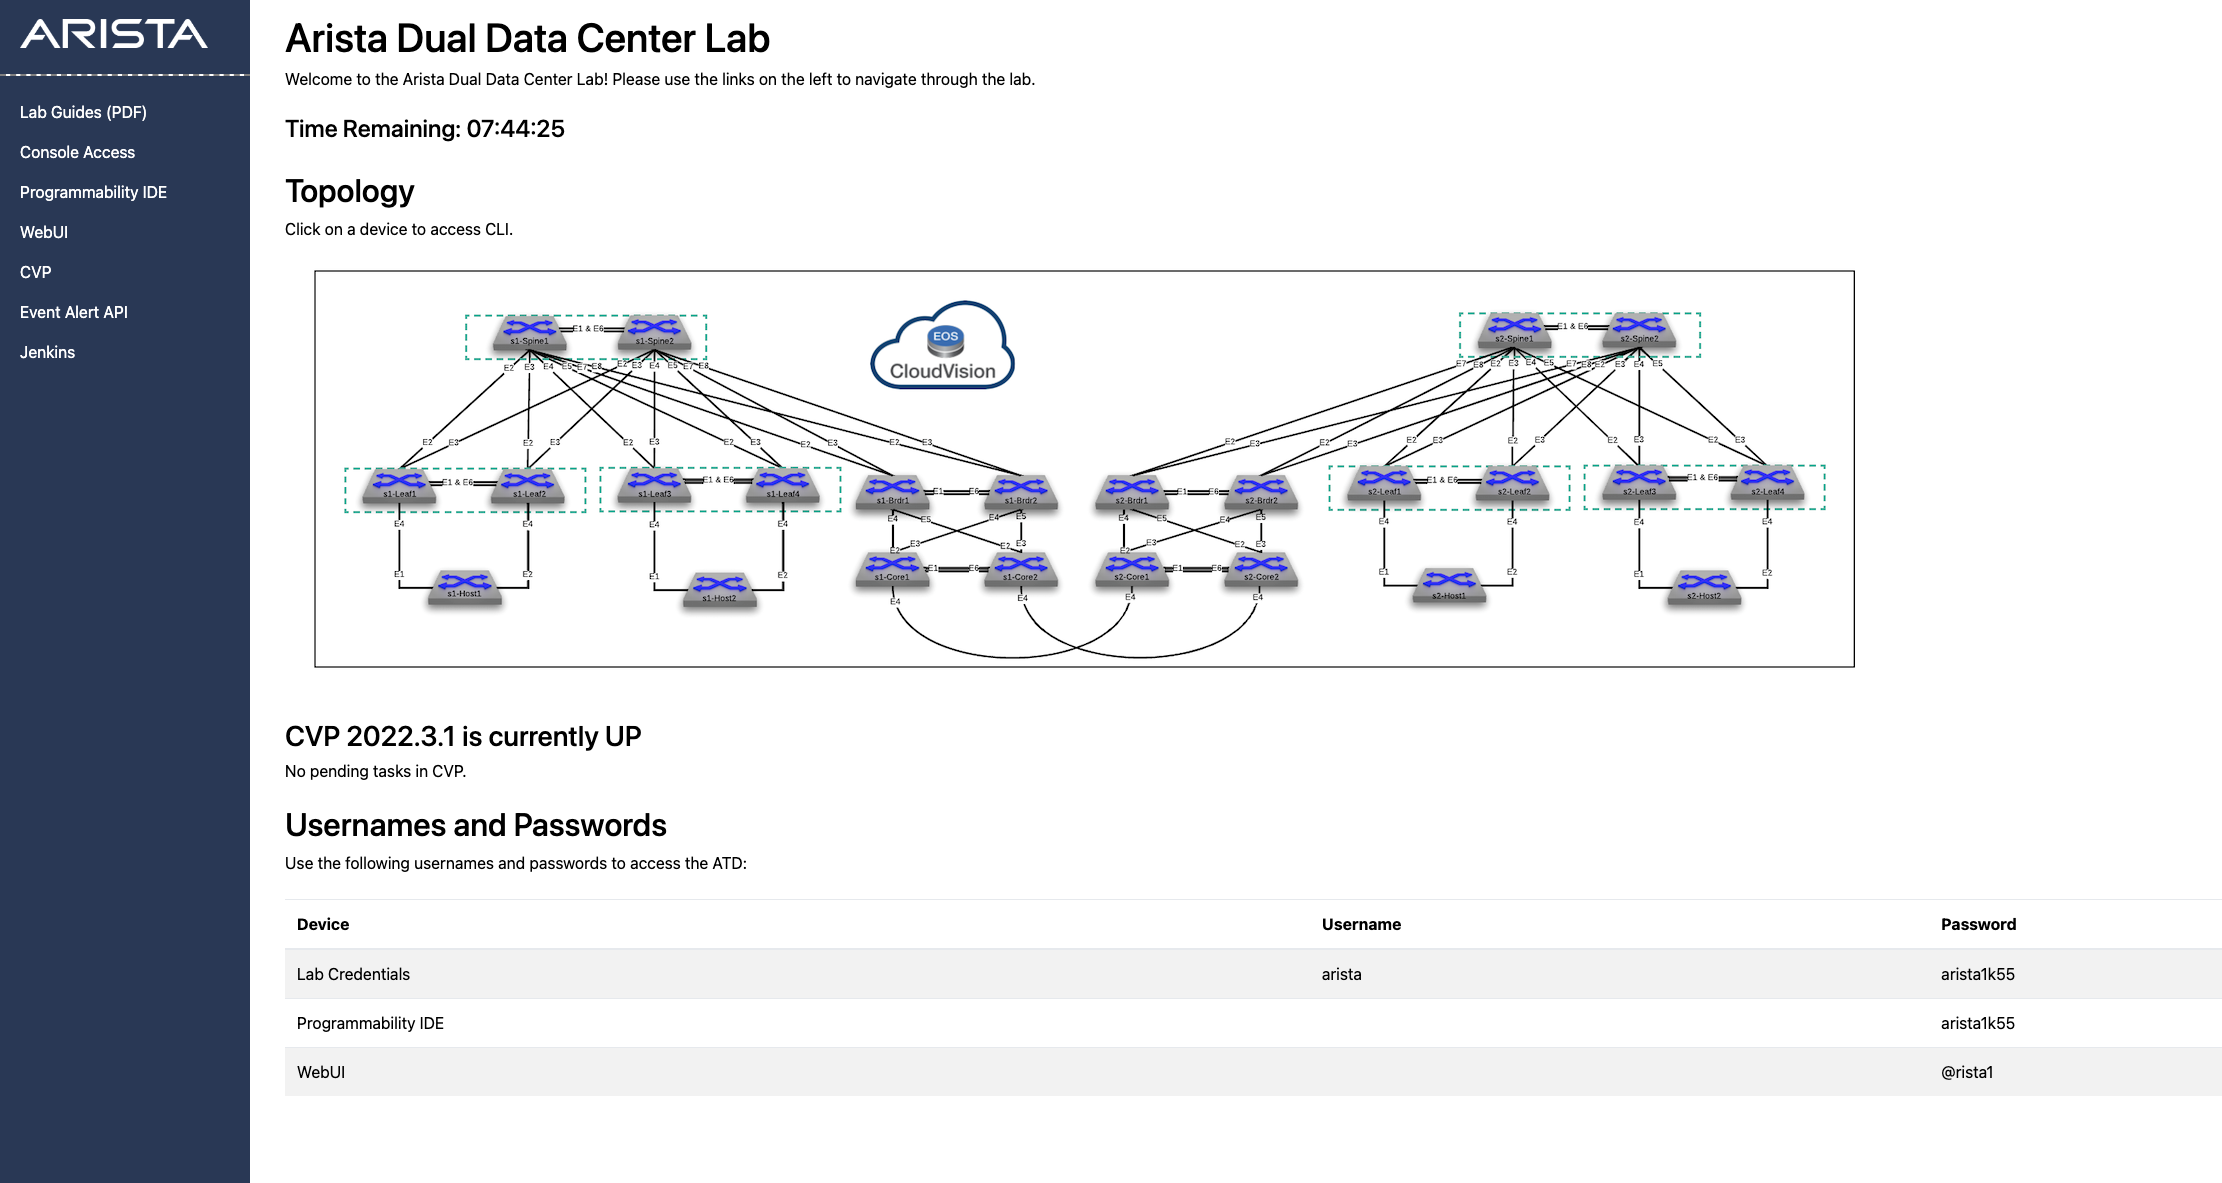
Click on the link Click Here To Access Topology and navigate to the below page. Click the CVP link on the left side of the screen.
-
You will come to a login screen for CloudVision Portal. Enter the username
aristaand the password{REPLACE_PWD}
Creating the Change Control
-
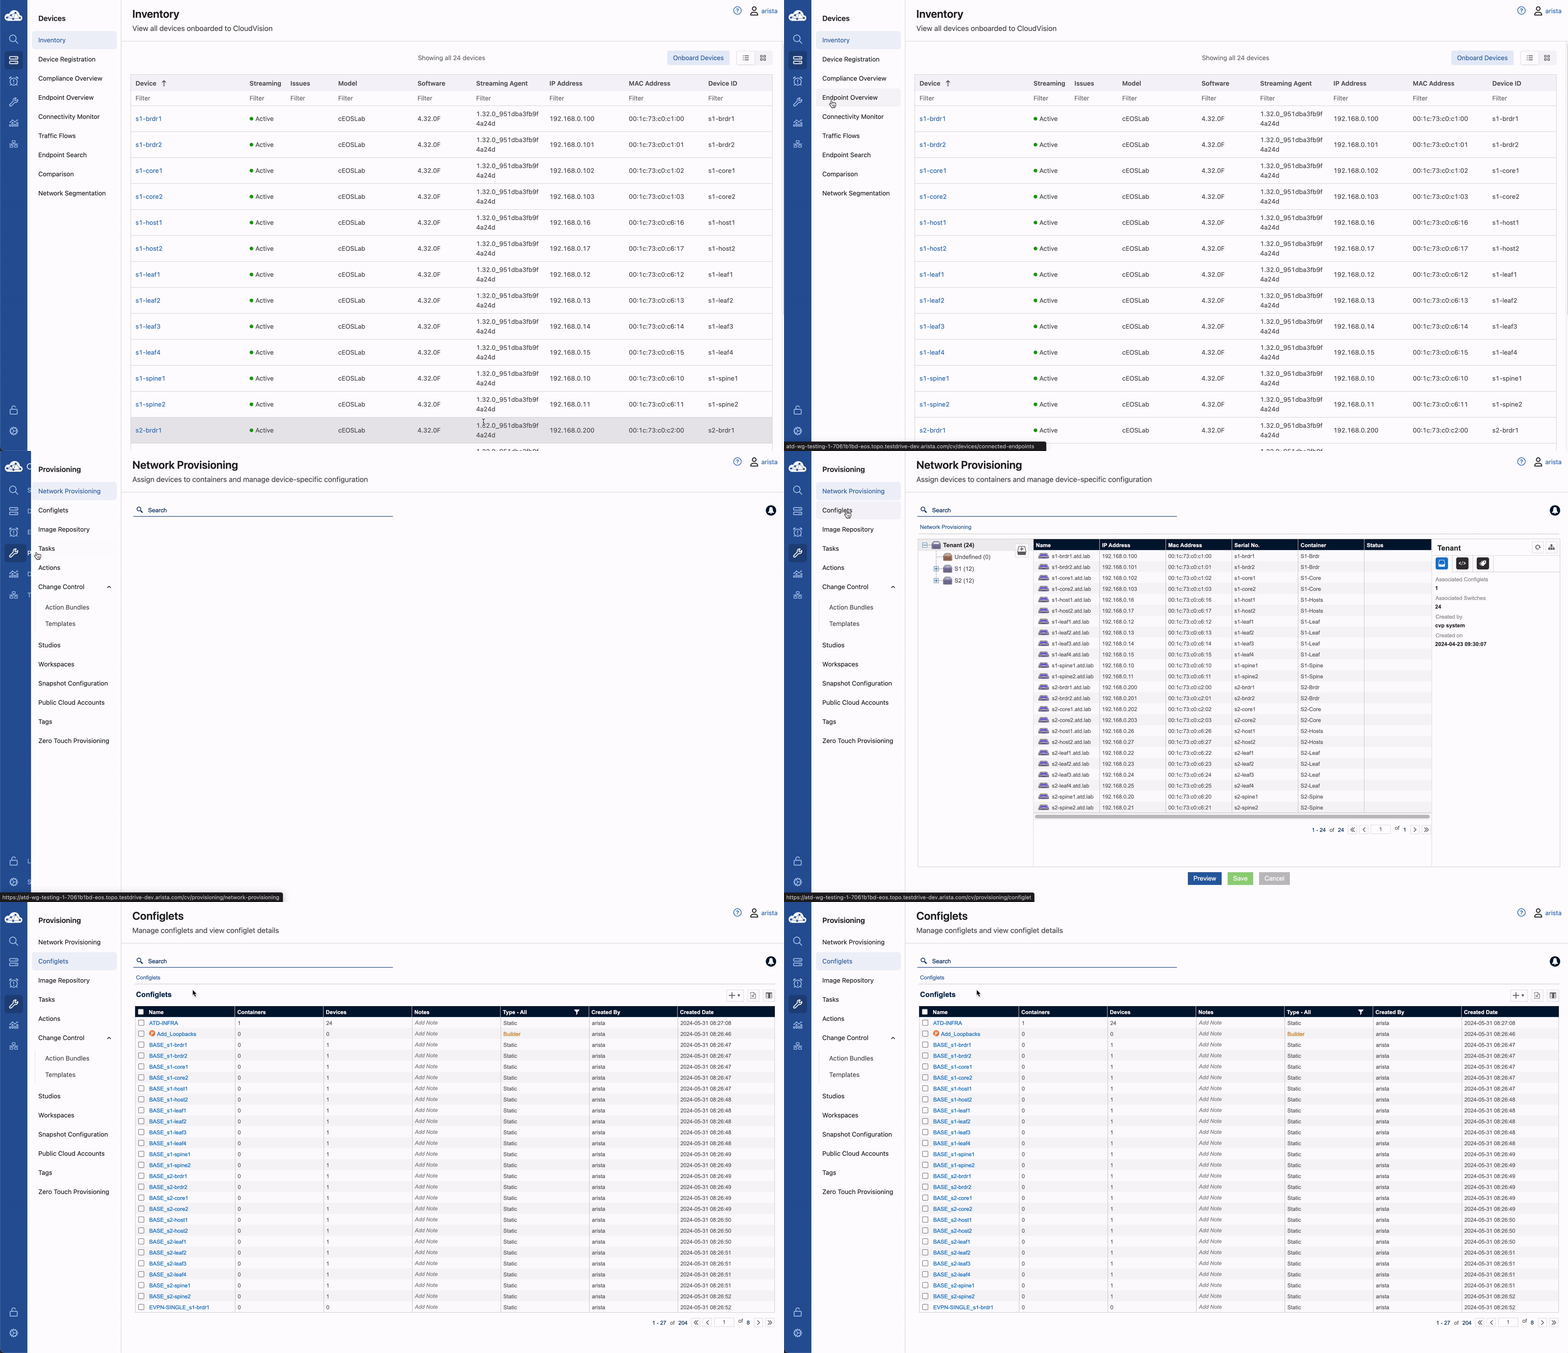
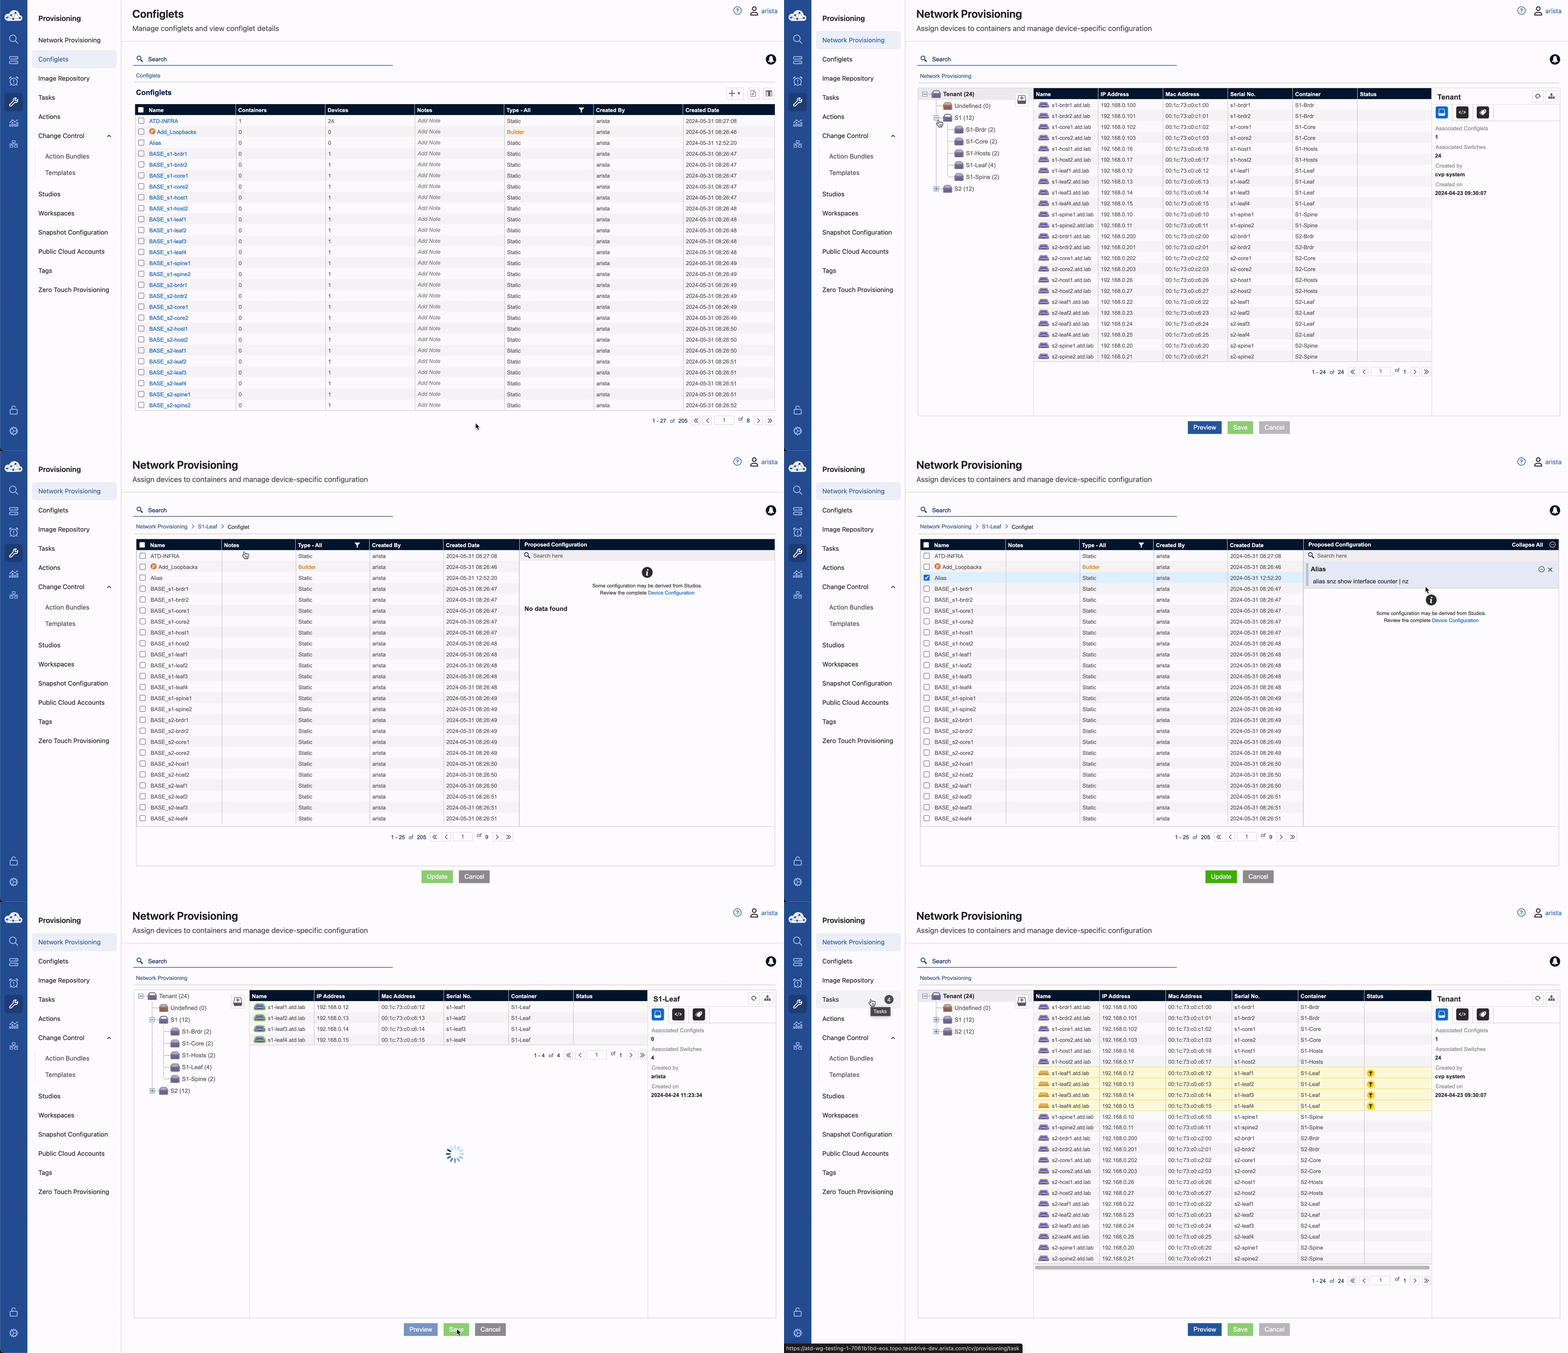
For this lab, select Provisioning -> Configlets from CloudVision. If you do not see Provisioning, hover over the Wrench Icon on the Left Navigation Menu.
-
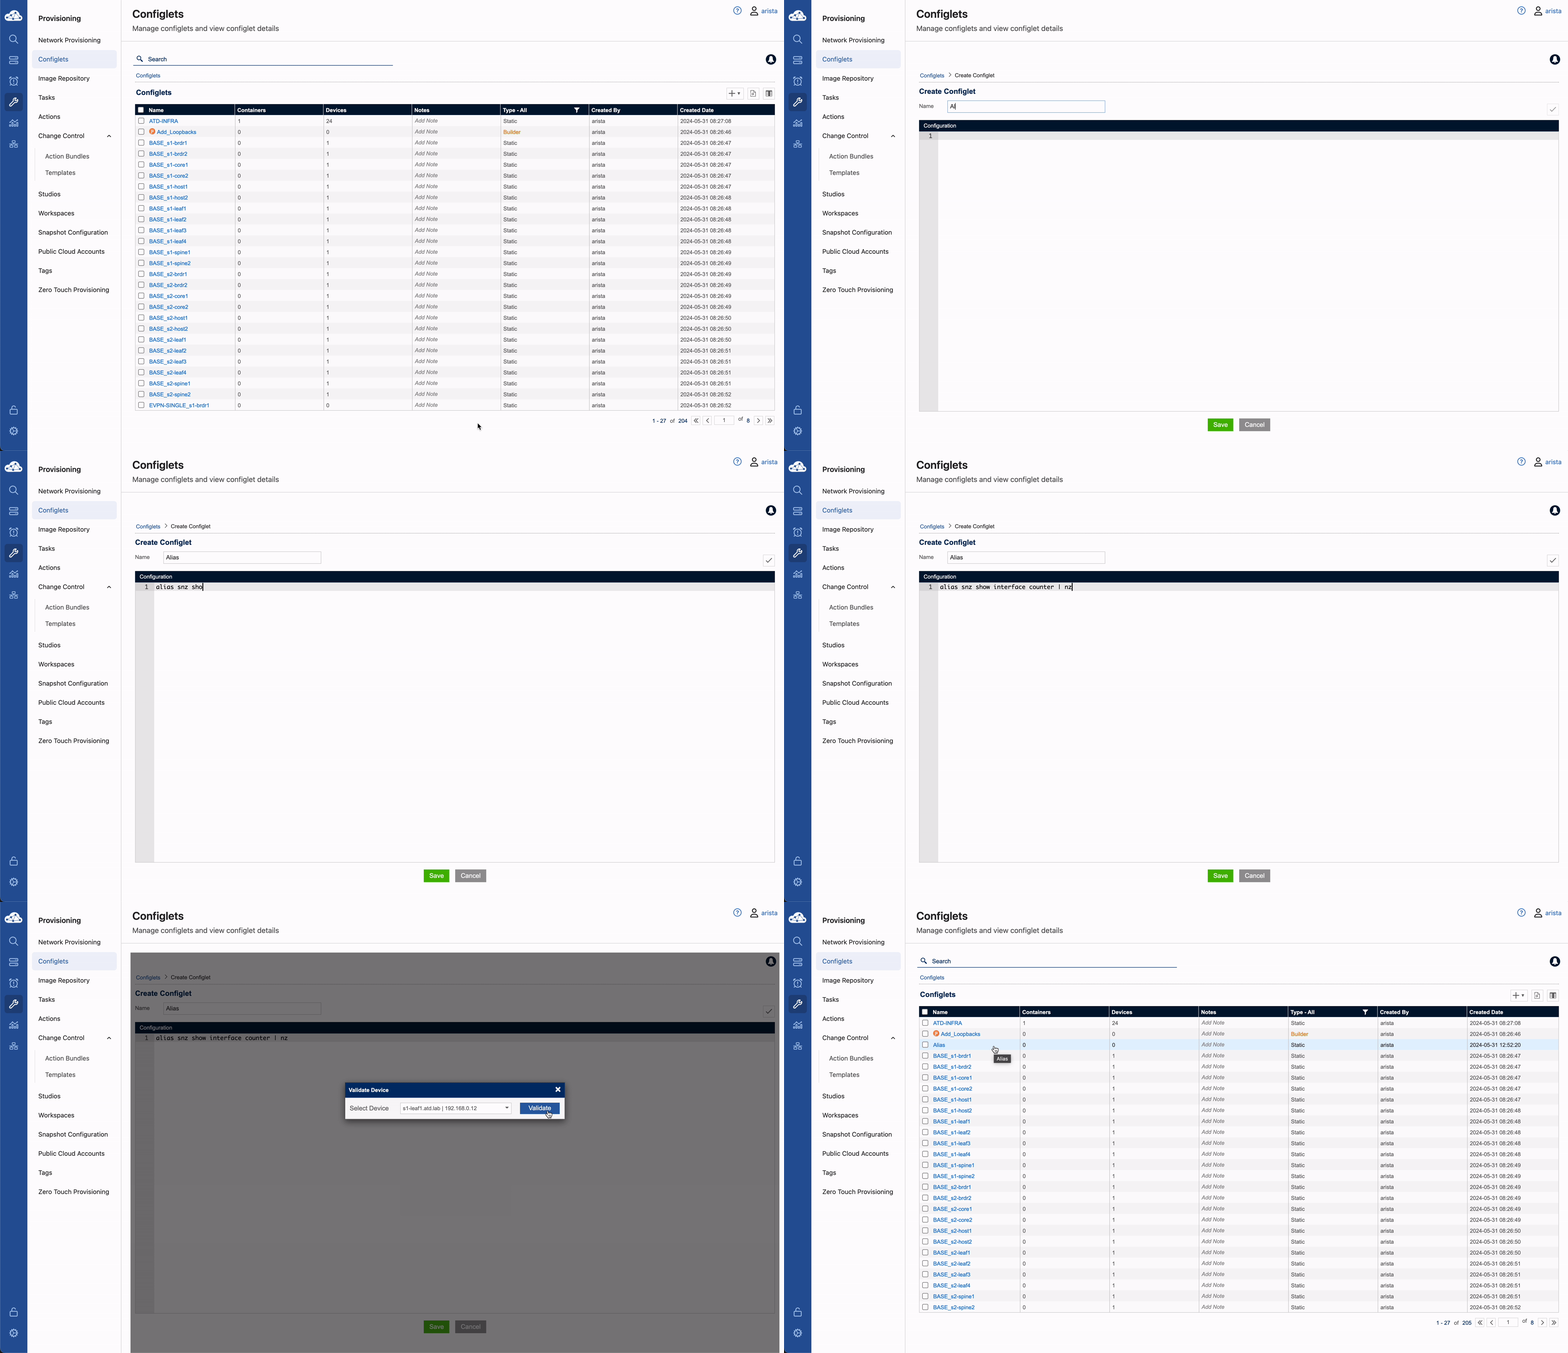
Click the + in the top right and select Configlets to create a new configlet.
-
In the configuration section enter the command information as shown:
-
Name the Configlet Alias.
-
The Configlet can be validated against a device to ensure there isn't a conflict and the configuration is validated. To validate, click the checkbox in the top right section.
-
Once the configuration is validated, Click the Save button to save the Configlet.
Applying the Configlet with a Change Control
-
To apply the Configlet, navigate to Network Provisioning expand the S1 container, right click on the S1-Leaf container and select Manage -> Configlet.
-
Select the Alias Configlet and click Update. This activity is to simply add a new configlet to the existing configlets applied on the 'Leaf' container. Do not Remove existing configlets from the Proposed Configuration section.
Expert Tip - Use search bar to find Configlets faster
-
On the 'Network Provisioning' page, Click the Save button to save the changes to the topology.
-
The screen will refresh and a 'T' for task will appear above each device, representing that tasks have been generated that need to run to push the configuration change.
-
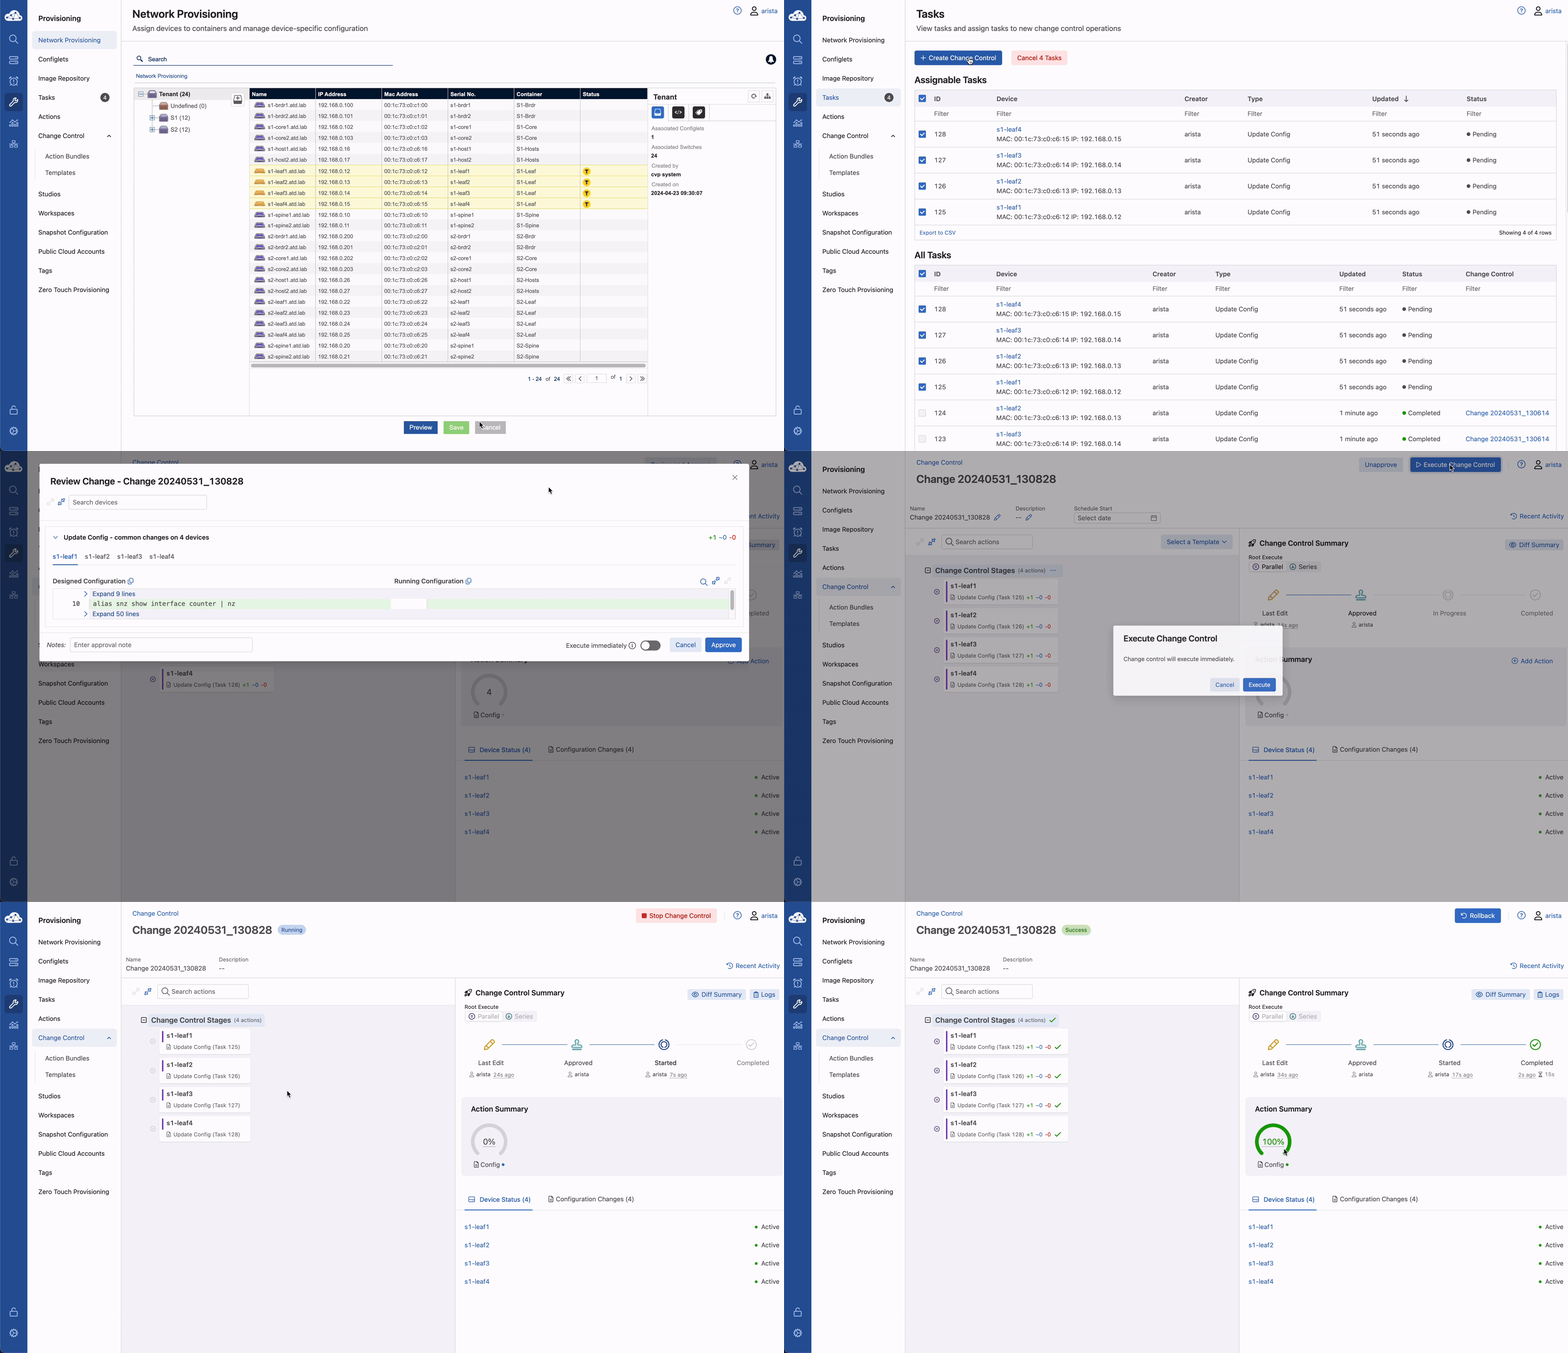
Click Tasks in the left navigation column.
-
Check each Task in the 'Assignable Tasks' section, then click the Create Change Control with 4 Tasks button. Select Parallel then Create Change Control.
-
Select Review and Approve in the top right. You will see the Designed Configuration vs. Running Configuration. The Designed Configuration is a combination of all configlets to build a full device configuration. The Running Configuration is the running-config prior to executing the task. Configuration differences are highlighted to show New Lines, Mismatch Lines, and To Reconcile.
-
Select Approve in the bottom right to approve the Change Control.
-
Select Execute Change Control in the top right and then Execute to execute the Change Control tasks.
-
When the tasks are completed, navigate into the task by clicking on the task object.
Parallel Change Control
Creating a Parallel Change Control will run all 4 tasks simultaneously. If we created a Series Change Control, the tasks would run one at a time See the 'CVP Advanced Change Control' lab guide for more information on Change Controls
Rolling Back the Change Control
Oh no! That Alias wasn't supposed to be deployed to production yet and now we need to return the leaf switches back to their original state. Not a problem, let's quickly do a Rollback.
-
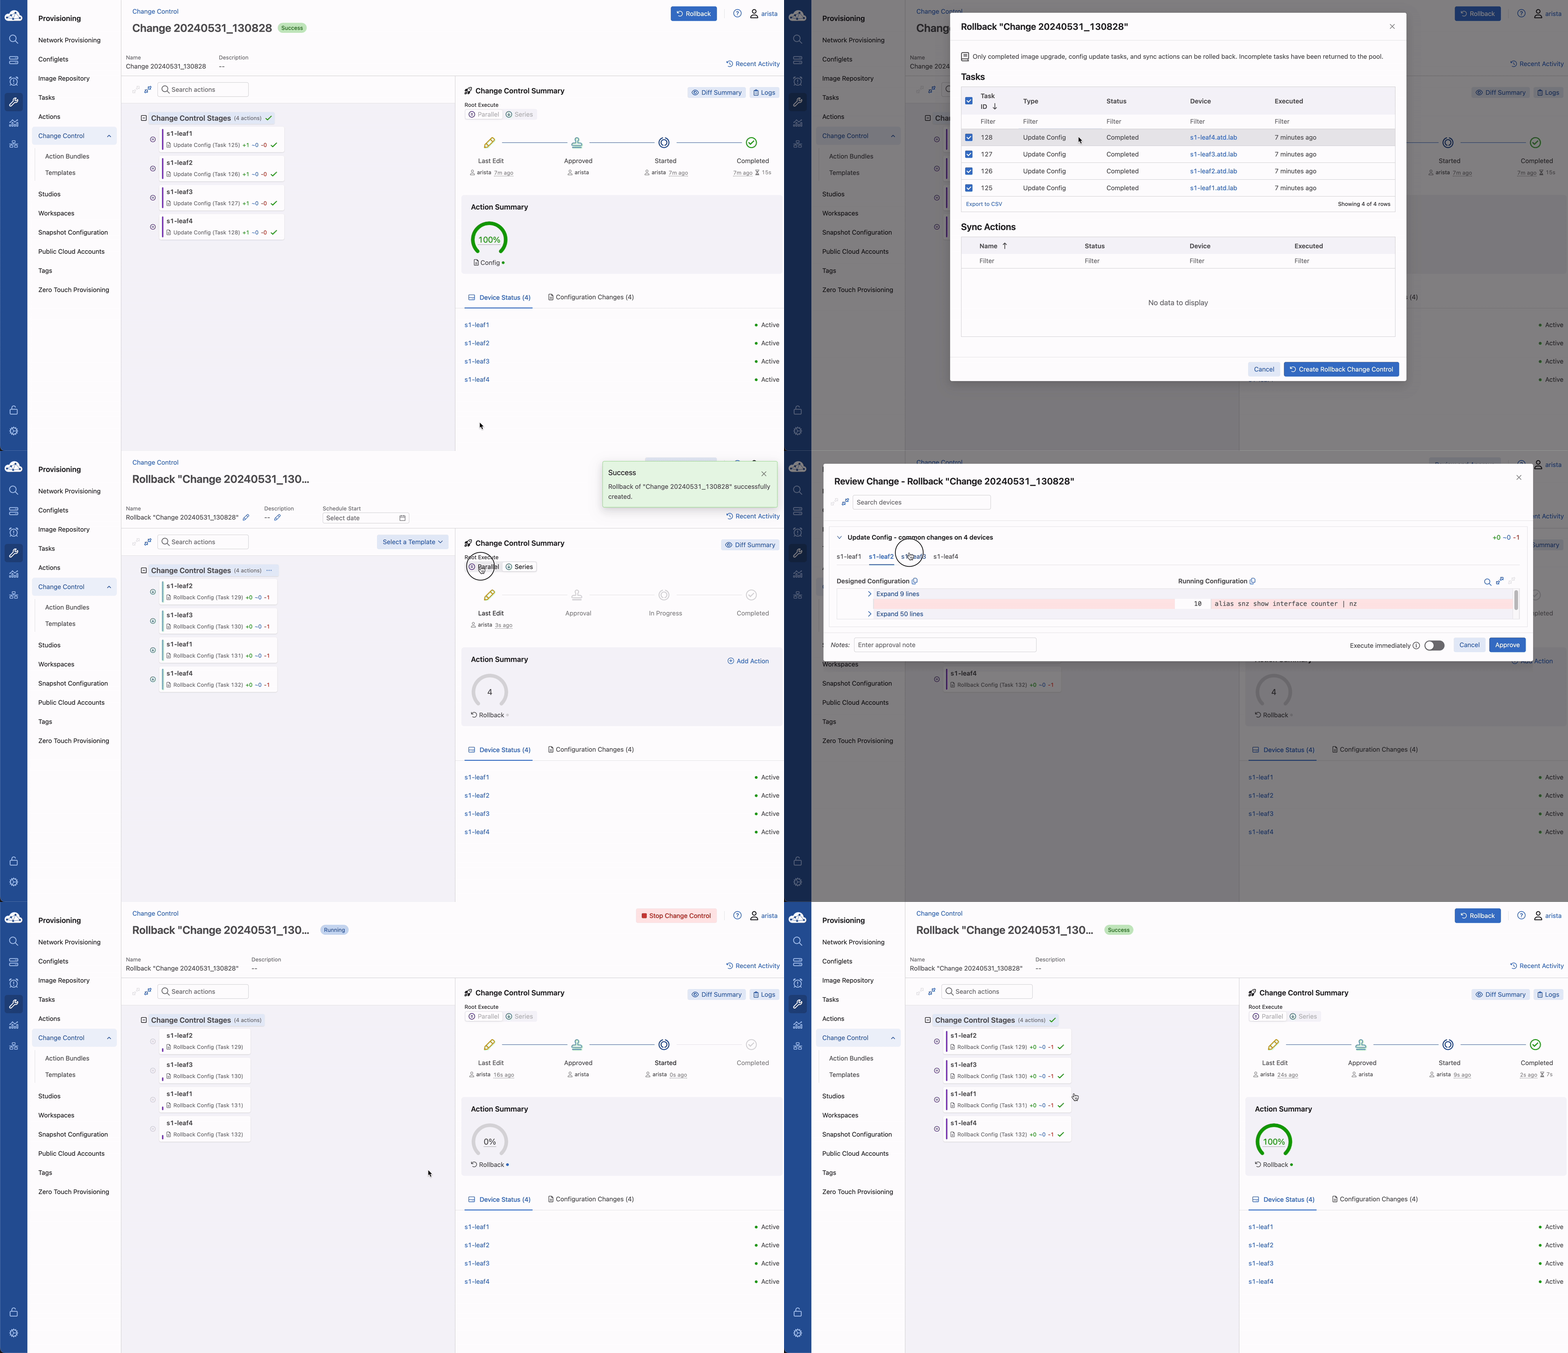
If you're still on the Change Control screen, you should see a Rollback button on the upper right. If you already navigated away from this screen, you can choose Provisioning at the top of the page, click on Change Control, then select the name of the last run Change Control
-
Once you select Rollback, the screen that pops up will have you select the switches you would like to rollback. Select all 4 switches, then click Create Rollback Change Control
-
Click Review and Approve. You will be shown the specific lines that will be removed from the running configuration of the switches. This time, lets select the Execute Immediately switch, then select Approve and Execute. The changes are being rolled back. Whew!
Success
Lab Complete!
