CVP Advanced Change Control
Learn how to use CloudVision's Change Control. A Change Control can be associated with one or more Tasks. CloudVision will take pre and post snapshots when a Change Control is executed to give us a state to revert back should there be any issues after the change.
Next, the lab will review Telemetry state-streaming information of the change of adding routes and how the routes propagate across the environment.
Lastly, the lab will initiate a Network Rollback to revert the changes that were implemented. The Network Rollback feature can greatly minimize downtime and gives the user the ability to restore the environment to a previous network state quickly.
Getting Started
-
Log into the Arista Test Drive portal with your assigned URL. If you don't have one, please see your ATD staff.
-
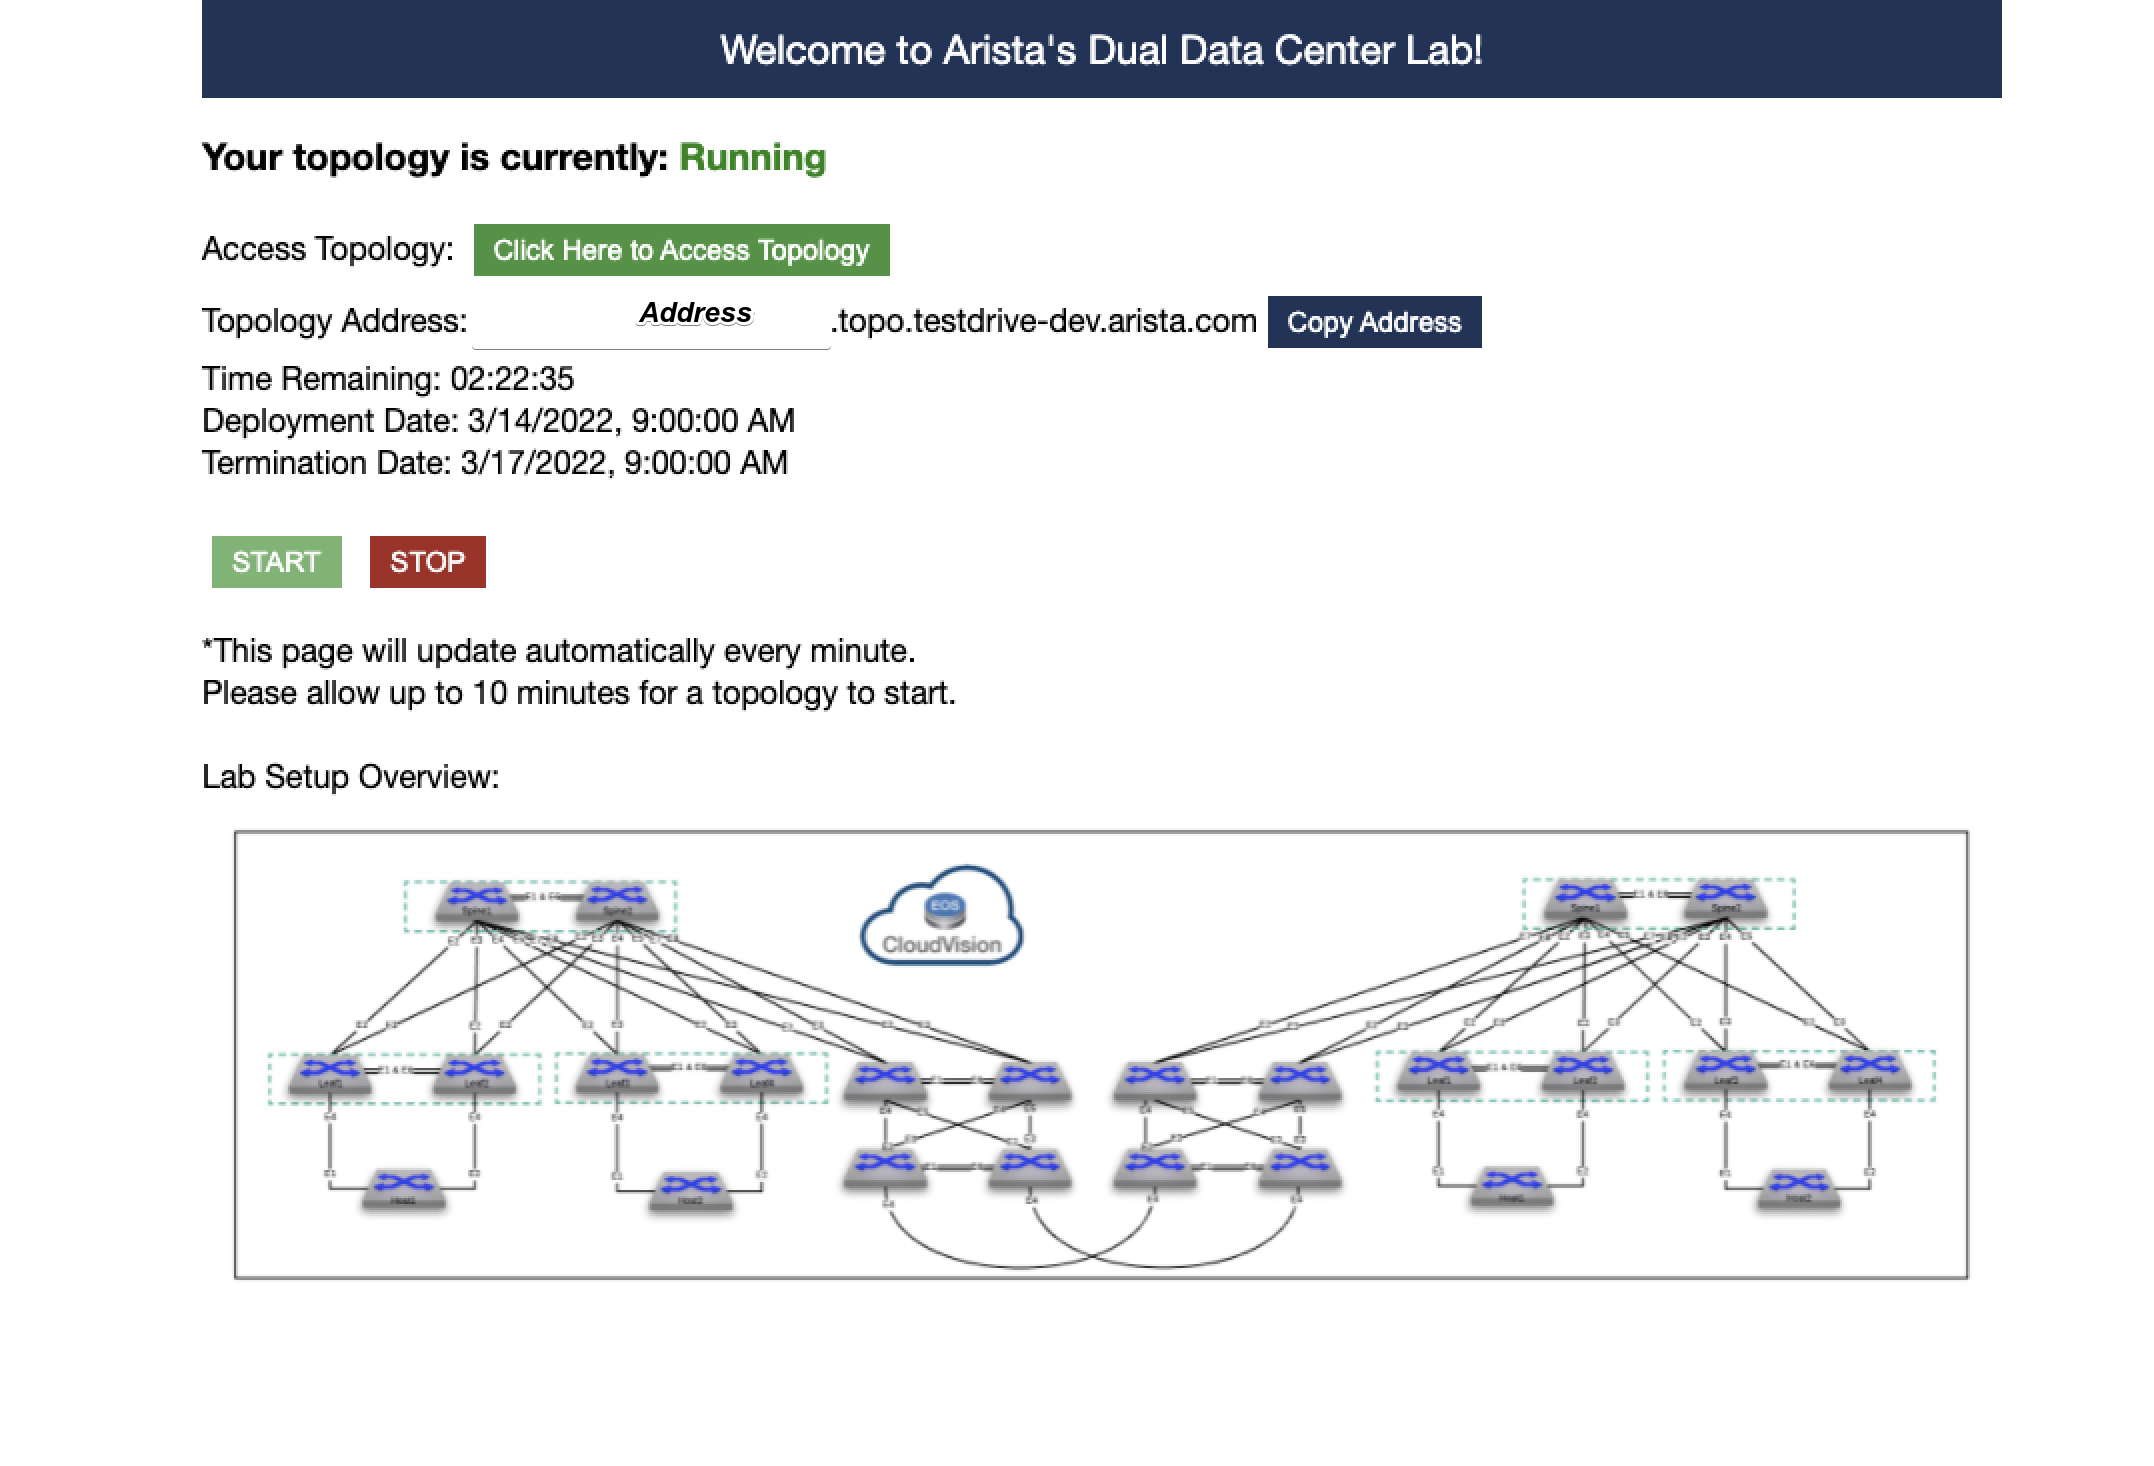
Click on the link Click Here To Access Topology and navigate to the below page.
-
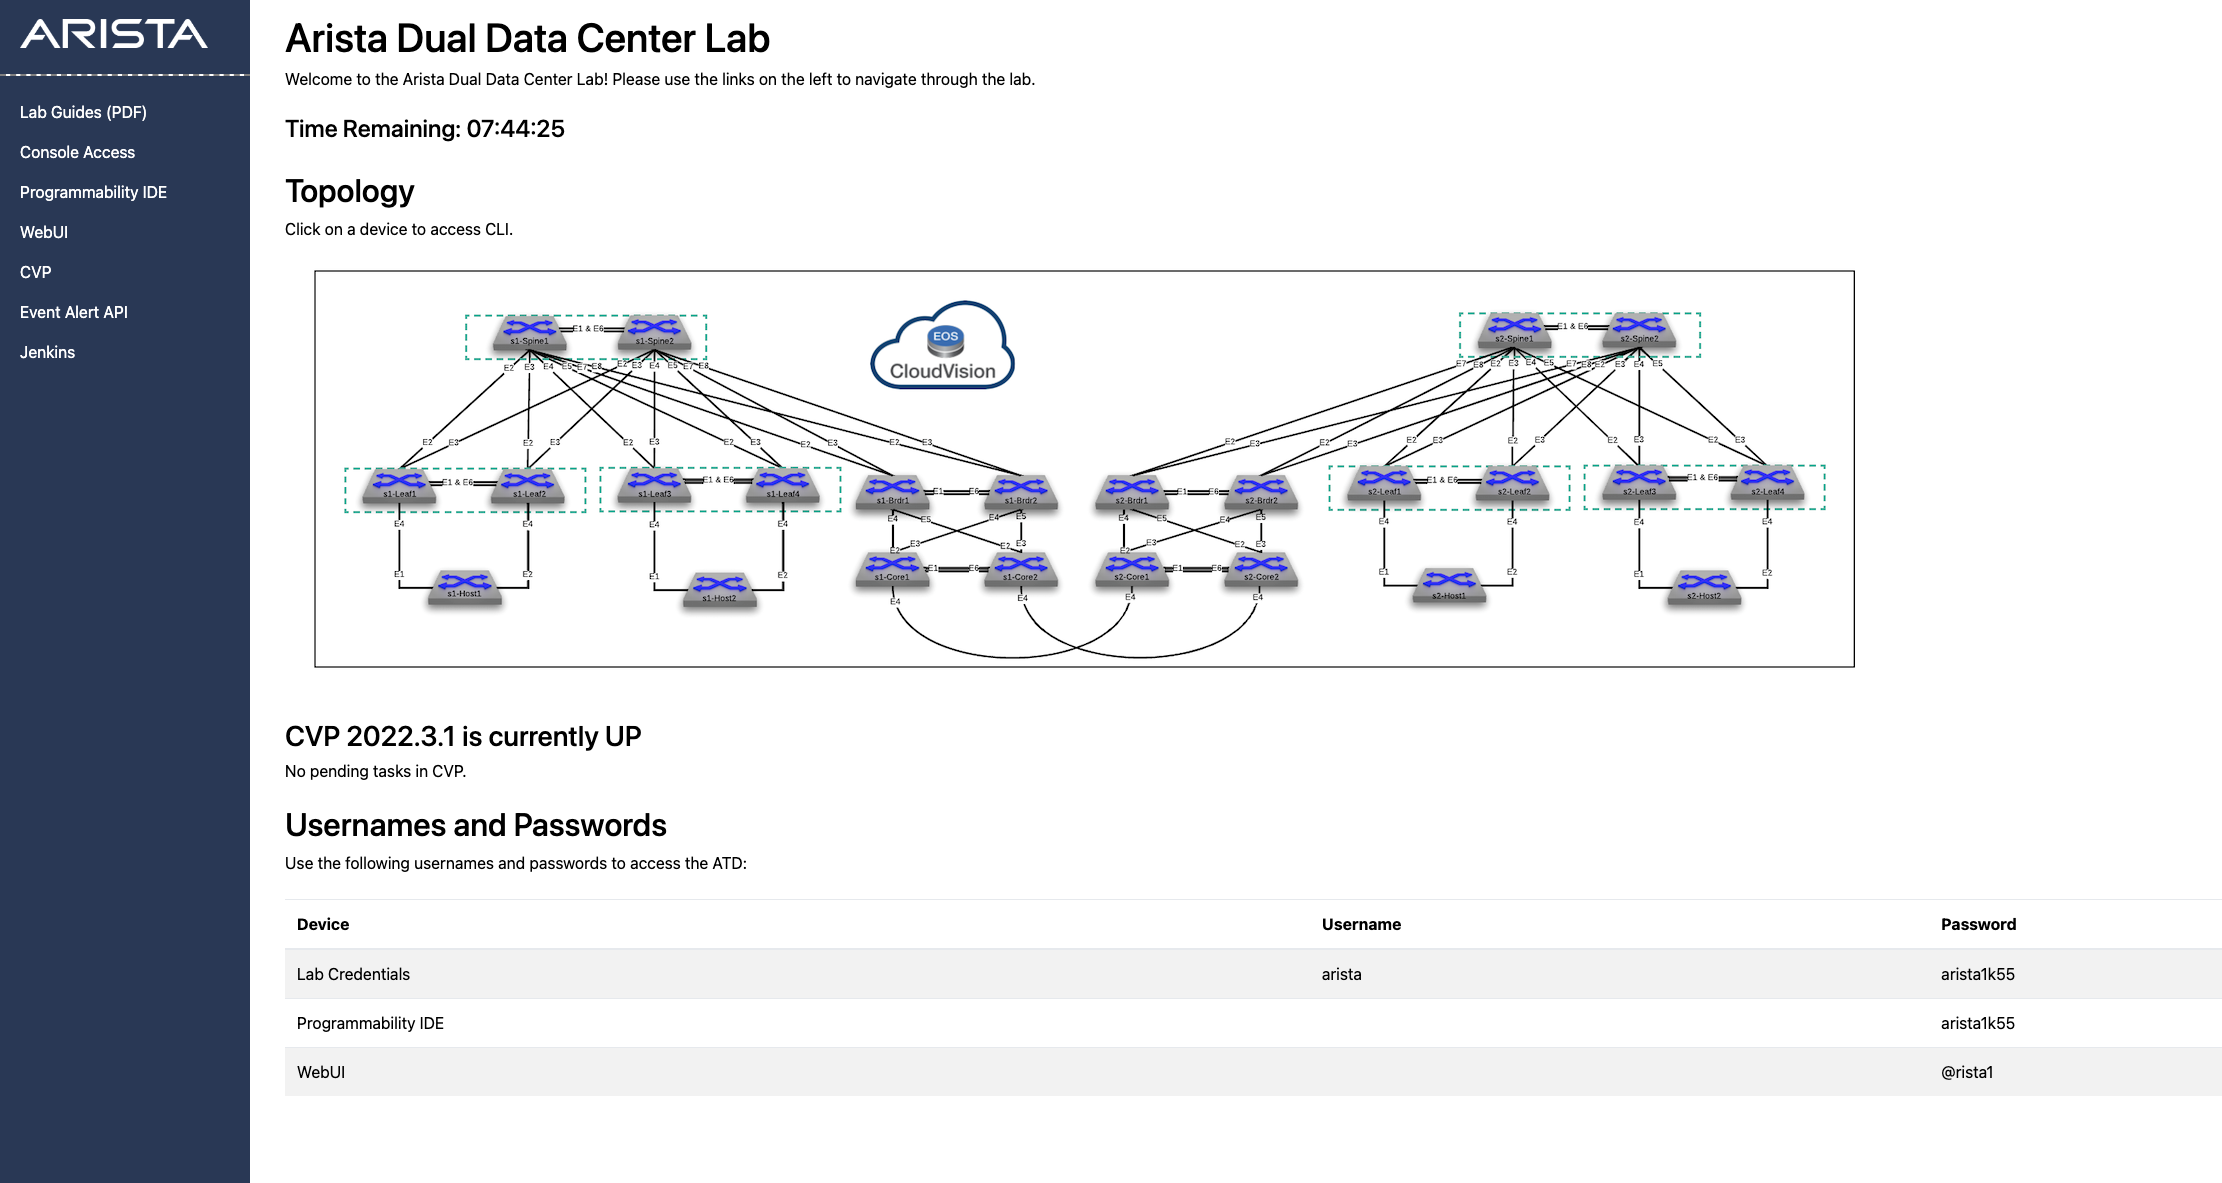
Log into the Console Access Jumpserver:
Warning
If starting from this lab module, type
cvpor6at the prompt. The script will configure all devices in the lab so you can complete this lab. The configlet builder will fail to generate device configlets if this script hasn't been run.Note
Did you know → the "cvp" script is composed of python code that uses the CloudVision Portal Rest API to automate the provisioning of CVP Configlets.
-
Click the CVP link on the left side of the screen. You will come to a login screen for CloudVision Portal. Enter the username
aristaand the password{REPLACE_PWD}
Applying Configlets with a Configlet Builder
Now we want to add several Loopbacks to each device using a Configlet
Builder at the s1/s1-Leaf level.
-
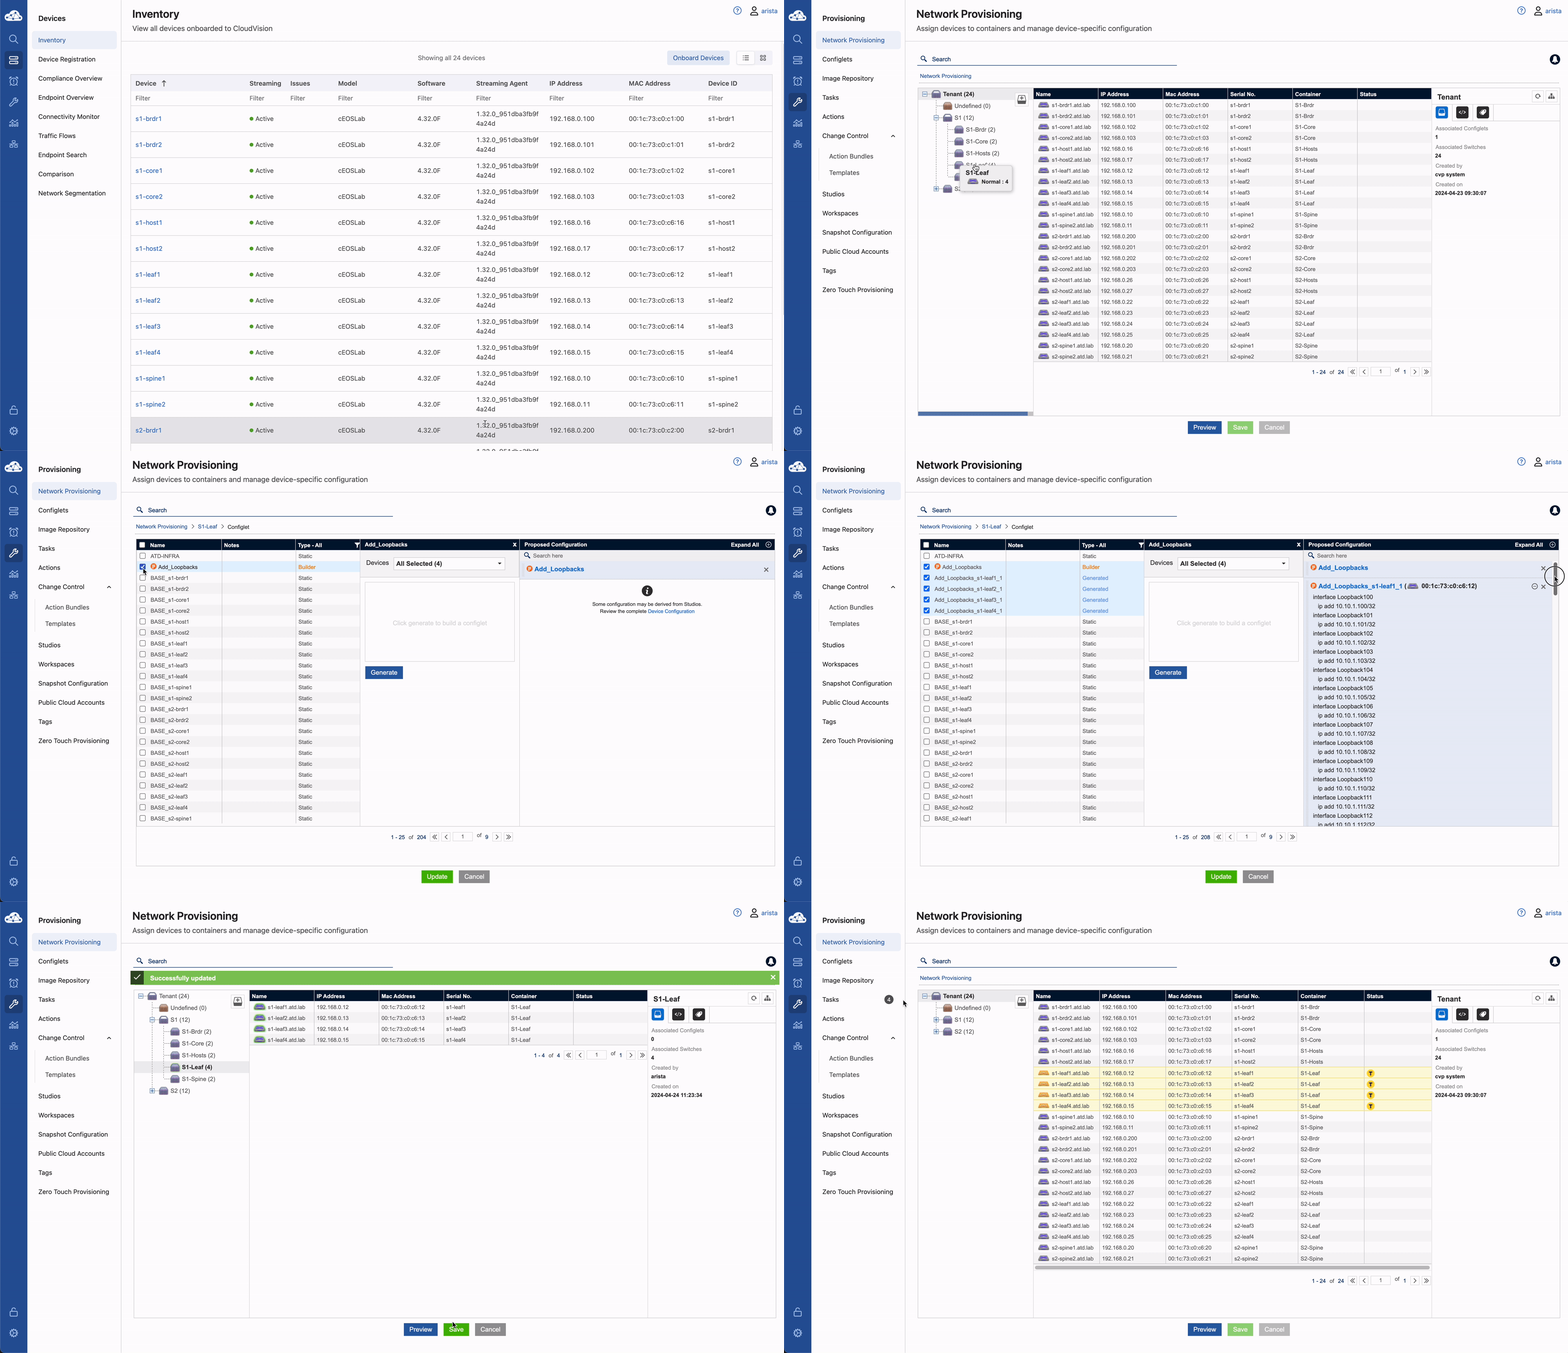
Navigate to the Network Provisioning page under the Provisioning tab.
-
Expand the
S1container, right click on theS1-Leafcontainer and select Manage -> Configlet -
Select the Add_Loopbacks configlet from the list of configlets.
-
Select Generate to build a configlet for each device. View the generated configuration by expanding the Proposed Configuration on the right by selecting the +
-
Select Update to return to 'Network Provisioning' and select Save at the bottom of the screen. Tasks will be generated and a notification will show next to the 'Tasks' option in the Navigation column. Now that we have Tasks created we can use Change Control feature.
Note
The Configlet Builder feature enables you to programmatically create device configurations (Configlets) for devices that have relatively dynamic configuration requirements. This helps to prevent you from having to manually code Configlets.
Creating the Change Control
-
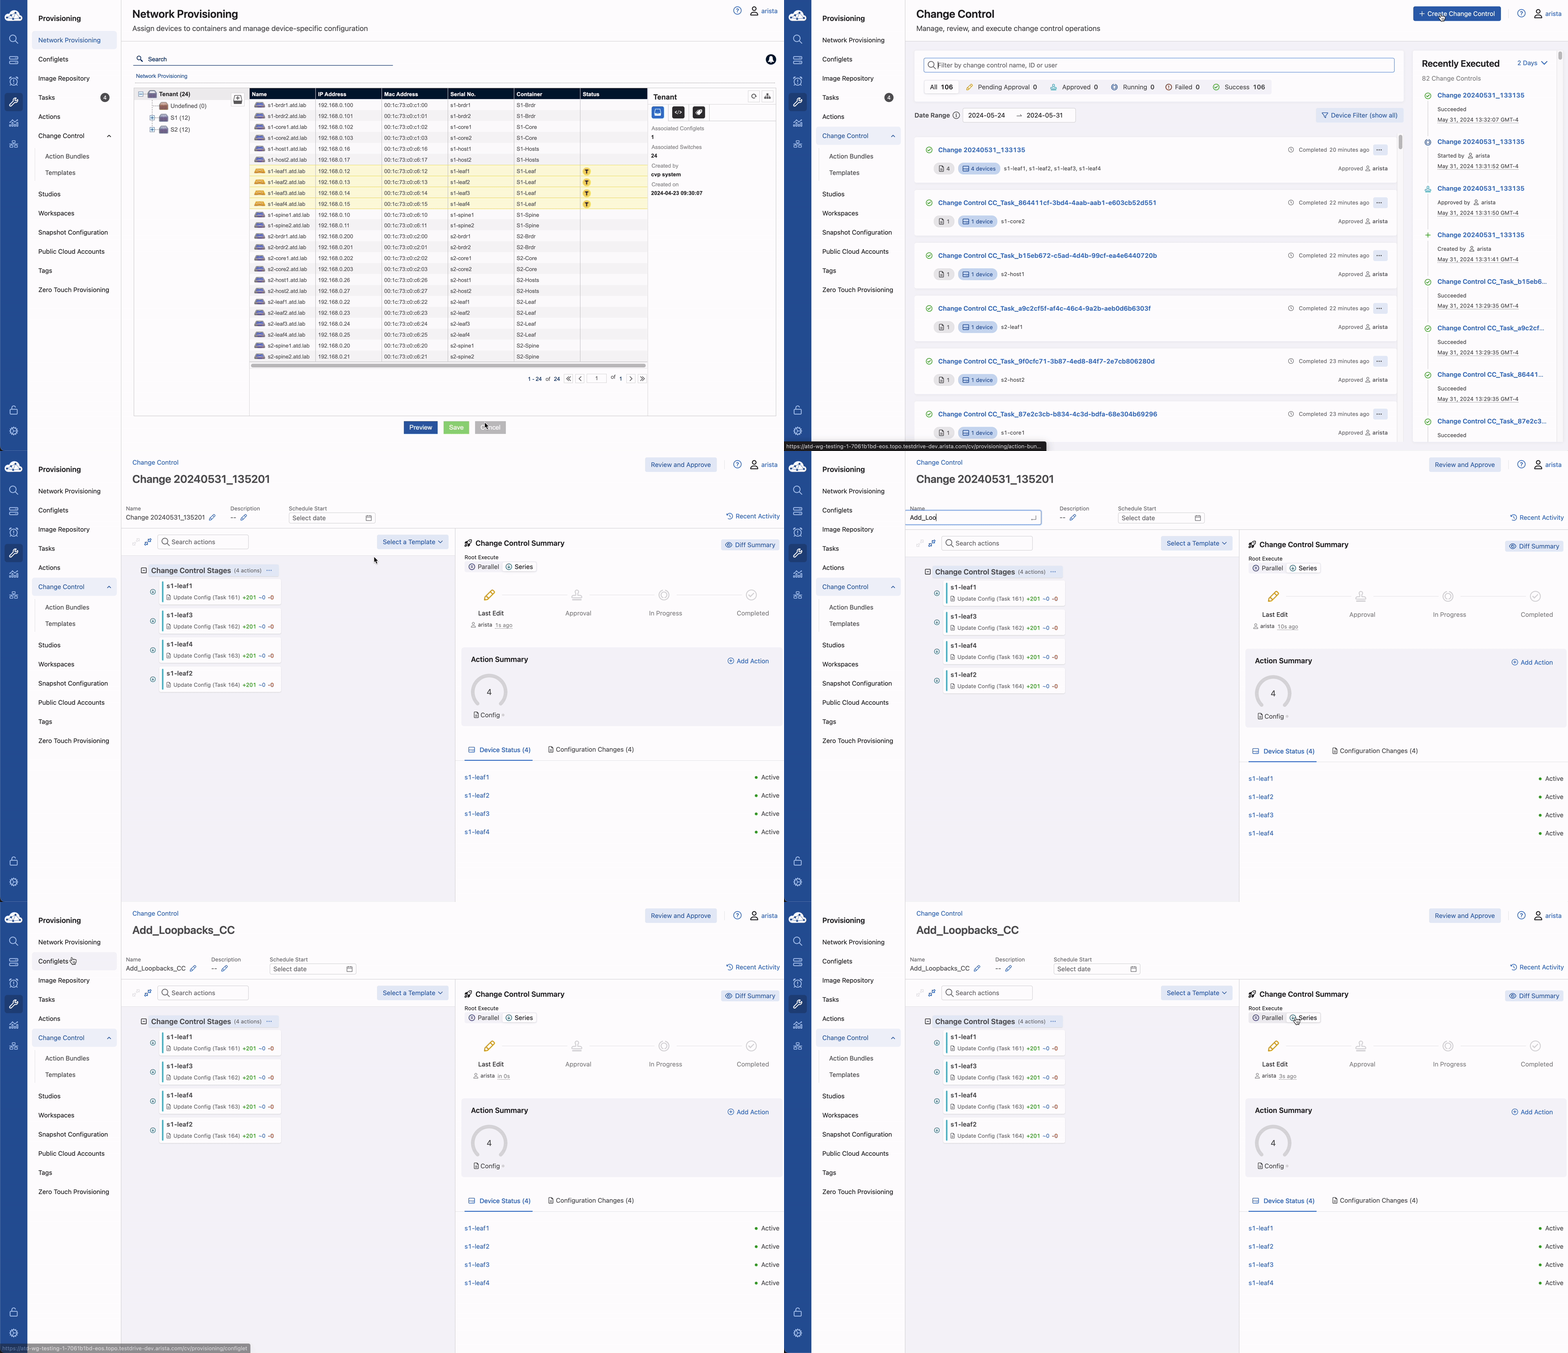
Select Provisioning from the Navigation Menu then select Change Control.
-
Create a new Change Control by selecting the + Create Change Control button in the top right.
-
This screen will show pending tasks that will be associated with a Change Control. Select all pending Tasks and select + Create Change Control with 4 Tasks.
-
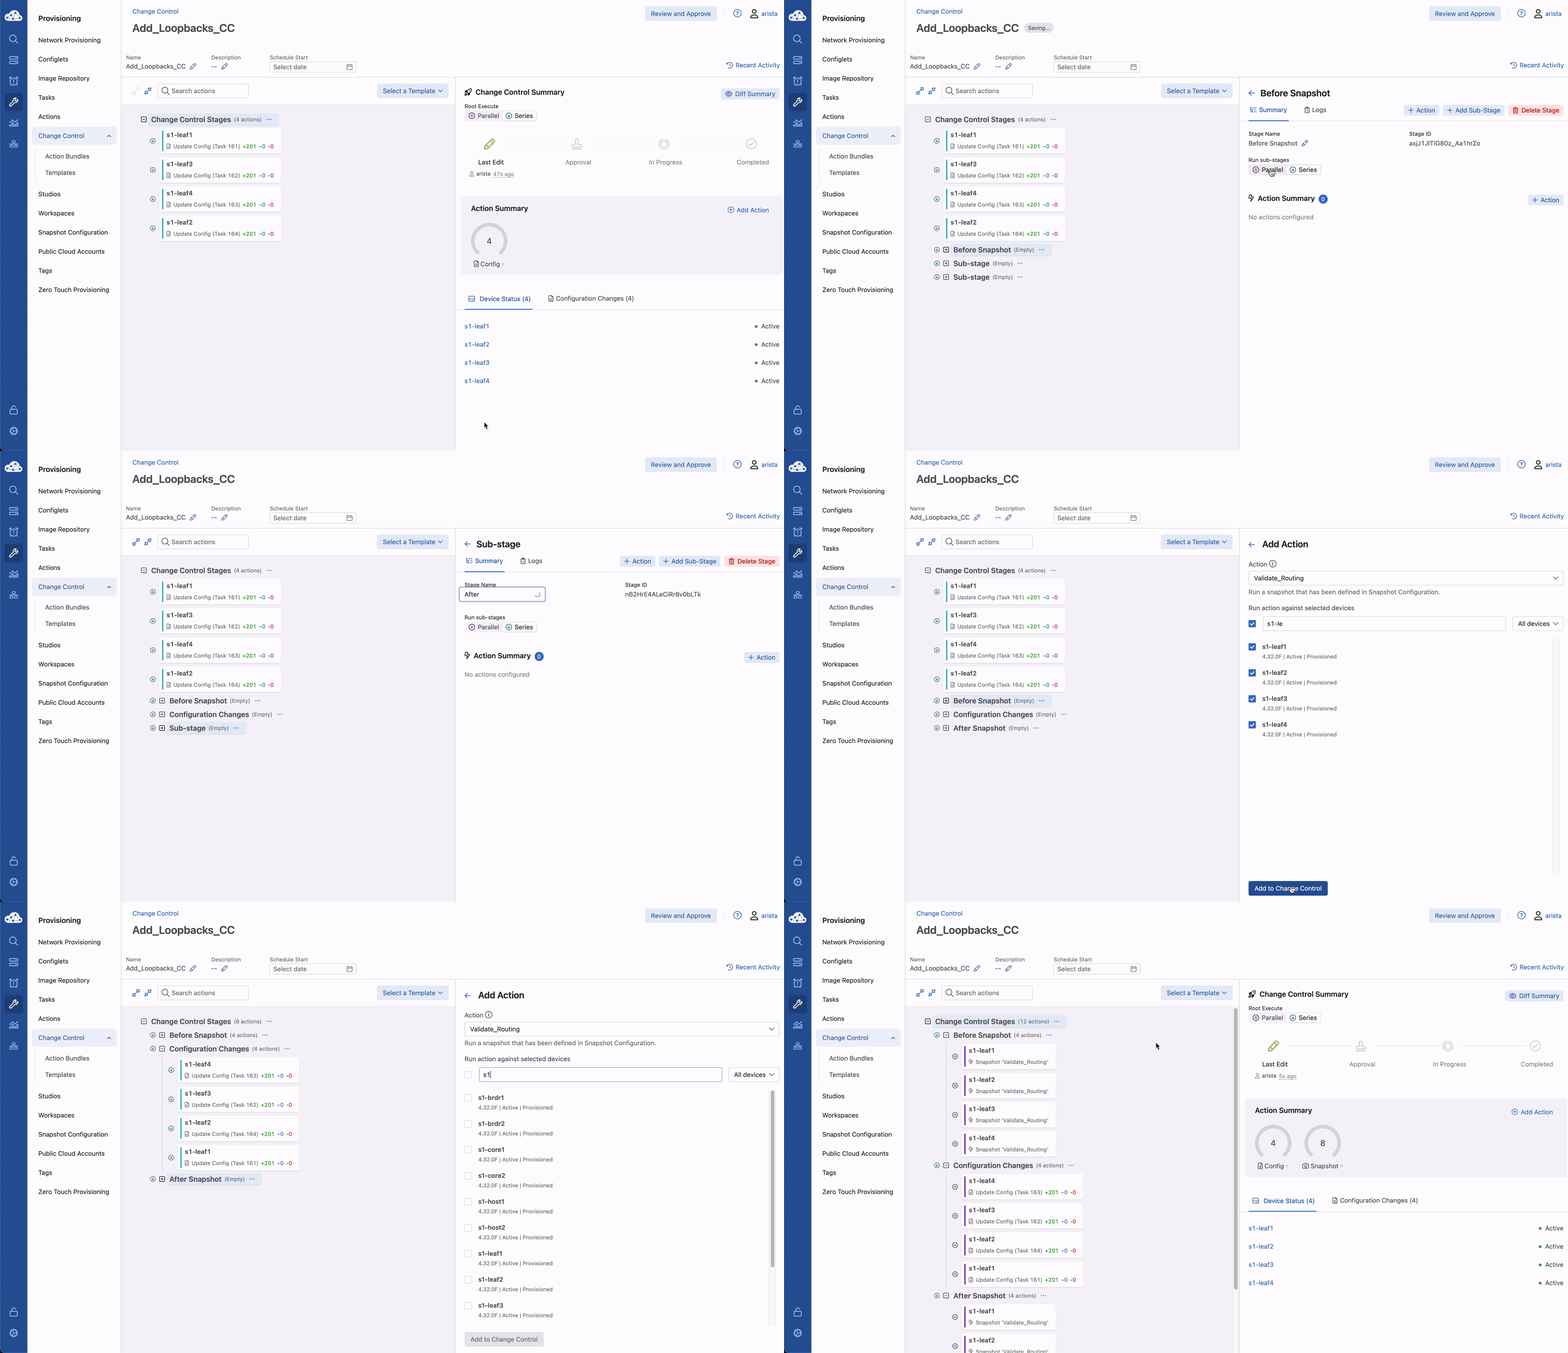
First, we need to give the Change Control a name. Select the pencil on the top right to edit the Change Control name. Name it Add_Loopbacks_CC and hit Enter.
-
Next we will need to change the root stage to Serial execution. To do this, select the Root stage, then on the right side, change the drop down to Series. You can also change between Parallel and Series within the Change Control screen.
-
Then we will create 3 new child stages. Click the ... on the right side of the root stage to create 3 stage containers.
-
Rename the top and bottom stages to Before Snapshot and After Snapshot respectively by selecting the Pencil icon. Name the middle stage Configuration Changes.
-
Next we can select a Snapshot template that we want to run before and after the change. Select the Before Snapshot stage and select Add Actions under the right side menu.
-
Under Select action, select Snapshot -> Validate_Routing and select 'S1-Leaf1', 'S1-Leaf2', 'S1-Leaf3', and 'S1-Leaf4' under 'Select devices to run on', then select Add to change control.
-
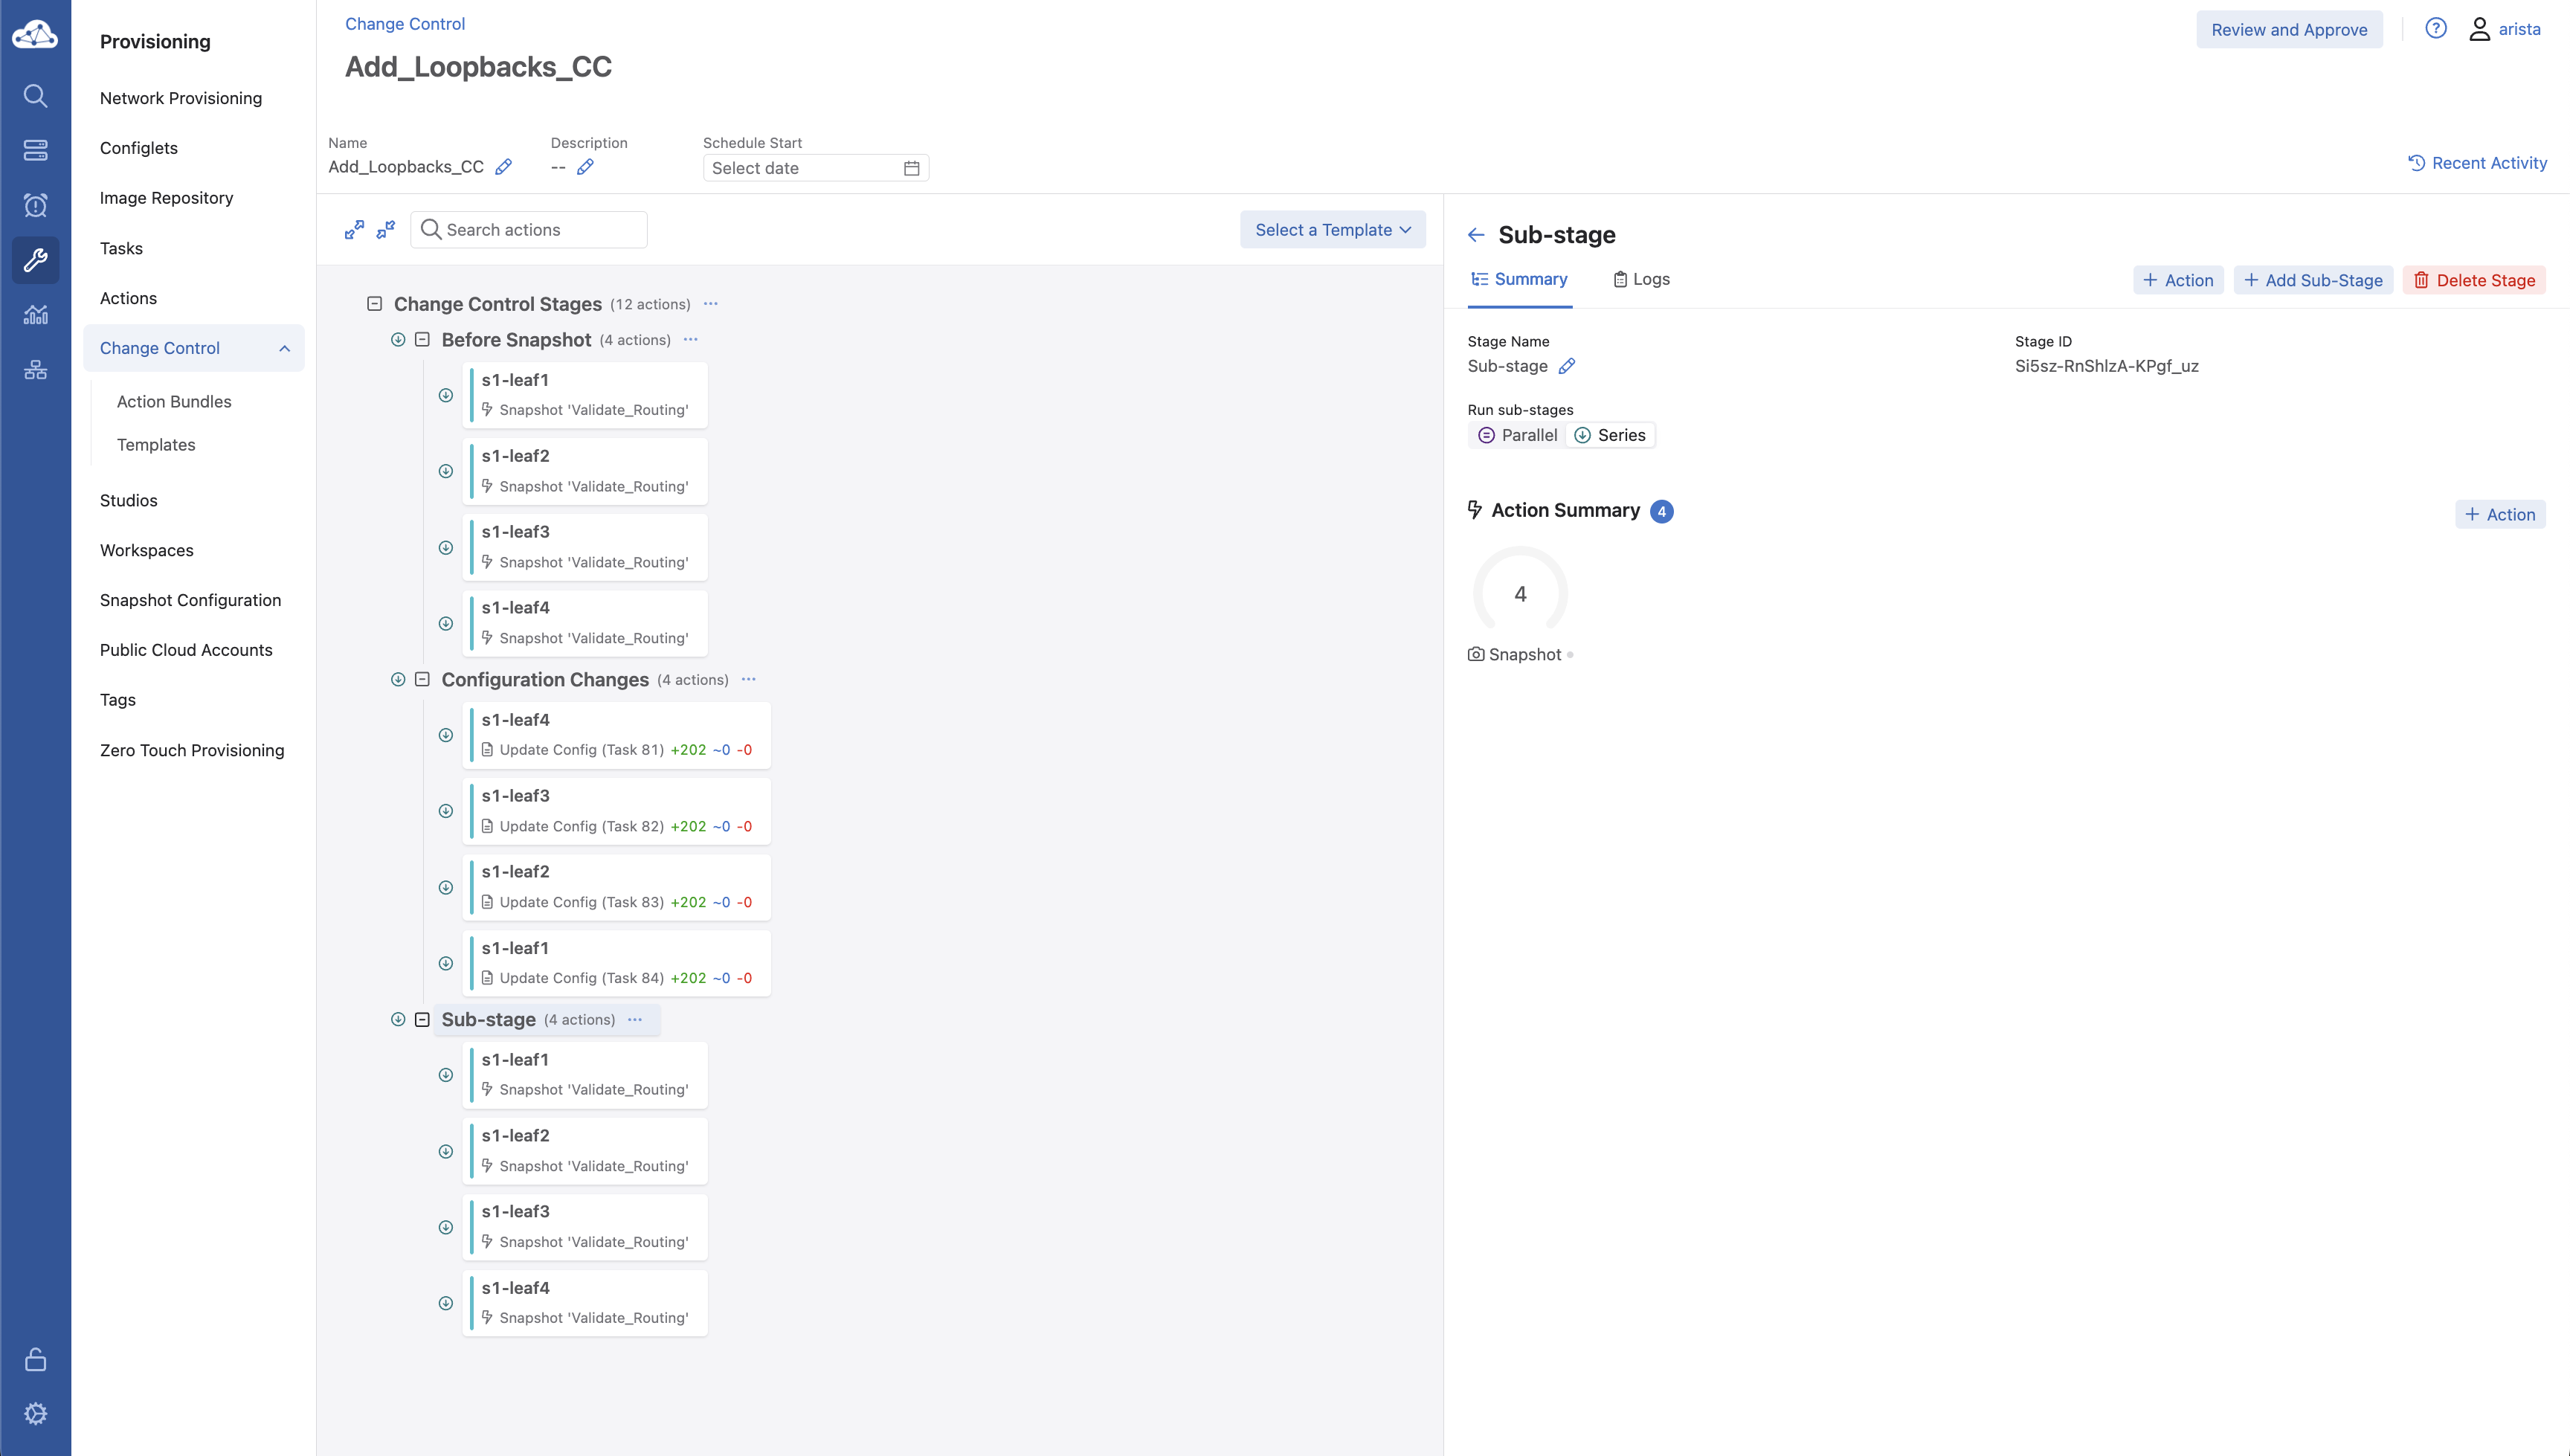
Now select and drag each of the four leaf switch tasks to the 'Configuration Changes' task.
-
Repeat step 15, but select 'After Snapshot'.
-
We should now have 2 stages that will take a before and after snapshot of the devices being changed and your Change Control screen should look like this:
Note
A few notes about Change Control:
- Each Task can be assigned to different stages if wanted. Health checks can be performed in stages before the next stage executes.
- The order of Task execution can be specified if there are dependencies. This is done by clicking the tasks and selecting the option in the drop-down menu.
- The root stage and child stages can each be set to series or parallel. We set the root stage to series earlier in the lab so that it will run the stages in order. The child stages can be set to run in parallel to speed up task execution
Executing the Change Control
We now want to execute the Change Control.
-
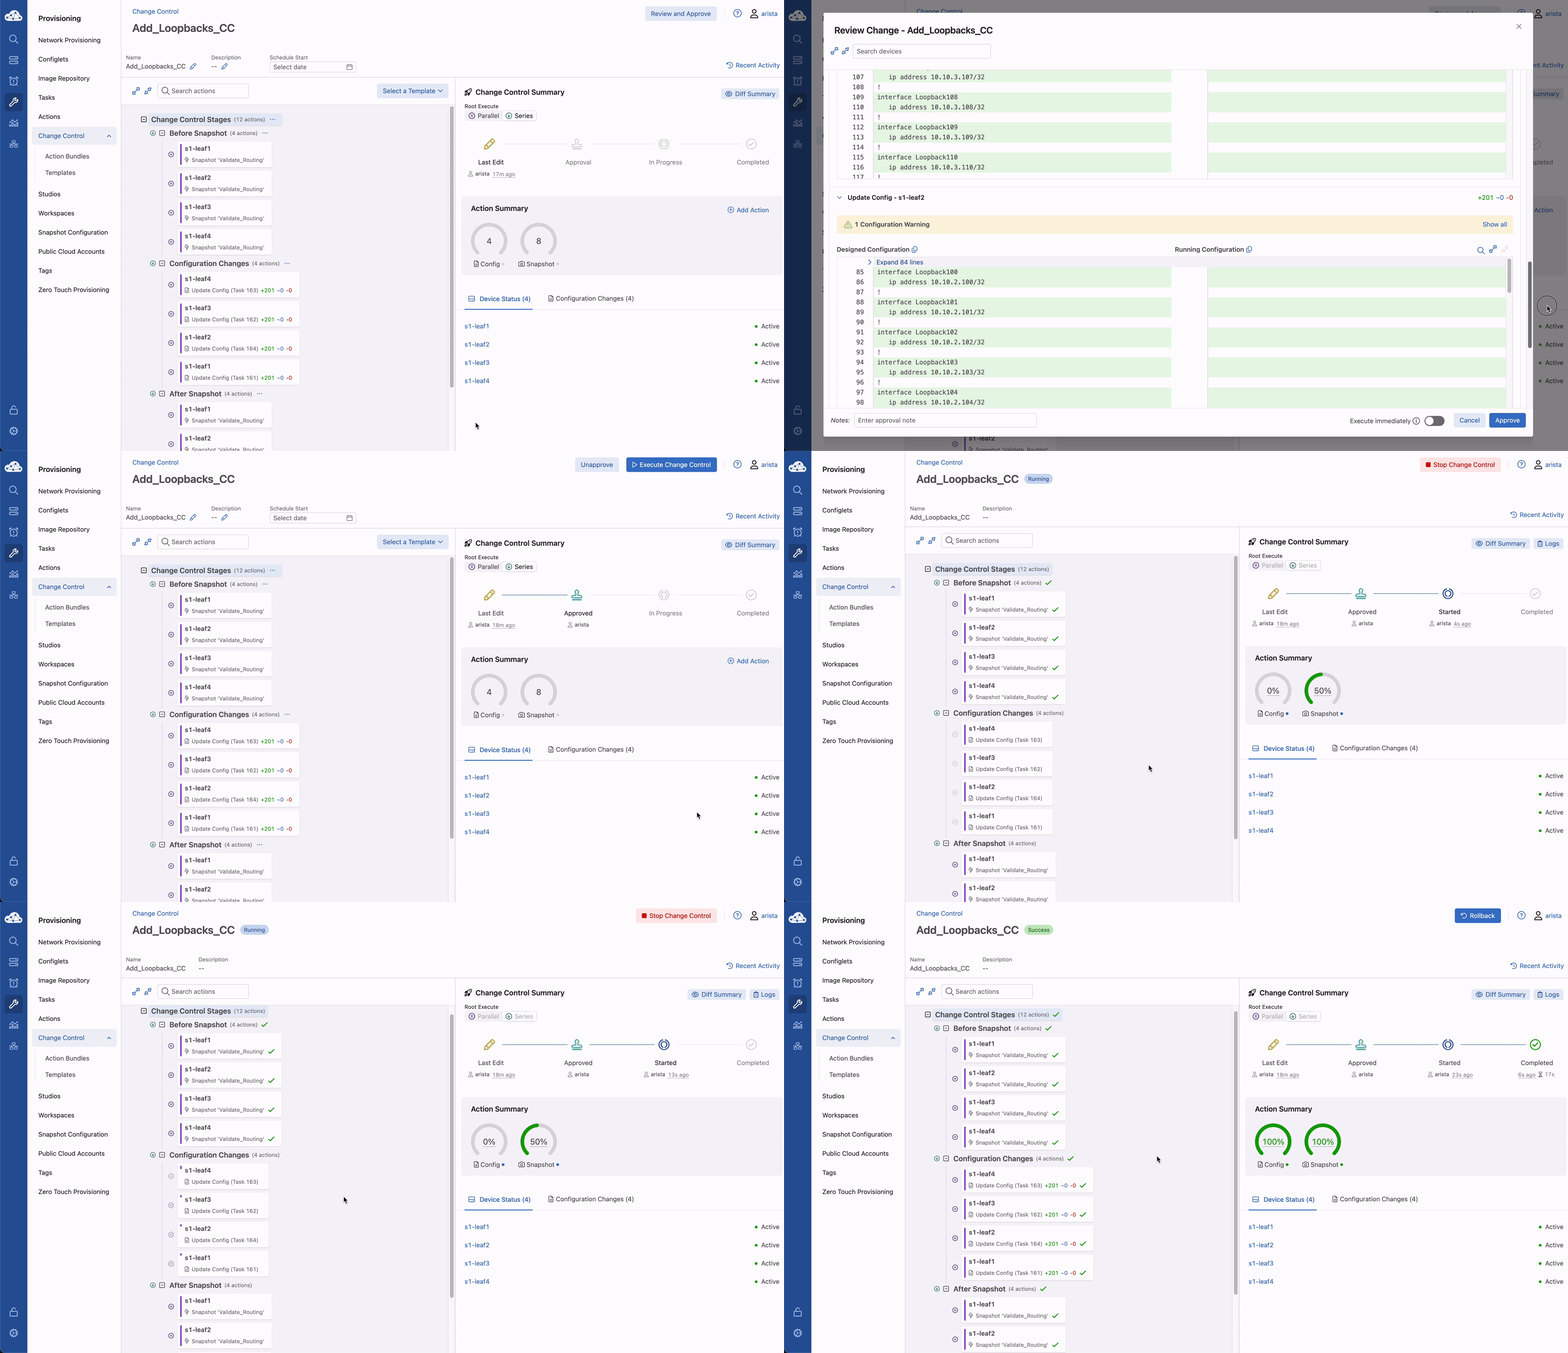
First a review and approval will need to take place. Select Review and Approve. Here we can view all of the changes for the tasks, snapshots to be taken, and any other information relative to the change control in order to approve it.
-
Once changes have been reviewed, we can click Approve in the bottom right.
-
Once the change has been approved, we should now have a button that says Execute Change Control in the top right corner. Click this to execute the changes.
-
We will now be prompted with a confirmation. Click Execute to confirm the Change Control execution.
-
While the Change Control executes, we can see the progress of each task as it is executed.
Comparing Snapshots
Once the Change Control is successfully completed, we can view and compare the snapshots.
-
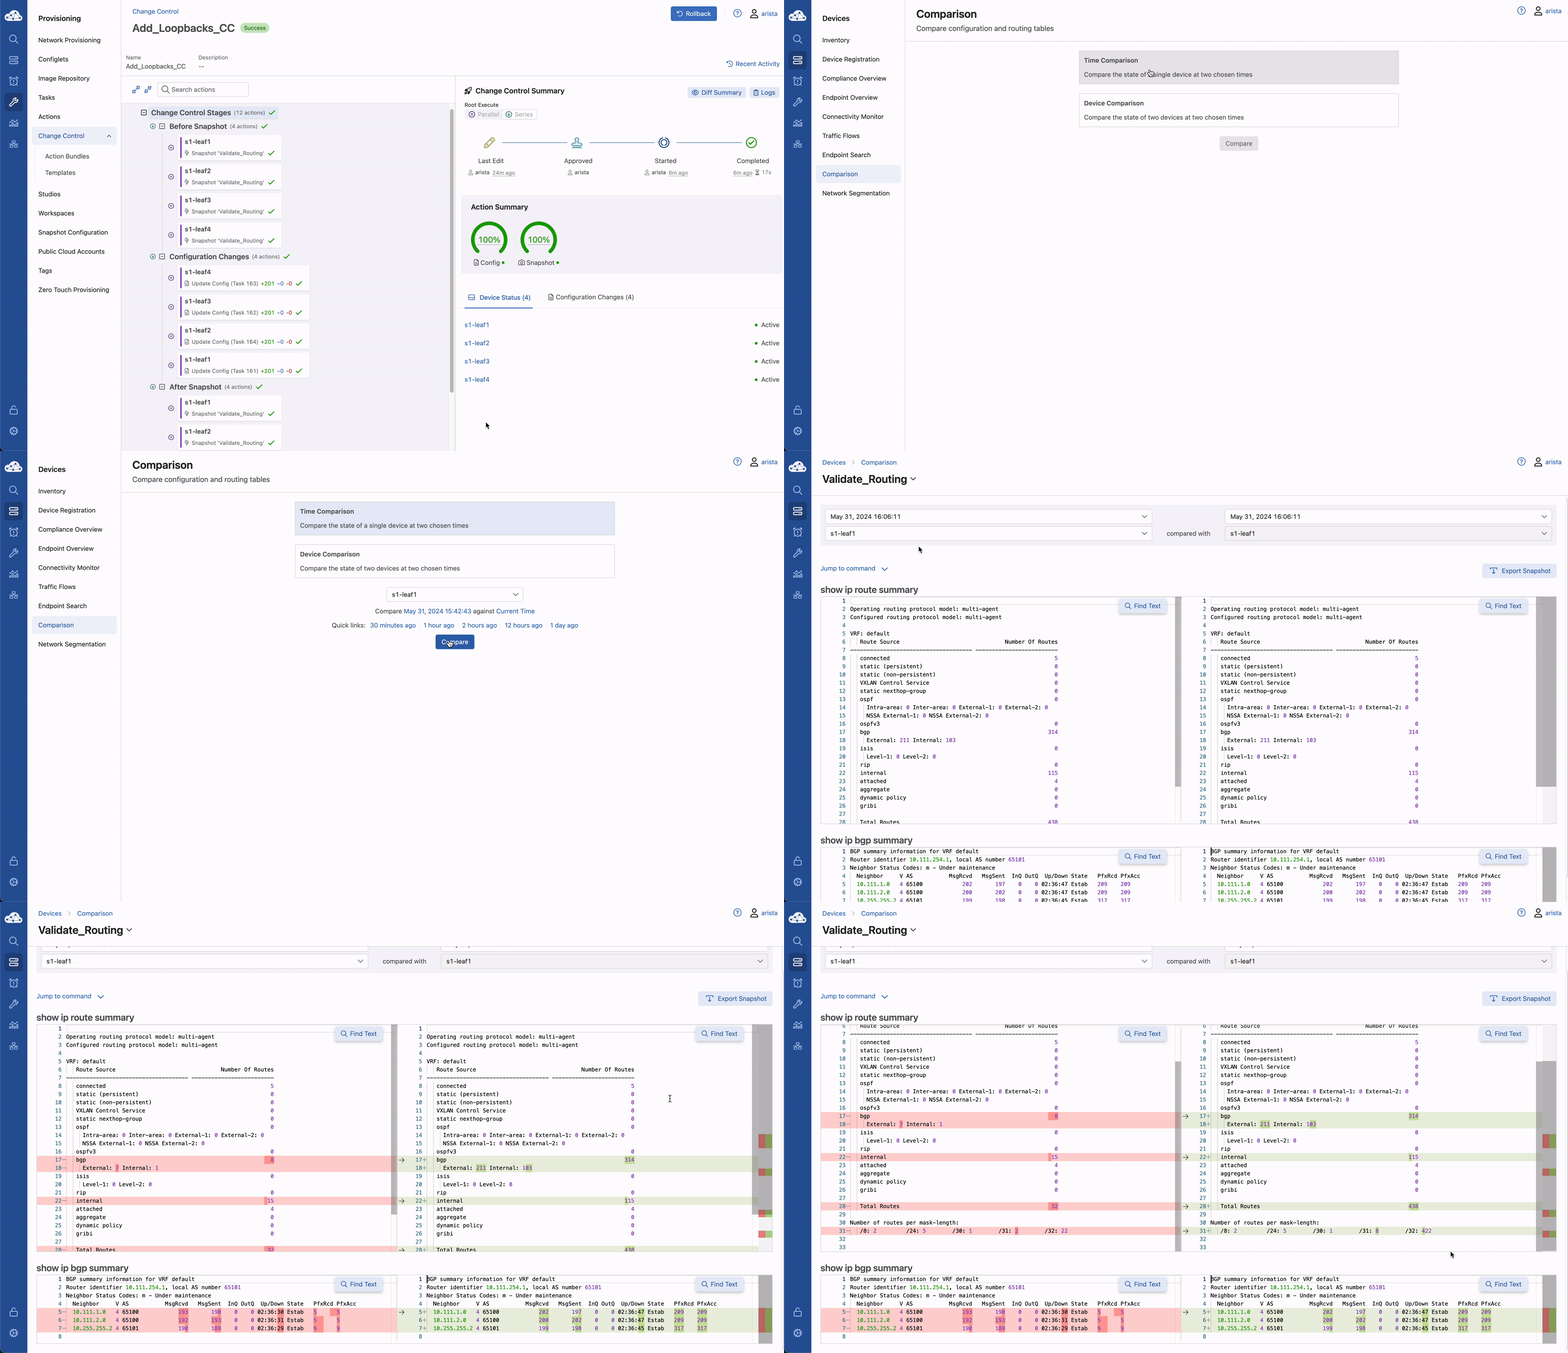
Navigate to Devices -> Comparison
-
To compare the before and after from our Change Control, select the Time Comparison option to compare two points in time for the same device. Select S1-Leaf1 from the dropdown menu and click the Quick link for 30 minutes ago. Then hit Compare.
-
CVP will bring up a variety of views that allows you to compare the state of the device from 30 minutes ago to the current time. Select Snapshots from the left Navigation column.
-
Select the first time to bring up a list of optional times to compare the Snapshot. The earlier option represents the 'Before Change' Snapshot taken when the Change Control was executed. Select that to see a comparison of the command outputs from before and after the change.
In the next part of this lab, we'll view and compare Telemetry data based on the changes we made, and then create a sample Dashboard showing the number of IPv4 routes
