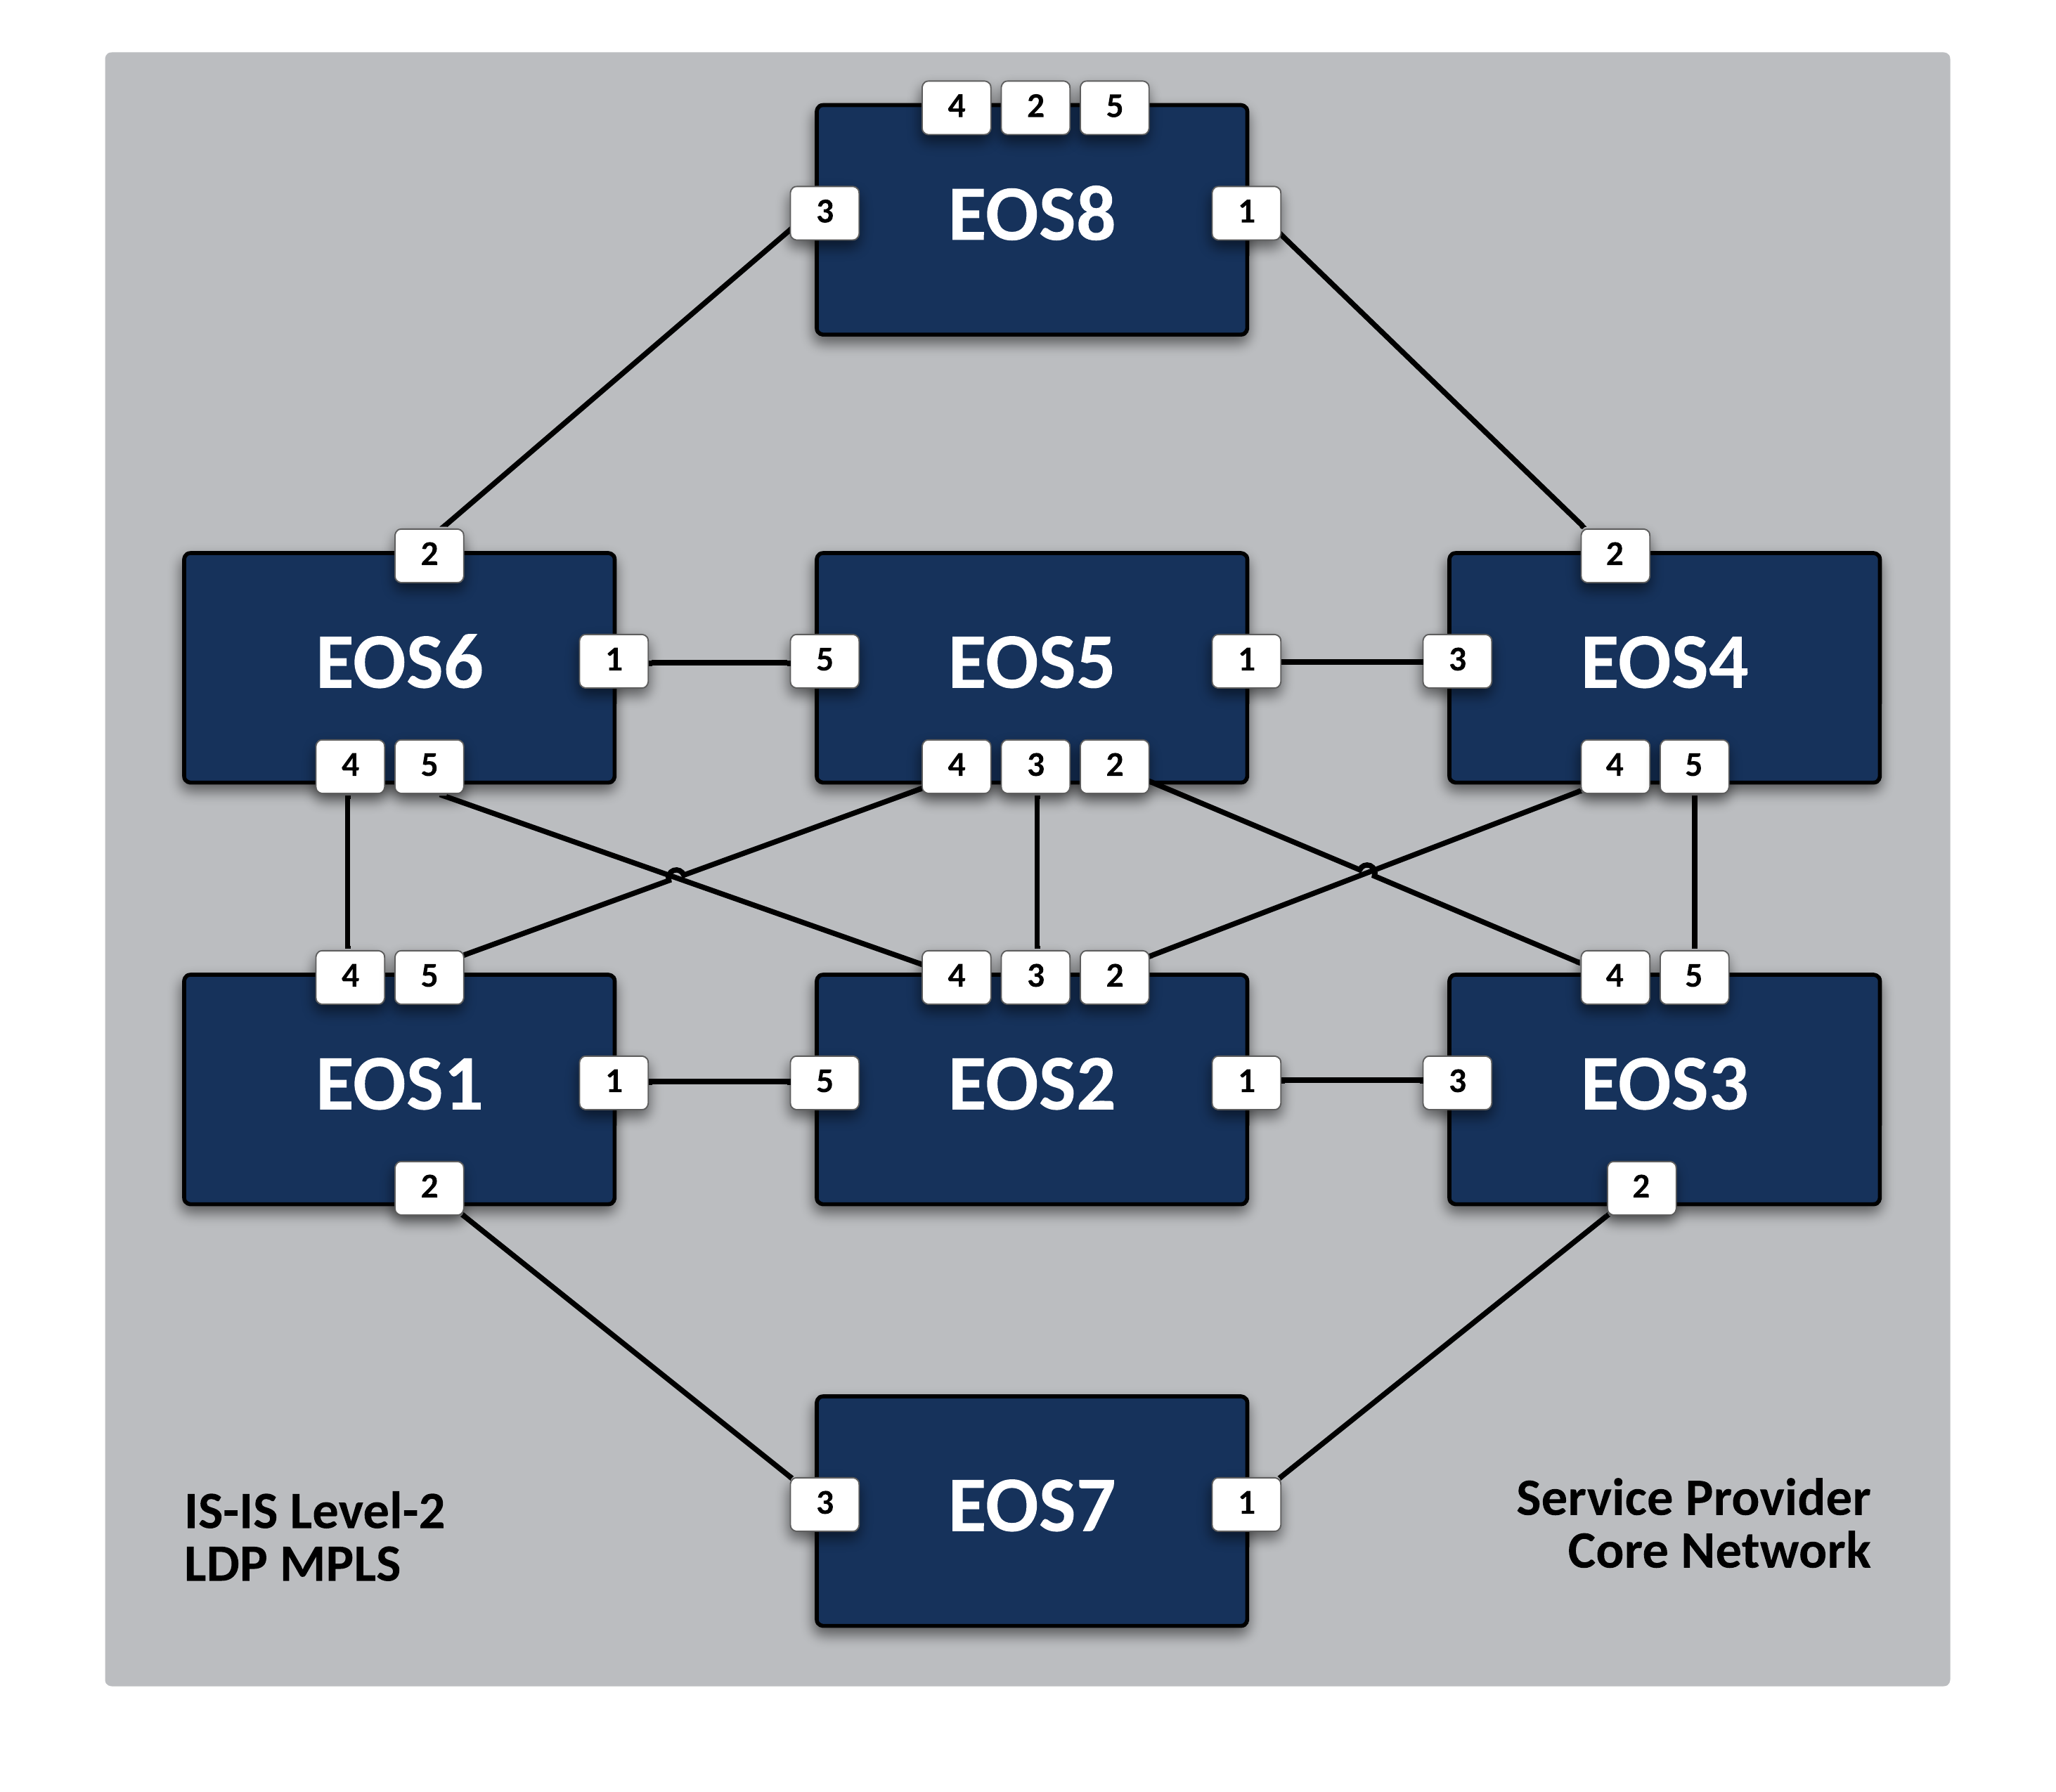
Establish MPLS Transport Label Distribution via LDP
Preparing The Lab
- Log into the LabAccess jumpserver:
- Type
labs, or select Option 97 to get to theAdditional Labsmenu. - Type or select the option for
mesh-topology-ipvpn-labsto access the LDP and IPVPN labs. - Type
ldpin this menu to configure the topology with the necessary prerequisites.
- Type
Lab Tasks
-
With IS-IS in place as the IGP for Loopback reachability, enable LDP for MPLS Label Distribution on
EOS1.-
First, we must enable MPLS forwarding on the router.
-
Enable the Label Distribution Protocol for MPLS.
-
Set Loopback0 as the interface for transport and Router-ID functions.
-
Disable LDP globally on the router interfaces then selectively enable on Service Provider facing interfaces and the Loopback0 interface for transport.
Note
By default when LDP is enabled, EOS will attempt peering on all interfaces.
-
Enable LDP Hello Redundancy to help maintain adjacencies in link-flap scenarios to cut down on session reestablishment time.
Note
Devices with Hello Redundancy enabled will begin sending Targeted Hello messages to the Transport Address found in the received LDP Link Hello message. The Targeted Hello adjacency can support the session established between peers even when all Link Hello adjacencies have timed out. The FEC label bindings between two peers with no Link Hello adjacency will not be active because the Interior Gateway Protocol will not use the other peer as the next hop. Nevertheless, maintaining the FEC label bindings and the session between the two peers can save significant time when the Link Hello adjacency is reestablished.
-
Enable Grace Restart capabilities for LDP to maintain forwarding when agent restarts occur.
Info
LDP Graceful Restart allows the device to preserve its entire MPLS LDP label if the LDP agent restarts and can also preserve the LFIB entries of the peer whose LDP agent has restarted.
-
Lastly, enable LDP synchronization with IS-IS to ensure MPLS LSPs are generated on valid underlay links.
Note
Sync timers can be adjusted in LDP as desired.
-
-
Verify local LDP configuration and MPLS label allocation on
EOS1.-
Display the configured Node SID and other ISIS-SR information.
-
Verify the MPLS label range assigned for use with LDP.
Note
EOS has a default allocation range for each type of MPLS label, which you can view. Of interest here is the ldp (dynamic) label range. LDP label bindings are locally significant to the router whose LFIB they exist in.
-
-
Repeat the above configuration steps on the other Service Provider nodes (
EOS2-EOS8) while only activating LDP on the necessary interfaces for each device.
Testing
Now that the LDP topology is deployed, verify MPLS label advertisement and reachability. These steps can be performed on any of the Service Provider EOS nodes.
-
Verify that all router adjacencies are successfully established. You should see an entry for each connected router.
-
Now display the tunnel information LDP will use to inform the data-plane which MPLS labels and interfaces to use to reach the other routers in the topology.
Note
An MPLS label value of the 3 represents the implicit-null label, which signifies the destination or endpoint router is adjacent to this node.
-
Verify the Label Bindings dynamically allocated to local and remote interfaces attached to LDP enabled peers.
Info
As mentioned, these labels are dynamically allocated by EOS out of the ldp (dynamic) label range. Also note these label values are only locally significant to the router, so they may overlap between the various nodes in the topology.
-
Test MPLS LSP reachability between routers by using MPLS ping and traceroute functions. This example is from
EOS1toEOS8.
Success
Lab Complete!
