CVP Advanced Change Control
Learn how to use CloudVision's Change Control. A Change Control can be associated with one or more Tasks. CloudVision will configuration sessions when a Change Control is executed to give us a state to revert back should there be any issues after the change.
We can take this a step further by creating a template that can be applied easily to a change control to give us additional information to validate our changes. In this lab, we will create a template for routing changes.
Getting Started
-
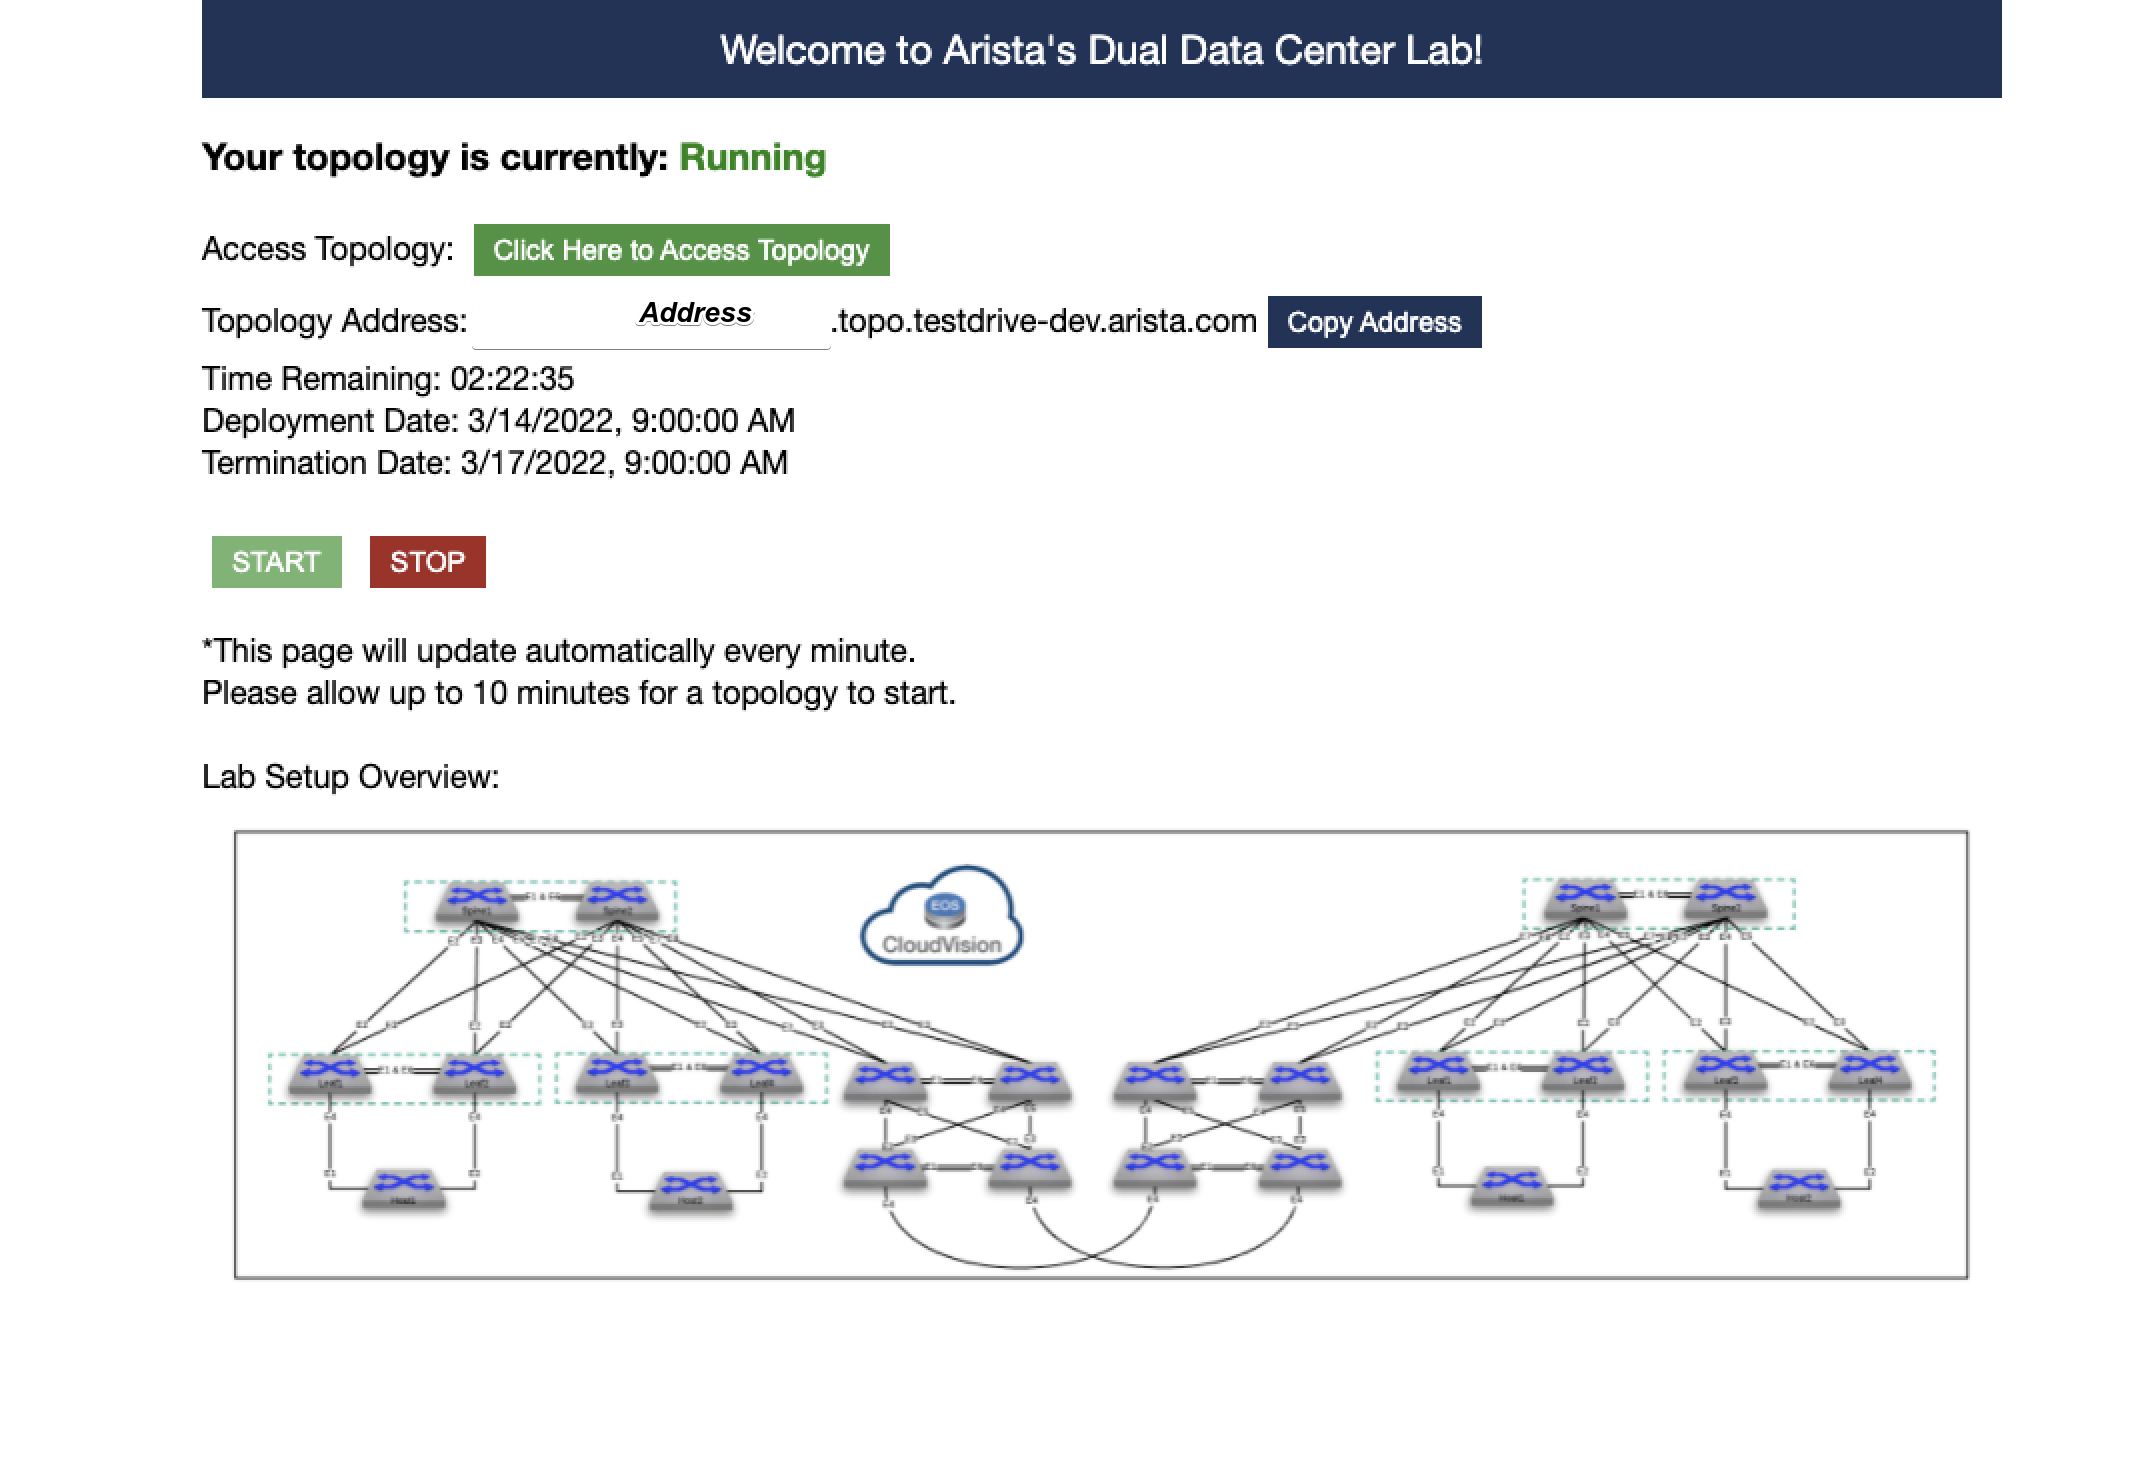
Log into the Arista Test Drive portal with your assigned URL. If you don't have one, please see your ATD staff.
-
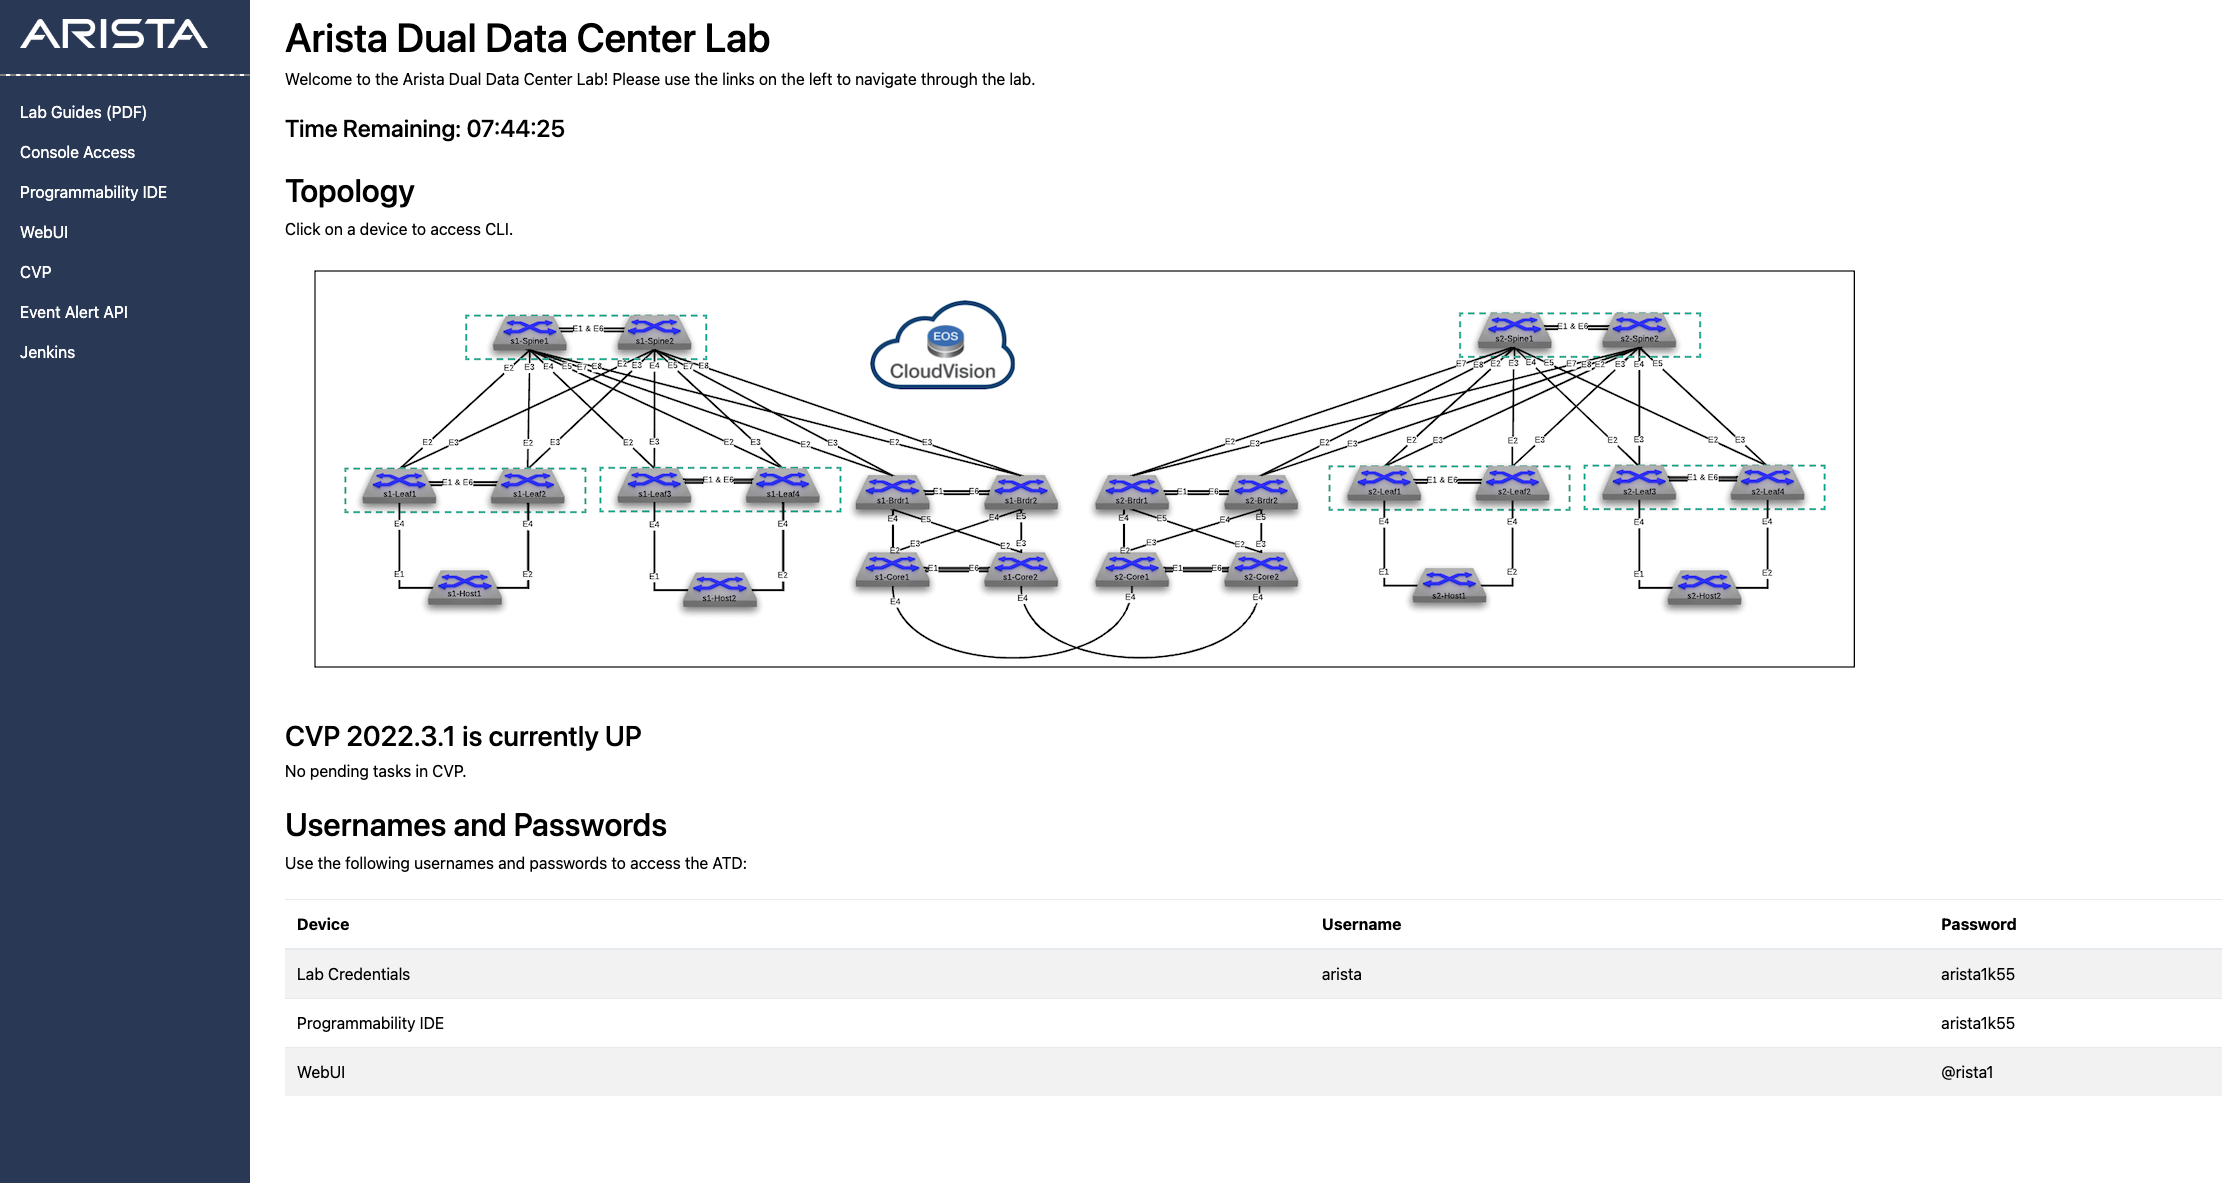
Click on the link Click Here To Access Topology and navigate to the below page.
-
Log into the Console Access Jumpserver and select
cvpor6to prepare the lab environment for this lab.Warning
The script will configure all devices in the lab so you can complete this lab.
Note
Did you know → the "cvp" script is composed of python code that uses the CloudVision Portal Rest API to automate the provisioning of CVP Configlets.
-
Click the CVP link on the left side of the screen. You will come to a login screen for CloudVision Portal. Enter the username
aristaand the password{REPLACE_PWD}
Adding Devices to Studios
First let's add all of the devices to Studios.
- Navigate to the Studios page under the Provisioning tab.
- Select Inventory and Topology
- Select Create Workspace to create a new workspace
- Add a name to the
Namefield. Then select Create - Select Network Updates
- Select Accept All Updates
- Select Review Workspace
- Select Submit Workspace

Creating Snapshots
The snapshot for this lab has already been created, but let's add an additional command.
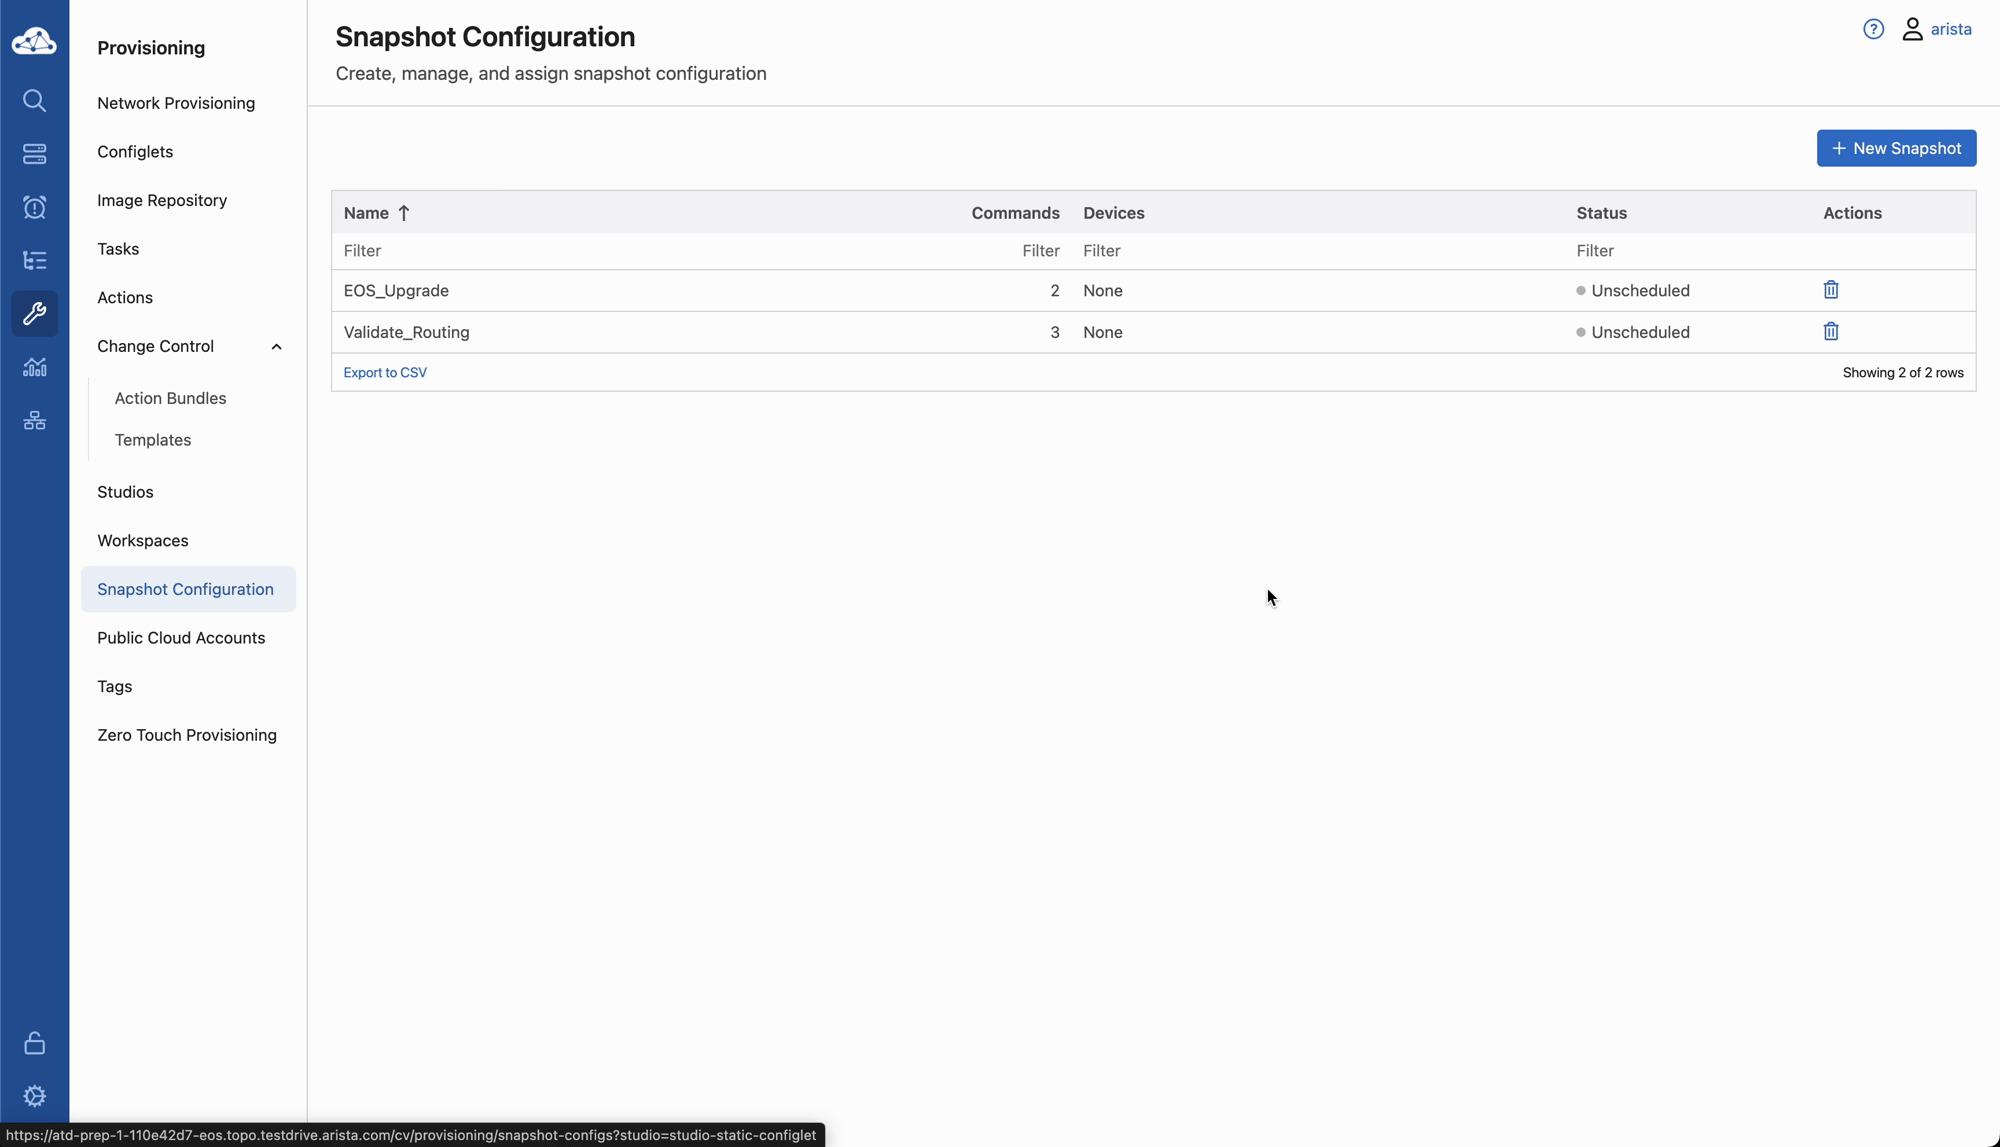
- Navigate to the Snapshot Configuration page under the Provisioning tab.
- Select the Validate_Routing Snapshot.
- Add the
show ip routecommand to the EOS Commands section. - Select the Save button to save the updated Snapshot.

Creating Action Bundles
The first step of creating a template is setting up action bundles. Action bundles are single actions or groups of actions that can be included in a change control. We will explore a few actions that can be included in a change control or change control template.
- Navigate to the Action Bundles page under the Provisioning tab (You may have to expand the Change Control Menu).
- Create the
Set ConfigurationAction Bundle:- Select the New Action Bundle button.
- Add
Set Configurationfor the Bundle Name. - Select the Add Action dropdown and select Set Configuration from the Provisioning Actions section.
- Verify Parallel executition is selected.
- Then select the Save button.
- Create the
Validate Routing SnapshotAction Bundle:- Select the New Action Bundle button.
- Add
Validate Routing Snapshotfor the Bundle Name. - Select the Add Action dropdown and select Validate_Routing from the Snapshots section.
- Set the DeviceID to
Provide via template. - Verify Parallel executition is selected.
- Then select the Save button.
- Create the
Sleep TimerAction Bundle:- Select the New Action Bundle button.
- Add
Sleep Timerfor the Bundle Name. - Select the Add Action dropdown and select Sleep from the Change Control Actions section.
- Set the Duration to
15. - Verify Parallel executition is selected.
- Then select the Save button.
Creating a Change Control Template
Now let's create the change control template. Once we have the template created, it can be used for any routing change controls.
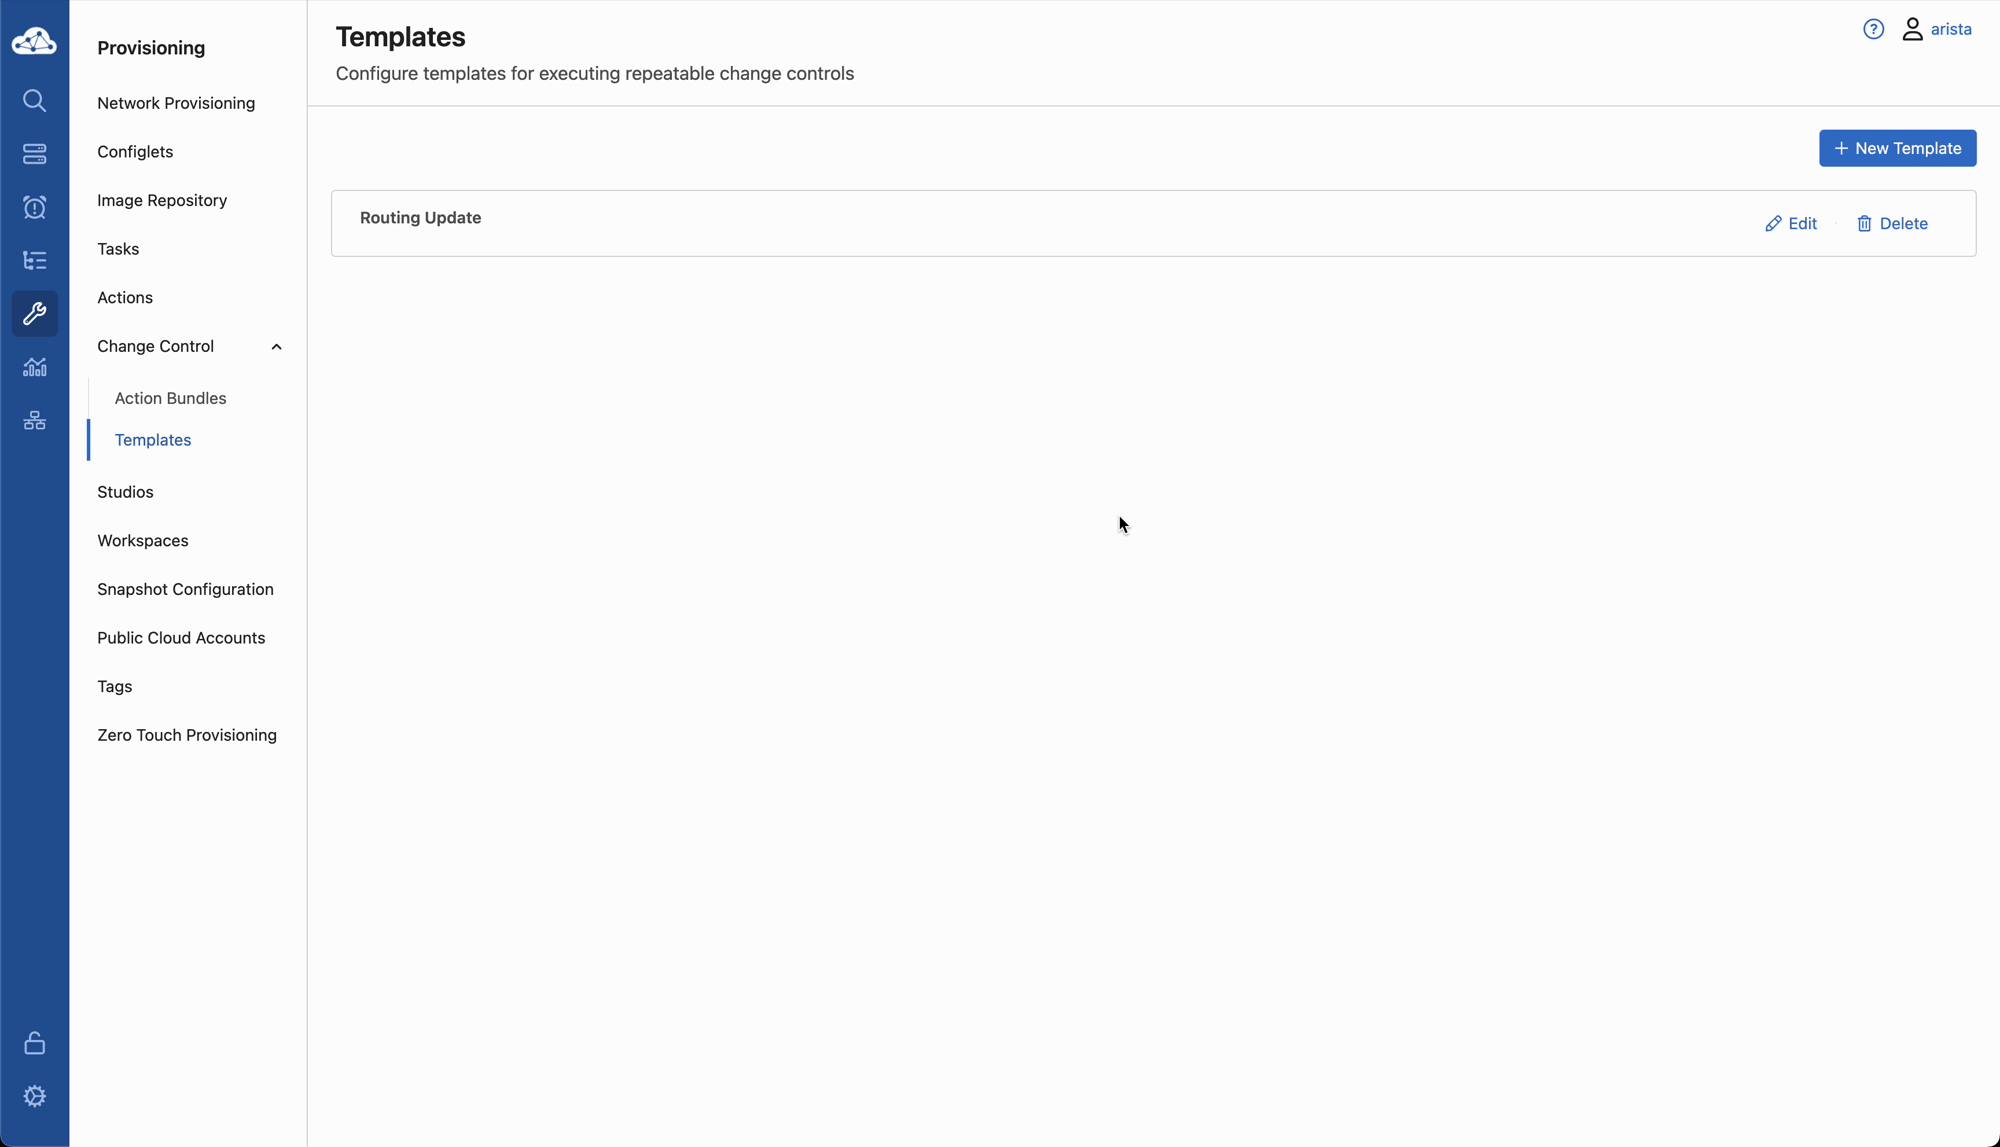
- Navigate to the Templates page under the Provisioning tab (You may have to expand the Change Control Menu).
- Select the New Template button.
- Set the
Namefield to:Routing Updateand select Save. - Set the Executition Mode to Series instead of Parallel.
- Select the Add Stage Rule Button three times. There should be four stage rules in total.
- Setup the Pre-Commit Snapshot Stage:
- Set the first stage name to
Pre-Commit Snapshot. - Select the Validate Routing Snapshot bundle.
- Set
Arrange Bundlesto Parallel.
- Set the first stage name to
- Setup the Set Configuration Stage:
- Set the second stage name to
Set Configuration. - Select the Set Configuration bundle.
- Set
Arrange Bundlesto Parallel.
- Set the second stage name to
- Setup the Sleep Timer Stage:
- Set the second stage name to
Sleep Timer. - Select the Sleep Timer bundle.
- Set
Arrange Bundlesto Parallel.
- Set the second stage name to
- Setup the Post-Commit Snapshot Stage:
- Set the first stage name to
Post-Commit Snapshot. - Select the Validate Routing Snapshot bundle.
- Set
Arrange Bundlesto Parallel.
- Set the first stage name to
- Select Save Template button.

Adding Loopbacks to the Fabric
Now lets add the new Loopbacks using the Static Configuration Studio.
- Navigate to the Studios page under the Provisioning tab.
- Select Static Configuration
- Select Create Workspace to create a new workspace
- Set the Name field to
Routing Update. Then select Create - Select the + Configuration Container button.
- Under Create a Tag, Set Tag Label to
Roleand the Tag Value to Leaf. Then select the + Create button - Select the Three Dots and select Add Device.
- Select the four S1-Leaf switches and select Add.
- Add loopbacks to s1-leaf1
- Select s1-leaf1
- Select + Configlet button.
- Select New Configlet and set the name to
s1-leaf1 - Copy the configuration into the configlet:
- Add loopbacks to s1-leaf2
- Select s1-leaf2
- Select + Configlet button.
- Select New Configlet and set the name to
s1-leaf2 - Copy the configuration into the configlet:
- Add loopbacks to s1-leaf3
- Select s1-leaf3
- Select + Configlet button.
- Select New Configlet and set the name to
s1-leaf3 - Copy the configuration into the configlet:
- Add loopbacks to s1-leaf1
- Select s1-leaf1
- Select + Configlet button.
- Select New Configlet and set the name to
s1-leaf1 - Copy the configuration into the configlet:
- Select Review Workspace
- Select Submit Workspace
- Select View Change Control
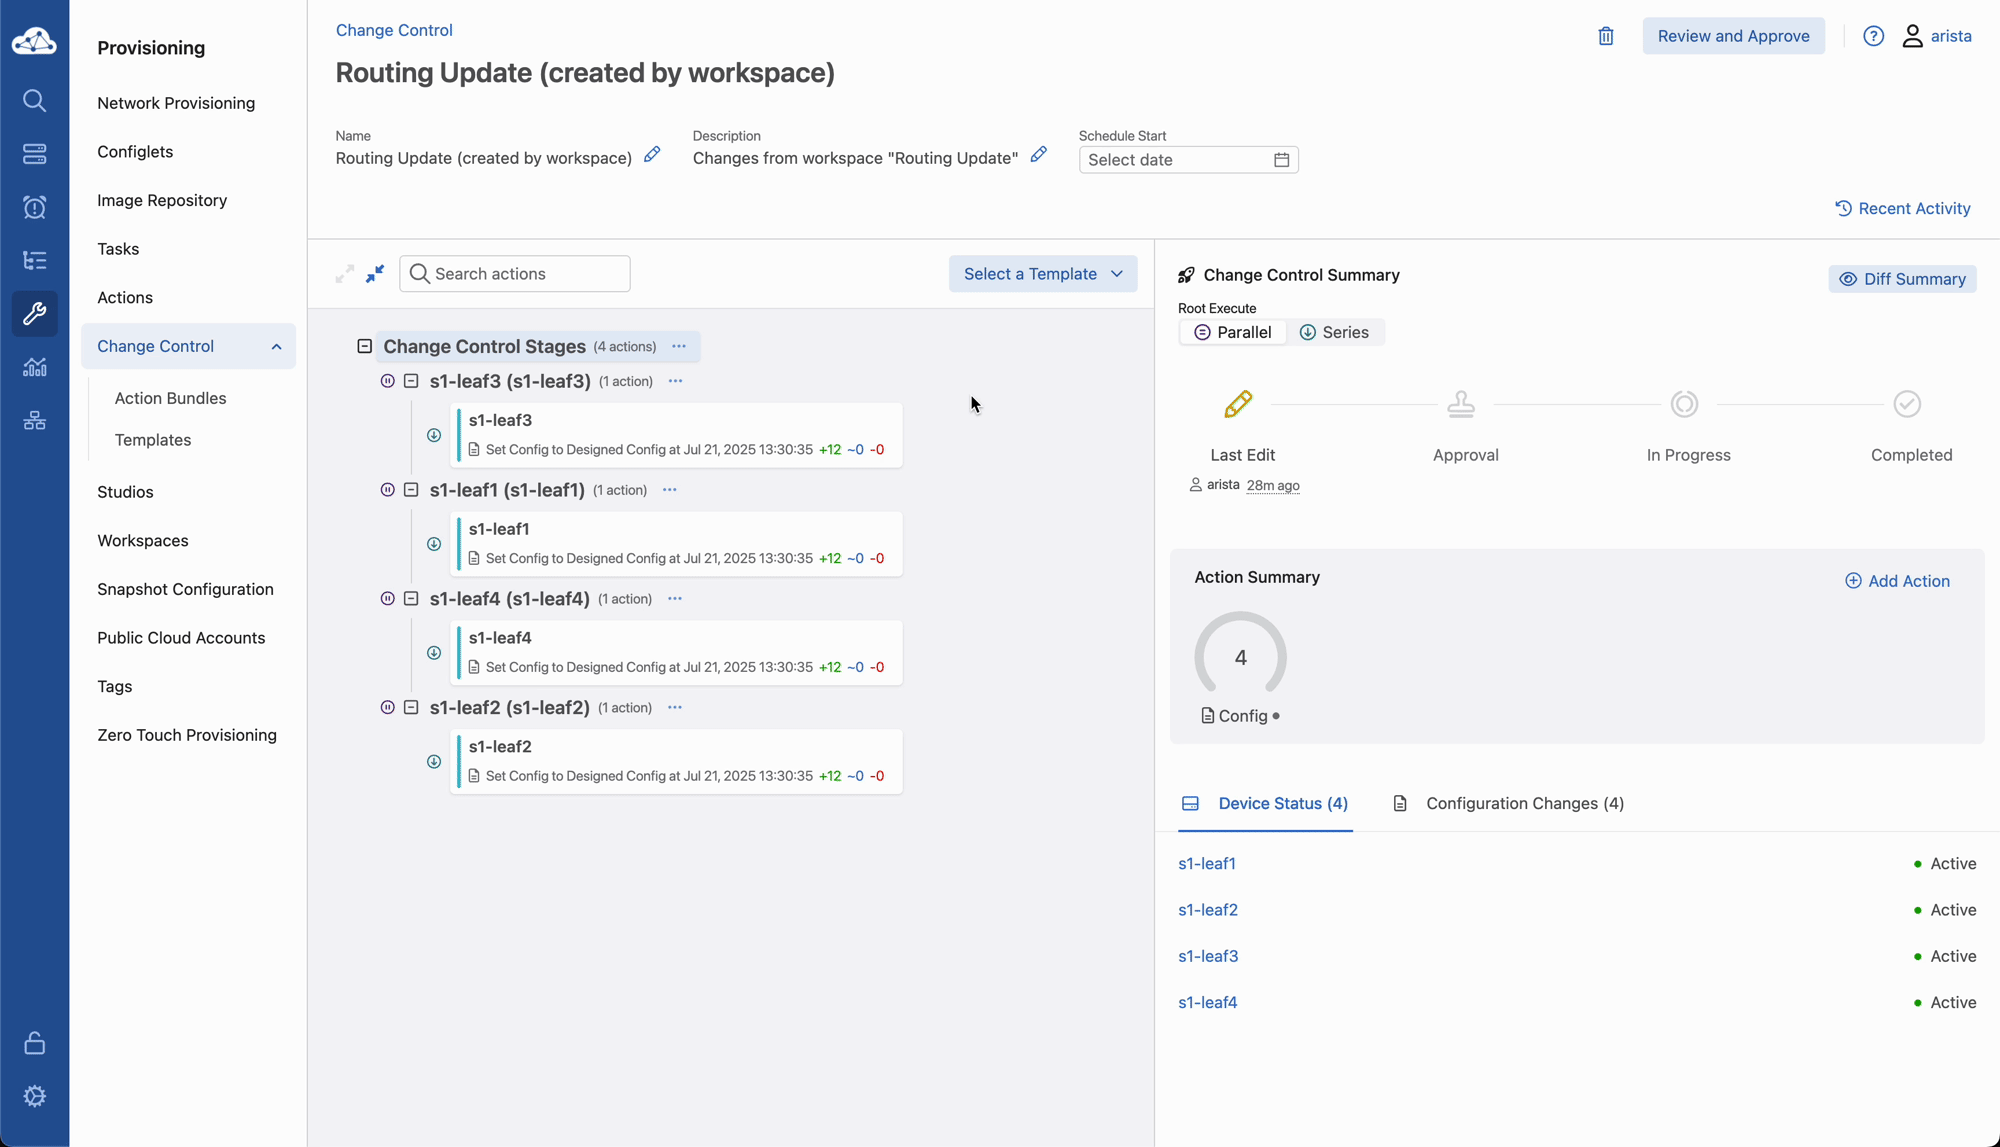
Submitting the Change Control
Finally let's apply the new Routing Update template and run the change control.
- The Change Control should be visible from the last step. If not, navigate to the Change Control page under the Provisioning tab. Then select the latest Change Control.
- Select the Routing Update template from the
Select a Templatedrop down and select Apply Template. - Select the Expand all Stages button.
- Select the Review and Approve Button
- Select the Execute Immediately radial button.
- Select Approve and Execute
- Select any of the Post-Commit Snapshot tasks to look at the snapshot diff from the Pre-Commit Snapshot. You should see the routing changes caused by adding loopbacks to the leaf switches.
In this lab we looked at creating snapshots, creating action bundles, creating a change control template using the action bundles, and finally using the template when executing a change control. There are many other actions that can be leveraged during change controls including updating EOS using SSU, removing old EOS images, checking MLAG peer health, etc. Spend a few minutes looking at other actions that could be used in other templates for common tasks.
Success
Lab Complete!